
If you keep a sourdough starter, you know the struggle — discard day comes around and you’re wondering what to do with that tangy, bubbly jar of leftover starter. These sourdough discard bagels are the answer. Chewy on the outside, soft on the inside, with just the right hint of sour flavor that makes every bite interesting. And yes, they’re easier than you think.
Why You’ll Love These Sourdough Discard Bagels Recipe

- Zero waste baking — uses up that discard you’d otherwise throw away.
- Incredible texture — the boiling step gives them that signature chewy crust.
- Tangy, complex flavor you simply can’t get from store-bought.
- Freezer-friendly — make a big batch and you’re set for weeks.
- Works with any toppings: sesame, everything bagel seasoning, poppy seeds, or plain.
What Makes This Recipe Special
Most bagel recipes rely entirely on commercial yeast. This one uses sourdough discard as a flavor booster alongside a small amount of instant yeast for reliable rise. You get the tang and depth of a true sourdough bake, without needing your discard to be active or freshly fed. It’s the best of both worlds — predictable results with artisan flavor.
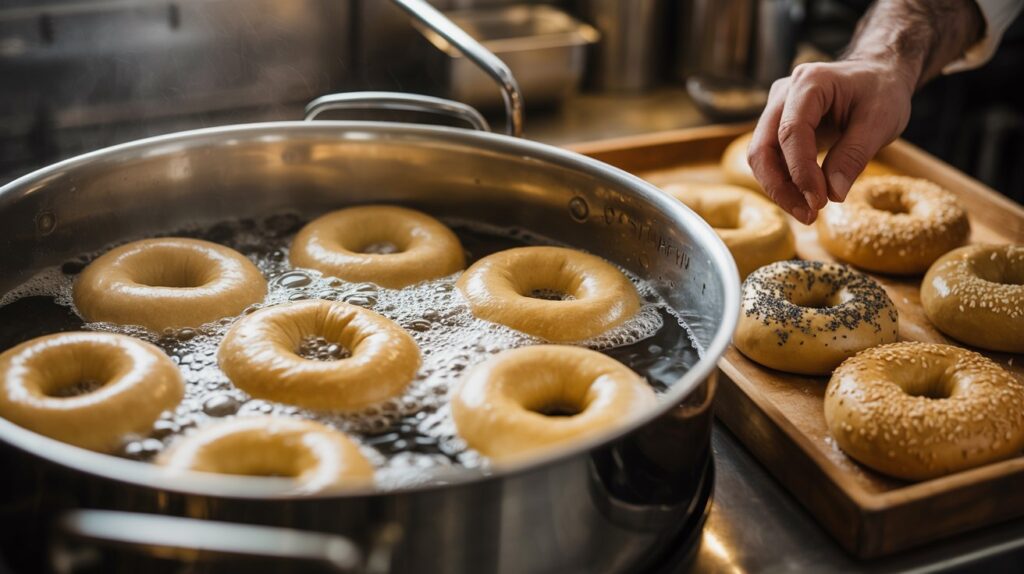
The boiling step (with a splash of baking soda and a drizzle of barley malt syrup or honey) is what sets real bagels apart from just “round bread with a hole.” Don’t skip it.


Ingredients You’ll Need
These are pantry basics you probably already have. The sourdough discard can be straight from the fridge — unfed, cold, and perfectly fine to use here.
- Bread flour — higher protein = chewier bagels. All-purpose works in a pinch but results won’t be as chewy.
- Sourdough discard — unfed is totally fine. Adds flavor, not lift.
- Instant yeast — for reliable, consistent rise.
- Salt — don’t under-salt your dough. It matters more than you think.
- Sugar or honey — small amount feeds the yeast and balances the tang.
- Water — warm, not hot. Hot water kills yeast.
- Baking soda — for the boiling water. Creates that shiny, chewy crust.
- Toppings of choice — everything bagel seasoning, sesame seeds, poppy seeds, or coarse salt.
Pro-Tips for Success
- Weigh your flour. Bagel dough is stiff — too much flour and they’ll crack; too little and they won’t hold their shape. A kitchen scale removes guesswork.
- Don’t over-proof. Once shaped, bagels only need 30–45 minutes to puff slightly. Over-proofed bagels lose their chew and go bready.
- Boil in batches. Don’t crowd the pot. 2–3 bagels at a time ensures even cooking and that glossy exterior.
- Bake on a preheated surface. A hot baking stone or inverted sheet pan gives better oven spring and a crispier bottom.
- Cool before slicing. Give them at least 20 minutes on a rack. Cutting too early makes the inside gummy.
Common Mistakes to Avoid
- Skipping the boil. This is non-negotiable. Boiling sets the crust and creates the iconic chew. If you skip it, you just have a round roll.
- Using active discard only. This recipe uses instant yeast for the lift — your discard doesn’t need to be bubbly or active. Cold, unfed discard from the fridge works perfectly.
- Loose, sticky dough. Bagel dough should feel stiff and firm, not tacky. If it sticks to your hands, add flour 1 tablespoon at a time until it cleans the bowl.
- Skimping on kneading. This dough needs 8–10 minutes of proper kneading to develop the gluten that gives bagels their structure. Under-kneaded dough = flat, dense bagels.
Flavor Variations
- Everything Bagel — Top with everything bagel seasoning before baking. Classic for a reason.
- Cinnamon Raisin — Fold in 1 tsp cinnamon and ½ cup raisins during kneading. Reduce salt slightly.
- Jalapeño Cheddar — Mix in ½ cup shredded sharp cheddar and 2 tbsp diced jalapeño for a spicy, savory twist.
- Whole Wheat — Replace up to 30% of the bread flour with whole wheat flour for a nuttier, earthier flavor.
- Asiago & Garlic — Press shredded Asiago and minced garlic on top before baking for a bold, cheesy finish.
What to Serve With Sourdough Discard Bagels
These bagels are incredibly versatile. Here are some favorite ways to enjoy them:
- Classic cream cheese — plain or with chives, lox, or everything seasoning stirred in.
- Avocado & egg for a satisfying breakfast or brunch.
- Sliced into a bagel sandwich with turkey, Swiss, and mustard.
- Toasted with butter and smoked salmon for something a little fancier.
- Alongside a bowl of soup — they’re great for dunking.
Storage and Reheating
Room temperature: Store in an airtight bag or container for up to 2 days. They’ll start to stale after that.
Freezing (recommended): Slice bagels in half before freezing. Place in a zip-lock freezer bag and freeze for up to 3 months. Toast directly from frozen — no thawing needed.
Reheating: For the best result, toast sliced bagels in a toaster or toaster oven at 180°C (350°F) for 3–5 minutes until warm and slightly crispy. Avoid the microwave — it makes them chewy in the wrong way.
View Full Recipe

Sourdough Discard Bagels Recipe
Description
These homemade sourdough discard bagels are chewy, golden, and packed with tangy flavor. Boiled then baked the traditional way, they're the perfect zero-waste bake for any sourdough baker.
Ingredients
Instructions
-
Step 1: Make the Dough (0–5 min)
In a large bowl, combine warm water, sugar, and instant yeast. Stir and let sit for 2 minutes. Add the sourdough discard and oil, then mix to combine. Add the bread flour and salt. Mix until a shaggy dough forms.
-
Step 2: Knead the Dough (5–15 min)
Turn the dough out onto a lightly floured surface and knead firmly for 8–10 minutes. Bagel dough is stiff — that's correct. It should be smooth, firm, and not sticky. If it sticks to your hands, add flour one tablespoon at a time. You can also use a stand mixer with a dough hook on medium speed for 8 minutes.
-
Step 3: First Rise (15–75 min)
Shape the dough into a ball and place it in a lightly oiled bowl. Cover with plastic wrap or a damp towel. Let rise at room temperature for 45–60 minutes, or until roughly doubled in size.
-
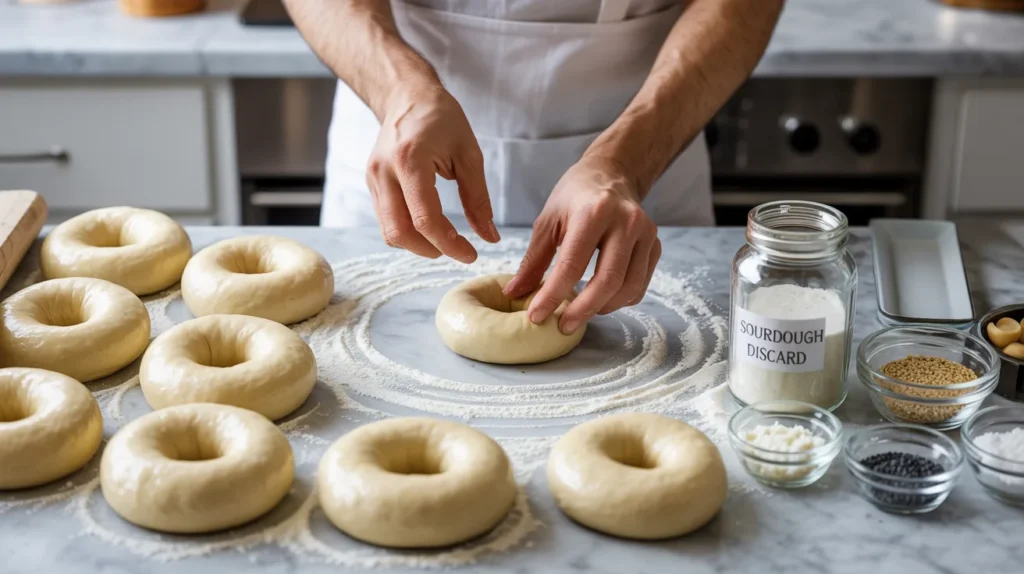
Step 4: Shape the Bagels (75–90 min)
Punch down the dough and divide into 8 equal pieces (about 90g each). Shape each piece into a smooth ball, then poke your thumb through the center and stretch the hole to about 4–5 cm wide (it will shrink slightly during proofing). Place on a parchment-lined baking sheet.
-
Step 5: Second Proof (90–130 min)
Cover the shaped bagels loosely with plastic wrap and let rest for 30–45 minutes until they look slightly puffed. Do not over-proof. Meanwhile, preheat your oven to 220°C (430°F) and bring the boiling water, baking soda, and malt syrup to a rolling boil in a large pot.
-
Step 6: Boil the Bagels (130–140 min)
Boil bagels 2–3 at a time for 45 seconds per side (1.5 minutes total). Use a slotted spoon to flip them. For a chewier crust, boil for 1 minute per side. Remove and place back on the parchment-lined tray.
-
Step 7: Add Toppings (140–143 min)
While the bagels are still wet from boiling, immediately sprinkle your toppings over each one. Press lightly so they stick. Work quickly — toppings won't adhere once the surface dries.
-
Step 8: Bake (143–165 min)
Bake at 220°C (430°F) for 20–22 minutes, rotating the pan halfway through, until deep golden brown. Transfer to a wire rack and cool for at least 20 minutes before slicing.
Nutrition Facts
Servings 8
- Amount Per Serving
- Calories 270kcal
- % Daily Value *
- Total Fat 1.5g3%
- Saturated Fat 0.3g2%
- Sodium 380mg16%
- Total Carbohydrate 54g18%
- Dietary Fiber 2g8%
- Sugars 3g
- Protein 9g18%
* Percent Daily Values are based on a 2,000 calorie diet. Your daily value may be higher or lower depending on your calorie needs.
Note
- Flour Matters: Bread flour is strongly recommended over all-purpose flour. Its higher protein content (12–14%) develops more gluten, which is what gives bagels their signature chew and structure. All-purpose will work but produces a softer, less chewy result.
- The Hole Will Shrink: When shaping, make the hole in the center noticeably larger than you want it to be — roughly 4–5 cm. It will shrink during proofing and baking. If the hole is too small going in, you'll end up with no hole at all after baking.
- Freeze for Easy Weekday Breakfasts: These bagels freeze beautifully. Slice them before freezing and store in a zip-lock bag. You can pop a frozen half directly into the toaster — no thawing needed — and have a fresh, chewy bagel in under 5 minutes any morning of the week.