
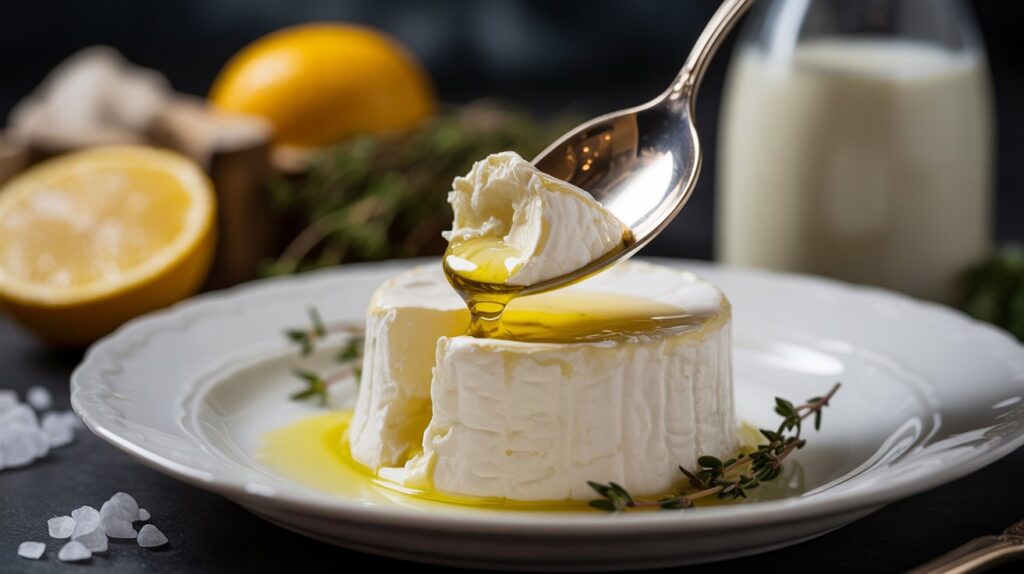
If you’ve ever spread a bit of creamy, tangy goat cheese on a cracker and thought “I wish I could make this at home,” this chevre cheese recipe is your answer. Chevre — the French word for goat — is one of the simplest fresh cheeses you can make. No special equipment, no aging, no complicated techniques. Just fresh goat’s milk, a little culture or acid, and some patience overnight.
Why You’ll Love This Chevre Cheese Recipe
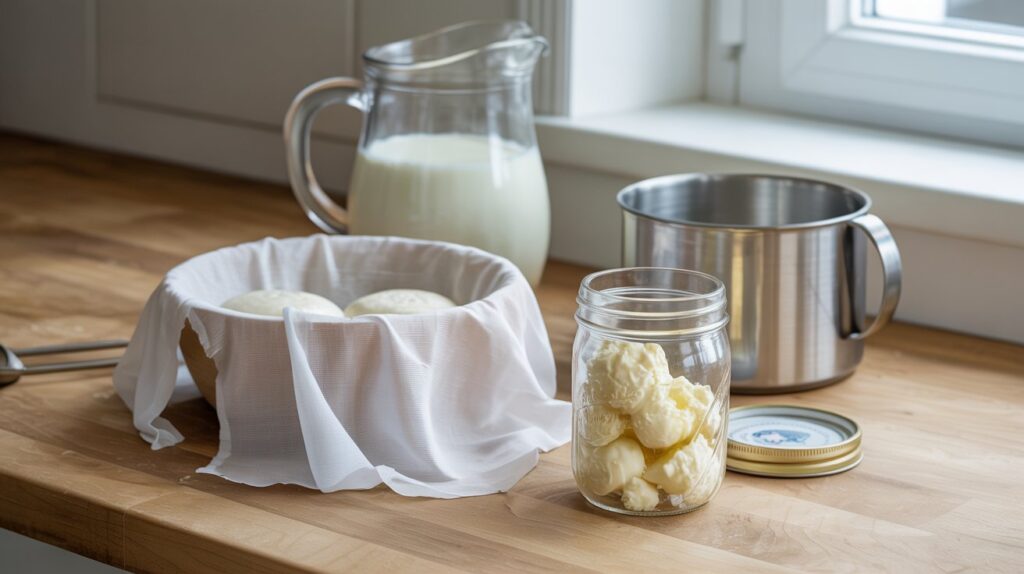
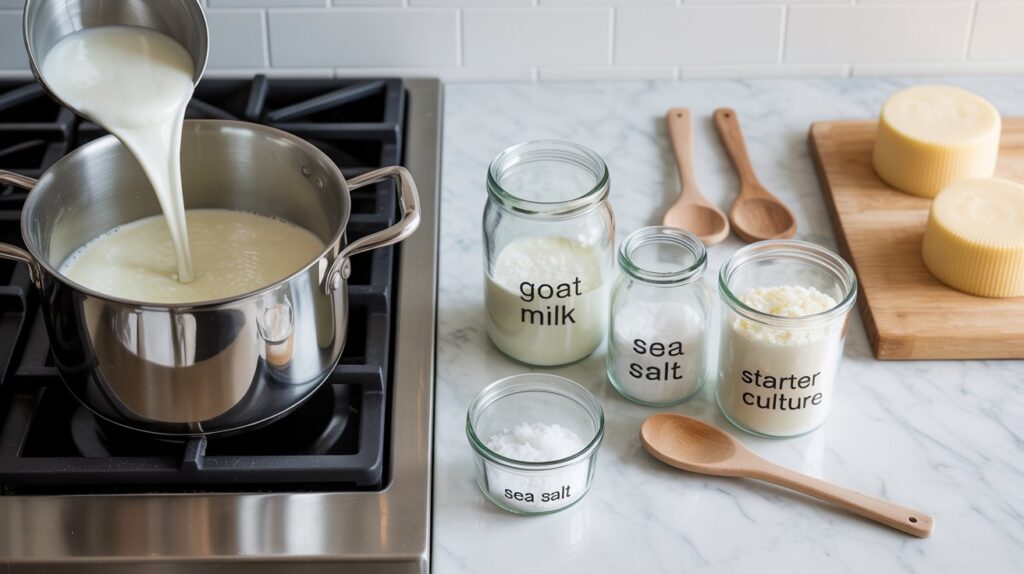
- Only 3 core ingredients — Goat’s milk, a starter culture (or lemon juice/vinegar), and salt. That’s it.
- Fresher than store-bought — Homemade chevre has a clean, bright flavor that commercial versions can’t match.
- No special equipment needed — A pot, a thermometer, cheesecloth, and a colander are all you need.
- Completely customizable — Roll it in herbs, add garlic, drizzle with honey — the base cheese is a blank canvas.
- Impressive and satisfying — There’s something deeply rewarding about serving cheese you made yourself.
What Makes This Recipe Special
Most chevre recipes either call for hard-to-find mesophilic starter cultures or use so much acid that the cheese turns grainy and sour. This recipe hits the sweet spot — using a gentle combination of citric acid and a small amount of culture (or just fresh lemon juice if you prefer) that produces a smooth, creamy curd with a delicate tang.
The key difference is temperature control. Heating the milk slowly and keeping it warm during culturing gives you a soft, cohesive curd rather than a crumbly mess. Follow the temperatures closely and you’ll have perfect chevre every single time.


Ingredients You’ll Need
Quality matters here more than in almost any other recipe. Since chevre has so few ingredients, each one shows up in the final flavor. Use the freshest goat’s milk you can find — ideally from a local farm or a good grocery store with high turnover.
- Fresh goat’s milk — Full-fat, pasteurized (not ultra-pasteurized). Ultra-pasteurized milk will not form a proper curd.
- Mesophilic starter culture — A small packet from a cheesemaking supplier. Alternatively, use 3 tablespoons of fresh lemon juice per liter of milk for a quicker, more acidic version.
- Liquid rennet (optional) — Just a few drops helps the curd set firmer. Skip it for a softer, spreadable result.
- Fine sea salt — Season to taste after draining. Start with less than you think you need.
- Fresh herbs or flavorings (optional) — Chives, thyme, cracked pepper, garlic, lemon zest — all work beautifully.
Pro-Tips for Success
- Never use ultra-pasteurized milk. This is the most common reason homemade chevre fails. The high-heat processing breaks down the proteins so they can no longer form a curd. Check the carton — it will say “ultra-pasteurized” or “UHT.” Regular pasteurized is fine.
- Use a thermometer. Cheesemaking is about precision. The difference between 30°C and 38°C changes everything about how your curd develops. A simple instant-read thermometer costs a few dollars and makes a huge difference.
- Keep the milk warm during culturing. After adding the culture, you need to maintain a temperature around 20–22°C (68–72°F) for 12 hours. Wrap the pot in towels, place it in an oven with just the light on, or use a yogurt maker. Cold kitchens slow everything down.
- Don’t disturb the curd while it’s forming. Once you’ve added the culture (and rennet if using), leave the milk completely undisturbed. Moving or stirring it breaks up the delicate curd structure before it has a chance to set properly.
- Drain slowly for a creamier result. The longer you drain, the firmer the cheese. For spreadable chevre, 8–10 hours is ideal. For a firmer, sliceable log, drain up to 18 hours.
- Salt after draining, not before. Salt draws out moisture, so adding it too early can affect how the curd drains. Season at the very end for best control over texture.
Common Mistakes to Avoid
- Using ultra-pasteurized milk. We said it once but it bears repeating — this single mistake ruins more homemade cheese than anything else. Always check the label.
- Skipping the thermometer and guessing temperatures. “Warm” is not specific enough in cheesemaking. Too hot kills the culture; too cold and it won’t activate. Buy a thermometer — it’s the best cheesemaking investment you’ll make.
- Draining in a cold environment. If your kitchen is cold, the draining process slows dramatically and the cheese can develop off-flavors. Drain at room temperature (18–22°C is ideal) for consistent results.
- Oversalting straight away. Fresh chevre is delicate. Add a little salt, taste, wait a few minutes, and taste again before adding more. The salt takes a moment to fully integrate into the cheese.
Flavor Variations
- Herbed Chevre Log: Roll the finished cheese in a mixture of fresh chopped chives, thyme, and flat-leaf parsley. Wrap in plastic and refrigerate for 1 hour to set the herbs.
- Garlic and Black Pepper: Mix in 1 minced garlic clove and 1/2 teaspoon of coarsely cracked black pepper per 200g of cheese. Bold and savory — perfect on a charcuterie board.
- Honey and Walnut: Serve the plain chevre drizzled with good honey and topped with toasted chopped walnuts. No mixing needed — the contrast of sweet, creamy, and crunchy is the whole point.
- Lemon Zest and Dill: Fold in the zest of one lemon and 2 tablespoons of fresh dill. Bright, fresh, and ideal for spreading on cucumber slices or crackers.
- Smoked Paprika and Chili: Roll the log in a mix of smoked paprika and dried chili flakes for a Spanish-inspired twist with a gentle kick.
What to Serve With Chevre Cheese Recipe
Fresh chevre is endlessly versatile. Here are the best ways to serve it:
- Cheese board — Pair with crackers, sliced baguette, fresh grapes, fig jam, and cured meats for a stunning spread.
- Salads — Crumble over a warm beet and walnut salad, or a simple arugula salad with balsamic dressing.
- Flatbreads and pizza — Dot over a thin-crust pizza before baking, or spread on warm flatbread with roasted vegetables.
- Pasta — Toss with warm pasta, olive oil, and cherry tomatoes. The chevre melts into a light, creamy sauce.
- Eggs — Fold into scrambled eggs or spread on an omelet just before folding. Rich and decadent.
Storage and Reheating
Refrigerating: Store fresh chevre wrapped tightly in plastic wrap or in an airtight container in the refrigerator. It will keep for 1–2 weeks. The flavor actually develops and deepens after the first day or two.
Freezing: Chevre freezes surprisingly well. Wrap it tightly in plastic wrap, then foil, and freeze for up to 2 months. Thaw overnight in the fridge. The texture may become slightly more crumbly after freezing — perfect for crumbling over salads, less ideal for spreading.
Serving from cold: Always let chevre sit at room temperature for 20–30 minutes before serving. Cold cheese mutes the flavor and makes the texture feel dense. Room temperature chevre is creamier, more aromatic, and far more enjoyable.
View Full Recipe

Chevre Cheese Recipe
Description
This chevre cheese recipe walks you through making fresh, creamy goat cheese at home using just pasteurized goat's milk, a starter culture, and salt. No aging required — ready to eat in under 24 hours.
Ingredients
Instructions
-
Step 1 — Warm the Milk (0–10 min)
Pour the goat's milk into a heavy-bottomed stainless steel or enamel pot. Heat over low-medium heat, stirring gently, until it reaches exactly 30°C (86°F). Use a thermometer — precision matters here. Remove from heat once you hit the target temperature. Do not let it boil or overheat.
-
Step 2 — Add the Culture (10–12 min)
If using mesophilic starter culture, sprinkle it over the surface of the warm milk and let it rehydrate for 2 minutes without stirring. Then stir gently with a slotted spoon using slow, deliberate up-and-down motions for 1 minute to fully incorporate. If using lemon juice instead, add it now and stir gently for 30 seconds.
-
Step 3 — Add Rennet (Optional) (12–13 min)
If using liquid rennet for a firmer curd, add the diluted rennet solution now. Stir gently for 30 seconds using the same slow up-and-down motion. Stop stirring completely after this point. The milk needs to be completely still to form a clean curd.
-
Step 4 — Culture Overnight (12 hours)
Cover the pot with a clean cloth or lid and place in a warm spot (20–22°C / 68–72°F) for 12 hours. Good options include an oven with just the light turned on, wrapped in thick towels, or inside a turned-off microwave with a cup of hot water. Do not stir or move the pot during this time. After 12 hours, the curd should be set like a soft yogurt with clear whey pooling on the surface.
-
Step 5 — Drain the Curd (8–18 hours)
Line a colander with 2–3 layers of cheesecloth (or a clean, thin cotton tea towel). Gently ladle the curd into the cheesecloth — do not stir or break it up more than necessary. Gather the corners of the cheesecloth and tie them together. Hang over a bowl or set the colander over a deep bowl and refrigerate (or leave at room temperature if your kitchen is cool). Drain for 8–10 hours for a soft, spreadable chevre, or up to 18 hours for a firmer consistency.
-
Step 6 — Season and Shape (5 min)
Transfer the drained cheese to a bowl. Add the fine sea salt and mix gently. Taste and adjust — it should be pleasantly savory, not salty. If adding herbs or flavorings, fold them in now. To shape into a log, lay a piece of plastic wrap on your counter, spoon the cheese along the center, roll into a log shape, and twist the ends tight. Refrigerate for at least 1 hour to firm up before serving.
-
Step 7 — Finish and Serve
Unwrap or transfer to a serving plate. If desired, roll in fresh herbs, cracked pepper, or paprika. Let the chevre sit at room temperature for 20–30 minutes before serving — this brings out the full flavor and creaminess. Serve with crackers, sliced baguette, fresh fruit, or as part of a cheese board.
Nutrition Facts
Servings 8
- Amount Per Serving
- Calories 110kcal
- % Daily Value *
- Total Fat 9g14%
- Saturated Fat 6g30%
- Cholesterol 22mg8%
- Sodium 160mg7%
- Total Carbohydrate 1g1%
- Sugars 1g
- Protein 7g15%
* Percent Daily Values are based on a 2,000 calorie diet. Your daily value may be higher or lower depending on your calorie needs.
Note
- Pasteurized Only — Never Ultra-Pasteurized: This is the single most important rule in this recipe. Ultra-pasteurized goat's milk will not form a curd no matter what you do. Look for "pasteurized" on the label, and avoid anything marked "UHT" or "ultra-pasteurized." Fresh goat's milk from a local farm is ideal if you can find it.
- Save the Whey: The liquid that drains from the curd is whey — don't throw it away. It's packed with protein and works beautifully as a substitute for water or milk in bread, pancakes, pizza dough, or smoothies. Store it in the fridge for up to a week.
- Draining Time Controls Texture: 8 hours of draining gives you a soft, creamy, spreadable chevre. 12 hours gives a firmer but still smooth texture. 18 hours gives a dense, sliceable log. Taste and check the texture as you go — you have more control than you think.