
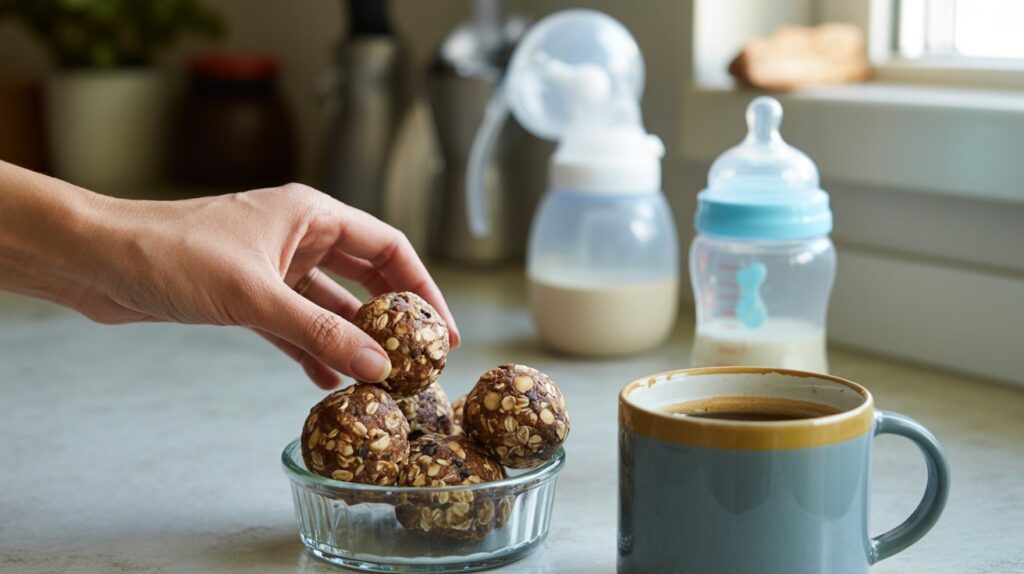
Whether you’re a new mom trying to keep your milk supply up or just looking for a nutrient-dense snack that actually tastes good, these lactation balls are about to become your best friend. This lactation balls recipe combines rolled oats, ground flaxseed, brewer’s yeast, and peanut butter into no-bake energy balls that are chewy, chocolatey, and satisfying. No oven, no complicated steps — just mix, roll, and refrigerate. They’re ready in 15 minutes and keep in the fridge all week.
Why You’ll Love This Lactation Balls Recipe
- No baking required — Mix everything in one bowl, roll into balls, and refrigerate. Done in 15 minutes flat.
- Actually delicious — These taste like chocolate peanut butter energy balls, not like a supplement. Even partners and older kids love them.
- Packed with galactagogues — Oats, flaxseed, and brewer’s yeast are three of the most well-known milk-supporting ingredients, all in one snack.
- Meal-prep perfect — Make a big batch on Sunday and grab two or three throughout the day all week long.
- Customizable — Nut allergy? Swap the peanut butter. Don’t have brewer’s yeast? There are good alternatives. This recipe adapts easily.
What Makes This Recipe Special
A lot of lactation snack recipes either taste medicinal or fall apart in your hands. This one solves both problems. The combination of peanut butter and honey acts as the binding agent, holding everything together without needing eggs, flour, or any baking. The result is a firm, rollable ball that holds its shape in the fridge and doesn’t crumble when you eat it.
The chocolate chips aren’t just for flavor — they make these something you’ll want to reach for during a 3am feeding rather than something you feel obligated to eat. That matters when you’re exhausted and need a quick, nourishing snack within arm’s reach.


Ingredients You’ll Need
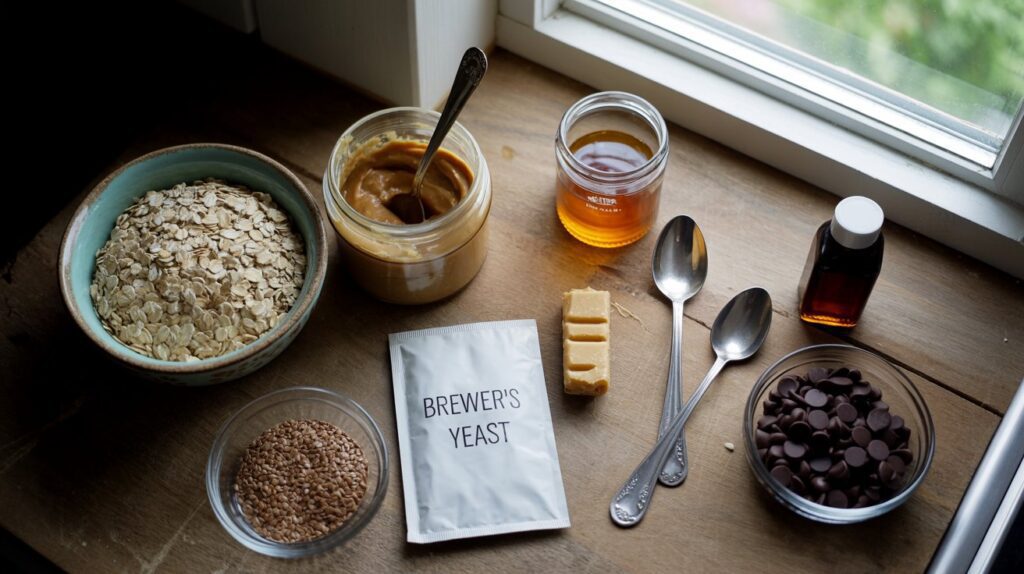
Every ingredient in this recipe is pulling double duty — providing flavor and nutrition at the same time. Here’s what each one does and why it’s included.
- Rolled oats (old-fashioned oats) — The bulk of the recipe. Oats are one of the most commonly recommended foods for supporting milk supply. They’re also high in iron, which is important for postpartum recovery. Use old-fashioned rolled oats, not instant — they give a better chewy texture.
- Brewer’s yeast — The key lactation-supporting ingredient. Brewer’s yeast (not nutritional yeast — they are different) is rich in B vitamins, iron, protein, and chromium. It has a slightly bitter, malty flavor that gets balanced out by the honey and peanut butter. Start with 2 tablespoons if you’re new to it.
- Ground flaxseed (flaxseed meal) — Another well-known galactagogue. Ground flaxseed is also high in omega-3 fatty acids and fiber. Ground works much better than whole seeds here — whole seeds pass through without being absorbed.
- Peanut butter — Binds the balls together and adds healthy fats and protein. Use natural, drippy peanut butter for the easiest mixing. Thick, stiff peanut butter makes the mixture harder to combine.
- Honey — Sweetens the recipe and helps the balls hold together. Raw honey adds a subtle floral note. Maple syrup is a great vegan substitute.
- Chocolate chips — Semi-sweet or dark chocolate chips. A small amount goes a long way in making these genuinely enjoyable. Mini chips distribute more evenly throughout the balls.
- Vanilla extract — Rounds out the flavor and makes everything taste more cohesive.
- Coconut oil (optional) — A tablespoon added to the mix helps bind and adds a subtle richness. Also thought to support milk supply due to its lauric acid content.
- Shredded coconut (optional) — Adds texture and a slight sweetness. Unsweetened desiccated coconut works best.
Pro-Tips for Success
- Chill the mixture before rolling. After mixing, the dough can feel too soft and sticky to roll into clean balls. Pop the bowl in the fridge for 20–30 minutes first. The mixture firms up considerably and becomes much easier to work with.
- Use a cookie scoop for even sizing. A 1.5 tablespoon cookie scoop gives you consistently sized balls that look great and refrigerate evenly. No scoop? Use a tablespoon and eyeball it — perfection isn’t the goal here.
- Wet your hands slightly before rolling. The mixture is naturally sticky. Lightly dampening your palms before rolling each ball prevents sticking and gives you a smoother finish.
- Taste and adjust before rolling. Before you commit to rolling the whole batch, taste a small amount of the mixture. Too sweet? Add a little more brewer’s yeast or flaxseed. Not sweet enough? Add a drizzle more honey. Adjust now, not after.
- Start with less brewer’s yeast if you’re sensitive to the taste. Brewer’s yeast has a strong, malty, slightly bitter flavor that some people find overpowering. Start with 1–2 tablespoons and increase in subsequent batches as you get used to it.
- Double the batch. These take almost no extra time to double and freeze beautifully. Make a big batch, freeze half, and pull from the freezer as needed throughout your breastfeeding journey.
Common Mistakes to Avoid
- Using instant oats instead of rolled oats. Instant oats are too fine and powdery — they make the mixture pasty and dense rather than chewy. Old-fashioned rolled oats give you the right texture. Quick oats are an acceptable middle ground if that’s all you have.
- Skipping the chilling step and trying to roll immediately. Fresh out of the mixing bowl, the mixture is often too soft and warm to roll cleanly. It sticks to your hands and doesn’t form neat balls. Twenty minutes in the fridge makes an enormous difference — don’t skip it.
- Using stiff, thick peanut butter. Natural, drippy peanut butter mixes in effortlessly. Thick, stabilized peanut butter (the kind that never separates) is much harder to incorporate and often makes the mixture too stiff. If your peanut butter is thick, warm it in the microwave for 20–30 seconds to loosen it before adding.
- Confusing brewer’s yeast with nutritional yeast. These are two completely different products. Nutritional yeast is deactivated and has a cheesy, savory flavor — it does not contain the same nutritional profile as brewer’s yeast and is not an equivalent substitute for lactation support. Make sure your label specifically says “brewer’s yeast.”
Flavor Variations
- Almond Butter and Dark Chocolate: Swap peanut butter for almond butter and use dark chocolate chips (70% cocoa or higher). Slightly more sophisticated flavor, equally delicious.
- Sunflower Seed Butter (Nut-Free): Replace peanut butter with sunflower seed butter for a completely nut-free version safe for daycare and school environments. The flavor is milder but still very good.
- Coconut and Mango: Skip the chocolate chips and add 3 tablespoons of unsweetened desiccated coconut and 2 tablespoons of finely chopped dried mango. Roll the finished balls in extra coconut for a tropical finish.
- Ginger and Oat: Add 1 teaspoon of ground ginger and 1 tablespoon of molasses (replacing some of the honey). Warming and great for winter months.
- Protein Boost: Add 2 tablespoons of unflavored or vanilla protein powder to the mix for an extra protein hit. You may need to add a splash more honey to compensate for the extra dryness.
What to Serve With Lactation Balls Recipe
These are designed as a grab-and-go snack, but here are some great ways to incorporate them into your day:
- With a large glass of water — Staying hydrated is just as important for milk supply as what you eat. Make it a habit to drink a full glass every time you reach for a ball.
- Alongside a smoothie — Pair with a banana-oat smoothie or a spinach and berry smoothie for a complete nursing snack.
- With a cup of lactation tea — Fenugreek, fennel, or blessed thistle teas pair naturally with these balls for a dedicated milk-support snack break.
- As a late-night snack — Keep a small container on your nightstand for easy access during night feeds. Cold from the fridge, they’re firm and easy to eat one-handed.
- Crumbled over yogurt — Crumble 1–2 balls over a bowl of full-fat Greek yogurt with a drizzle of honey for a more substantial snack or light breakfast.
Storage and Reheating
Refrigerator: Store in an airtight container in the fridge for up to 1 week. They firm up more as they chill, which most people actually prefer. Layer with parchment paper if stacking to prevent sticking.
Freezer: These freeze exceptionally well. Arrange the rolled balls on a parchment-lined tray and freeze for 1–2 hours until solid (this prevents them from sticking together). Transfer to a zip-lock freezer bag and freeze for up to 3 months. Pull out as many as you need and thaw in the fridge overnight or at room temperature for 20–30 minutes.
No reheating needed: Lactation balls are designed to be eaten cold or at room temperature. There’s no need to heat them — in fact, warming softens them to the point of falling apart. Enjoy straight from the fridge for the best texture.
View Full Recipe

Lactation Balls Recipe
Description
These lactation balls are chewy, chocolatey no-bake energy balls packed with rolled oats, brewer's yeast, ground flaxseed, and peanut butter — all known to support breast milk supply. Ready in 15 minutes with no oven required.
Ingredients
Instructions
-
Step 1 — Combine Dry Ingredients (0–3 min)
In a large mixing bowl, combine the rolled oats, brewer's yeast, ground flaxseed, shredded coconut (if using), and a pinch of salt. Stir together with a wooden spoon until evenly mixed. Make sure the brewer's yeast and flaxseed are distributed throughout the oats — you don't want pockets of bitterness from concentrated brewer's yeast.
-
Step 2 — Add Wet Ingredients (3–7 min)
Add the peanut butter, honey, vanilla extract, and melted coconut oil (if using) to the dry ingredients. Stir vigorously until everything is fully combined and a cohesive, sticky dough forms. If the peanut butter is stiff and difficult to mix in, warm it in the microwave for 20–30 seconds first to loosen it. The mixture should hold together when pressed between your fingers — if it feels too dry and crumbly, add honey one teaspoon at a time.
-
Step 3 — Fold in Chocolate Chips (7–8 min)
Add the chocolate chips and fold them into the mixture gently. If you stir too aggressively at this point the chips can break up and the chocolate melts from the warmth of your hands into the dough, which affects the look of the finished balls. A few gentle folds is all you need.
-
Step 4 — Chill the Mixture (8–30 min)
Cover the bowl with plastic wrap and refrigerate for 20–30 minutes. This step is important — the chilled mixture is much firmer and easier to roll into neat balls. It also helps the oats absorb some of the moisture, which improves the texture of the finished balls. Don't skip this step if you want clean, round results.
-
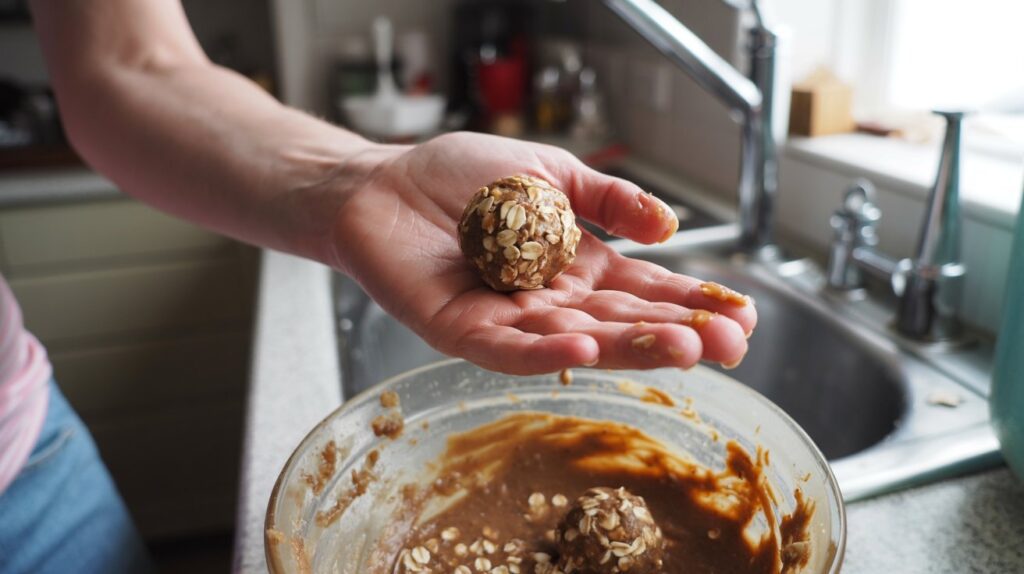
Step 5 — Roll into Balls (30–45 min)
Remove the bowl from the fridge. Using a 1.5 tablespoon cookie scoop or a tablespoon, portion the mixture and roll each portion between your lightly dampened palms into a smooth ball. Place each ball on a parchment-lined tray or plate as you go. If the mixture warms up and becomes too sticky to work with, return it to the fridge for another 10 minutes. Aim for balls roughly the size of a large marble or small truffle — about 3cm in diameter.
-
Step 6 — Set and Store
Once all the balls are rolled, place the tray in the fridge for at least 30 minutes to fully set and firm up before transferring to a storage container. Layer with parchment paper if stacking multiple layers to prevent sticking. They are ready to eat once firm. Enjoy 2–3 per day as a nursing snack alongside plenty of water.
Nutrition Facts
Servings 20
- Amount Per Serving
- Calories 145kcal
- % Daily Value *
- Total Fat 7g11%
- Saturated Fat 2g10%
- Sodium 55mg3%
- Total Carbohydrate 17g6%
- Dietary Fiber 2g8%
- Sugars 8g
- Protein 5g10%
* Percent Daily Values are based on a 2,000 calorie diet. Your daily value may be higher or lower depending on your calorie needs.
Note
- Brewer's Yeast vs Nutritional Yeast — They Are NOT the Same: This is the most common mistake people make with this recipe. Brewer's yeast (sometimes labeled "nutritional brewer's yeast" at health food stores) is a specific product with a distinct nutritional profile that includes B vitamins, iron, chromium, and protein. Nutritional yeast has a cheesy flavor and a completely different composition. Always check the label — it should specifically say "brewer's yeast."
- Freeze a Batch for the Postpartum Period: If you're still pregnant and have the energy, make a double batch of these before your due date and freeze them. Arrange on a tray, freeze solid, then transfer to a zip-lock bag. You'll have a month's worth of nutritious nursing snacks ready to go the moment you need them — which is exactly when you'll have the least time or energy to make them.
- Drink Water Every Time You Eat One: Hydration is arguably the most important factor in maintaining milk supply — more important than any food or supplement. Make it a habit to drink a full glass of water every single time you eat one of these balls. Pair the snack with the habit and you'll naturally stay better hydrated throughout the day.