

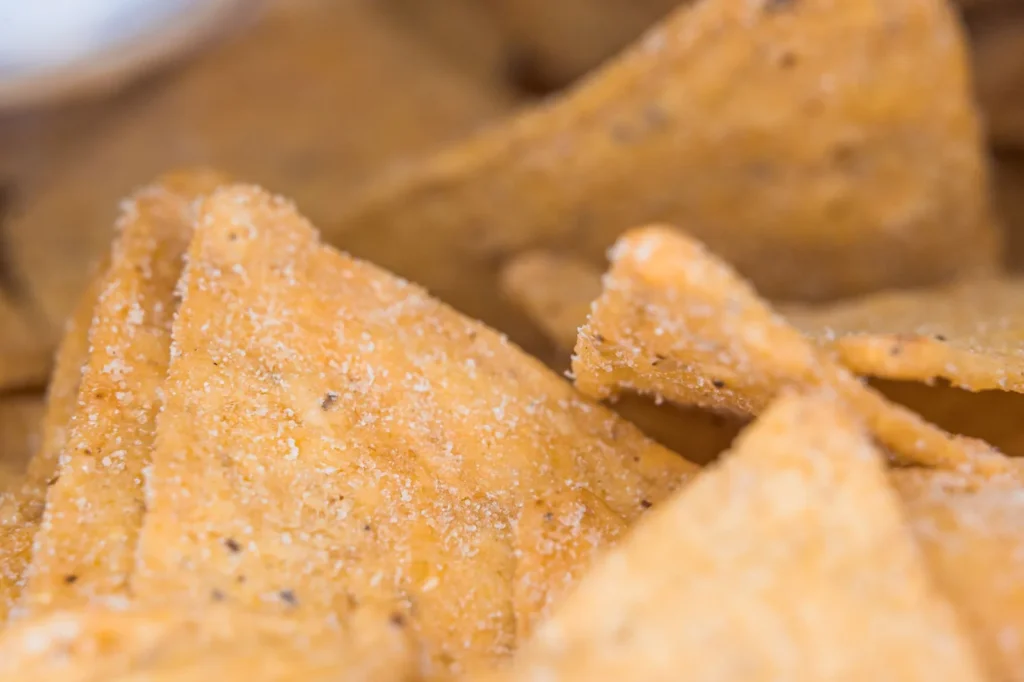
The everything but the salt tortilla chips are a low-sodium twist on the everything-bagel trend, built from plain corn tortillas and a salt-free seed and spice blend. You get the same crunch and aromatic pop of sesame, garlic, and onion without the sodium load that makes regular seasoned chips hard to stop eating. This recipe shows you how to bake them evenly so they snap instead of bend.
Most store-bought everything chips lean heavy on salt, which masks the toasty nuttiness of the seeds. By controlling the blend yourself, you keep the flavor loud and the sodium near zero. They work as a snack, a dipper for mild salsas, or a base for nachos where you add salt only through toppings. If you enjoyed this, our refreshing peach lemonade is worth trying next. Making this everything but the salt tortilla chips at home is surprisingly straightforward once you know the key steps.
Why You’ll Love These Everything But The Salt Tortilla Chips
- Corn tortillas turn genuinely crisp in about 12 minutes with no frying oil mess.
- The salt-free blend keeps sodium under 10mg per serving while tasting like everything bagel seasoning.
- You control the seed ratio, so you can add extra sesame if that’s your favorite part.
- They hold up to chunky dip better than thin potato chips because the tortilla gives a sturdy bite.
- One batch costs a fraction of specialty bags and uses pantry spices you already own.
Ingredients You’ll Need
- 8 small corn tortillas (6-inch), room temperature
- 2 tbsp white sesame seeds
- 2 tbsp black sesame seeds
- 1 tbsp dried minced garlic
- 1 tbsp dried minced onion
- 1 tsp poppy seeds
- 2 tbsp olive oil
- 1/2 tsp ground black pepper
Ingredient Substitutions
White sesame seeds: Replace with an equal weight of hemp hearts for a softer chew and greener color. Hemp hearts toast faster than sesame, so cut the bake time by 2 minutes or they turn bitter. The flavor shifts from nutty to grassy, which pairs better with avocado dip than tomato salsa. The everything but the salt tortilla chips works well for weeknight cooking when time is limited.





Dried minced garlic: Use 1 tsp garlic powder for every 1 tbsp minced garlic to avoid hard brown bits. Powder coats the tortilla more evenly but loses the slight crunch the minced form gives. Watch the oven closely because powder browns quicker and can taste burnt at 14 minutes. Storing leftover everything but the salt tortilla chips correctly keeps it tasting good for days.
Olive oil: Swap with an equal amount of avocado oil if you want a higher smoke point and neutral taste. Avocado oil lets the seeds toast without adding fruitiness, so the onion comes forward more. The chips crisp the same way but feel lighter on the tongue. For the best results with this everything but the salt tortilla chips, read through all the steps before starting.
Corn tortillas: Use 8 small flour tortillas for a wheat-based chip with a paler look and softer snap. Flour browns slower, so add 3 minutes to the bake and check the edges for golden and crispy cues. The seed blend sticks just as well but the inside stays slightly bendy. For another easy option, check out our basil pesto you.
Step-by-Step Instructions
- Heat the oven to 180°C / 350°F and line a large baking sheet with parchment so the tortillas don’t stick when the oil heats.
- Brush both sides of each tortilla with olive oil using a pastry brush, aiming for a thin even film rather than puddles that steam the center.
- Stir the sesame seeds, minced garlic, minced onion, poppy seeds, and black pepper in a small bowl until the blend looks evenly mixed with no clumping.
- Sprinkle the blend over the oiled tortillas, pressing gently with your hand so the seeds anchor into the oil instead of rolling off during baking.
- Bake on the middle rack for 12 minutes, rotating the sheet at the 6-minute mark so the back corners don’t brown faster than the front.
- Pull them when the edges are golden and crispy and the center shows no pale doughy spot, then cool on a rack for 5 minutes to finish crisping.
- Break each tortilla into 6 pieces with your hands once cooled, stacking loosely so trapped steam doesn’t soften the chips you just baked.
Pro Tips
Cut tortillas into triangles before baking if you want uniform dippers, but whole rounds break into more rustic shards that catch more salsa. A pastry brush gives thinner oil coverage than a pour, which is the difference between crisp and greasy. Cool the chips on a wire rack, not the tray, because the hot sheet keeps releasing heat that softens the bottoms. Make a double batch of the dry blend and store it in a jar so the next round takes 3 minutes of prep. If your seeds slide off, the oil layer was too thin, so brush a second light pass before sprinkling.
Common Mistakes to Avoid
Skipping the sheet rotation bakes one side dark while the other stays pale, so turn the pan halfway or accept uneven color. Using cold tortillas straight from the fridge makes them crack when you bend them for the brush, so let them sit out for 20 minutes first. Pouring oil instead of brushing pools liquid in the center and creates a chewy middle instead of a snap. Opening the oven repeatedly drops the temperature and extends bake time, so avoid opening the oven early beyond the single rotation.
Serving Suggestions
Pair the chips with a low-sodium zucchini side for a light lunch that keeps the salt low. They stand up to a thick black bean dip where you add lime and cumin for the seasoning instead of salt. Crumble them over a crab salad to replace salty crackers with something that actually stays crunchy. For movie night, stack them in a bowl with a pinch of nutritional yeast so the umami covers what salt normally does.
Storage and Reheating
Keep the cooled chips in an airtight container at room temperature for up to 3 days, though they lose crunch after day two. If they soften, spread them on a tray and bake at 180°C / 350°F for 4 minutes to re-crisp, then cool before sealing again. Do not refrigerate because the cold humid air makes corn tortilla chips tough rather than fresh. Never leave a baked batch out for more than 2 hours before container storage or the oil can pick up stale air taste.
Recipe Variations
Chili Version
Add 1/2 tsp ancho chili powder to the dry blend before sprinkling for a smoky heat that doesn’t need salt. The chili toasts with the seeds and turns the chip a deeper red with a warm finish. Serve with cooling cucumber dip to balance the spice.
Cheesy Bake
Slide a tablespoon of grated parmesan onto each tortilla at minute 8 so it melts into the seeds for a salty-free savory note from cheese, not sodium added separately. Watch closely because cheese browns faster than tortilla and can cross into bitter at 13 minutes. Break after cool and the cheese forms a thin crackly layer.
Flour Tortilla Chip
Use 8 small flour tortillas and bake 15 minutes total, checking at 12 for golden and crispy edges since wheat browns slower than corn. The result is paler, softer in the middle, and better for scooping soft dips like gravy based toppings. Cut into strips for a soup garnish instead of triangles.
Seed-Heavy Mix
Double the sesame and poppy amounts while dropping garlic to 2 tsp for a milder chip that leads with nutty crunch. The extra seeds need a second light oil pass or they fall off during the flip. This version pairs well with a potato side at brunch.

Everything But The Salt Tortilla Chips
Description
These everything but the salt tortilla chips are a low-sodium twist on the everything-bagel trend, made from plain corn tortillas and a salt-free seed and spice blend. You get the same crunch and aromatic pop of sesame, garlic, and onion without the sodium load of regular seasoned chips.
Ingredients
Instructions
-
Heat oven and line sheet
Heat the oven to 180°C / 350°F and line a large baking sheet with parchment so the tortillas don't stick when the oil heats. Make sure the parchment lies flat with no wrinkles to avoid uneven baking contact.
-
Brush tortillas with oil
Brush both sides of each tortilla with olive oil using a pastry brush, aiming for a thin even film rather than puddles that steam the center. Use room-temperature tortillas so they bend easily without cracking as you brush.
-
Mix seed blend
Stir the sesame seeds, minced garlic, minced onion, poppy seeds, and black pepper in a small bowl until the blend looks evenly mixed with no clumping. This ensures every chip gets a balanced aromatic pop when baked.
-
Sprinkle and press blend
Sprinkle the blend over the oiled tortillas, pressing gently with your hand so the seeds anchor into the oil instead of rolling off during baking. Cover the full surface so no bare oily spots remain exposed.
-
Bake and rotate
Bake on the middle rack for 12 minutes, rotating the sheet at the 6-minute mark so the back corners don't brown faster than the front. Keep the oven closed except for that single rotation to maintain steady heat.
-
Check doneness and cool
Pull them when the edges are golden and crispy and the center shows no pale doughy spot, then cool on a rack for 5 minutes to finish crisping. The chips should snap rather than bend when lifted from the rack.
-
Break into pieces
Break each tortilla into 6 pieces with your hands once cooled, stacking loosely so trapped steam doesn't soften the chips you just baked. Whole rounds break into rustic shards that catch more salsa than uniform cuts.
Nutrition Facts
Servings 4
- Amount Per Serving
- Calories 180kcal
- % Daily Value *
- Total Fat 11g17%
- Saturated Fat 2g10%
- Sodium 8mg1%
- Total Carbohydrate 18g6%
- Dietary Fiber 3g12%
- Sugars 1g
- Protein 3g6%
* Percent Daily Values are based on a 2,000 calorie diet. Your daily value may be higher or lower depending on your calorie needs.
Note
- Storage: Keep cooled chips in an airtight container at room temperature for up to 3 days, though they lose crunch after day two.
- Reheating: If they soften, spread on a tray and bake at 180°C / 350°F for 4 minutes to re-crisp, then cool before sealing again.
- Pro tip: Make a double batch of dry blend and store in a jar so the next round takes 3 minutes of prep.
- Pairing: Try our caprese flatbread for a complementary low-sodium spread.
