

A great salt and pepper shrimp recipe relies on a fast, hot pan and a light cornstarch coating so the shells crisp while the meat stays tender. The dish comes from Cantonese cooking, where whole shrimp are tossed with toasted salt, white pepper, and aromatics until every bite carries a clean, savory snap. This version keeps the steps short and the ingredient list realistic, so you can get it on the table in about 20 minutes without special equipment.
The coating is thin enough that you still taste the shrimp, not a thick batter. You control the heat with fresh chili and scallions, and the seasoning stays balanced rather than salty overload. If you like shrimp tapas, this is a simpler stovetop cousin that uses pantry spices instead of cured meat. Making this salt and pepper shrimp at home is surprisingly straightforward once you know the key steps.
Why You’ll Love These Salt And Pepper Shrimp
- Cooks in one skillet with no deep fryer or thermometer required.
- Light cornstarch shell turns golden and crispy without greasiness.
- Seasoning is adjustable—more white pepper for heat, less chili for mild.
- Works as a main over rice or as a shared appetizer with drinks.
- Uses frozen shrimp well once properly thawed and dried.
Ingredients You’ll Need
- 1 pound large shrimp (21–25 count), shell-on, deveined, tails on
- 3 tablespoons cornstarch
- 1 teaspoon fine sea salt
- 1 teaspoon ground white pepper
- 4 cloves garlic, minced
- 2 scallions, sliced thin (white and green separated)
- 1 fresh red chili, seeded and minced
- 3 tablespoons neutral oil (such as grapeseed or canola)
- 1 teaspoon toasted sesame oil
Ingredient Substitutions
Cornstarch: Replace with an equal amount of potato starch for a slightly clearer, crunchier finish. Potato starch browns a touch faster, so keep the pan at medium-high heat rather than high and watch the first batch closely. The texture stays crisp for a few minutes longer after cooking than cornstarch does. The salt and pepper shrimp works well for weeknight cooking when time is limited.





White pepper: Use an equal amount of finely ground black pepper if white pepper is unavailable. Black pepper gives a sharper, more visible speckle and a stronger pungency, so start with 3/4 teaspoon and taste before adding the rest. The dish will read slightly more rustic but still balanced. Storing leftover salt and pepper shrimp correctly keeps it tasting good for days.
Neutral oil: Swap with an equal volume of refined coconut oil for a clean, high-smoke-point option. Coconut oil solidifies below 76°F, so warm the measured oil briefly before adding to the pan. Expect the same crisp result with a faint sweetness at the edges. For the best results with this salt and pepper shrimp, read through all the steps before starting.
Fresh red chili: Replace with 1/2 teaspoon crushed red pepper flakes for a pantry-friendly heat. Flakes disperse faster and can scorch, so add them with the garlic off medium heat for 20 seconds before the shrimp go in. The heat is more even but less bright than fresh chili. If you enjoyed this, our pepper egg sandwich is worth trying next.
Step-by-Step Instructions
- Pat the shrimp very dry with paper towels; moisture on the shell prevents crisping. Toss them in a bowl with cornstarch until each piece is lightly dusted but not clumped.
- Mix the fine sea salt and white pepper in a small dish so they distribute evenly later. Keep this near the stove for fast seasoning at the end.
- Heat 3 tablespoons neutral oil in a 12-inch skillet over medium-high heat until it shimmers and a dropped cornstarch speck sizzles instantly. Arrange shrimp in a single layer, never crowd the pan, and cook 90 seconds per side until shells are golden and crispy.
- Lower to medium heat, push shrimp to one side, and add garlic, scallion whites, and chili to the cleared space. Stir 30 seconds until fragrant but not browned.
- Sprinkle the salt-pepper mix over everything and toss 30 seconds to coat. Drizzle sesame oil, add scallion greens, and toss once more off heat.
- Transfer to a warm plate and serve immediately while the coating stays crisp. Any rest beyond 5 minutes softens the shell under humid heat.
Pro Tips
Dry the shrimp thoroughly before coating; a damp surface steams instead of crisps and the cornstarch slides off. Use the technique guidance from pan frying to judge oil readiness by sound and shimmer rather than time alone.
Cook in two batches if your skillet is under 12 inches, since overlapping drops the temperature and yields chewy shrimp. A single uncrowded layer keeps the oil near medium-high heat and builds a real shell crust.
Toast the white pepper in a dry pan for 30 seconds before grinding if you buy whole berries; the aroma deepens and the heat reads rounder. Pre-toasted pepper also clings better to the oil-coated shrimp at the toss stage.
Finish with sesame oil off heat so its volatile compounds stay fragrant instead of turning bitter. A 3-second drizzle is enough for a pound of shrimp without greasing the palate.
Common Mistakes to Avoid
Skipping the dry step leads to a soggy coating that peels off in the pan. Press the shrimp between two towels for 20 seconds per side before the cornstarch goes in.
Adding garlic at the start with the shrimp burns it by the time the shells crisp. Wait until the shrimp are nearly done and use medium heat for the aromatics.
Dumping all the salt at once without pre-mixing causes salty pockets and bare spots. Blend salt and white pepper first so each toss seasons evenly. For another easy option, check out our scotch eggs juicy.
Serving Suggestions
Spoon the shrimp over steamed jasmine rice so the light oil soaks in and balances the pepper. For a lighter plate, pair with tzatziki sauce on the side as a cooling dip that contrasts the heat.
As an appetizer, serve with lime wedges and toothpicks for a hands-on bite. A chilled grapefruit cocktail cuts the savory edge if you are hosting.
Storage and Reheating
Refrigerate leftovers in an airtight container for up to 3 days; the coating softens but the meat stays safe and tender. Do not leave cooked shrimp at room temperature beyond 2 hours total.
Reheat in a 10-inch skillet over medium heat with 1 teaspoon oil, turning 2 minutes per side until the internal temperature reaches 145°F. Freezing is not advised because the cornstarch shell turns gummy on thaw.
Recipe Variations
Shell-Off Version
Peel the shrimp completely and coat as written for a neater bite that kids accept. Cook 60 seconds per side since bare meat crisps faster and overcooks quicker than shell-on.
Black Pepper Swap
Use the black pepper substitution from above and add 1/2 teaspoon sugar to mimic the rounded heat of white pepper. Expect a speckled, bolder crust and a slightly shorter crisp window.
Shrimp Tacos Twist
Load the cooked shrimp into warm corn tortillas with cabbage slaw as a nod to shrimp tacos. The pepper seasoning replaces taco spice and keeps the filling dry enough to hold.
Oven Crisp Method
Arrange coated shrimp on a wire rack at 220°C / 425°F for 10 minutes, flipping once, to skip the skillet. The shell crisps less sharply than pan-fried but the dish stays hands-off for batch cooking.
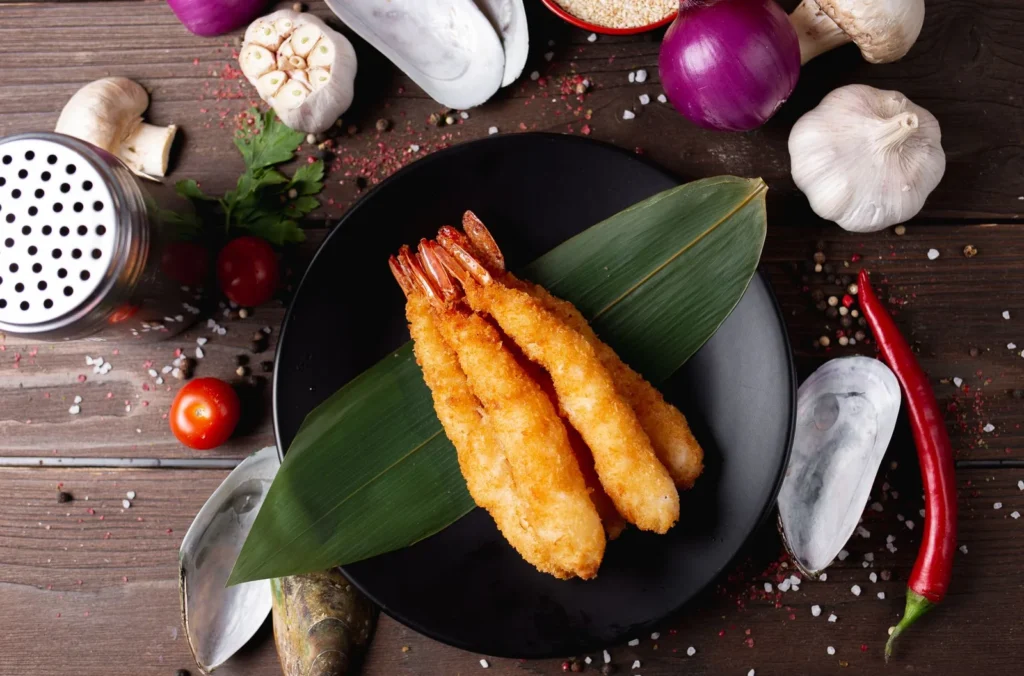

Salt And Pepper Shrimp Recipe
Description
A light cornstarch-coated shrimp crisped in a hot skillet with toasted salt, white pepper, garlic, chili, and scallions for a clean savory snap. It comes together in about 20 minutes with no deep fryer and works as a main over rice or a shared appetizer.
Ingredients
Instructions
-
Dry and dust shrimp
Pat the shrimp very dry with paper towels, since moisture on the shell prevents crisping and makes the coating slide off. Toss them in a bowl with 3 tablespoons cornstarch until each piece is lightly dusted but not clumped, with a thin white film rather than wet spots.
-
Prep seasoning mix
Mix the 1 teaspoon fine sea salt and 1 teaspoon ground white pepper in a small dish so they distribute evenly later. Keep this near the stove for fast seasoning at the end when the shrimp are cooked.
-
Heat oil and sear
Heat 3 tablespoons neutral oil in a 12-inch skillet over medium-high heat until it shimmers and a dropped cornstarch speck sizzles instantly. Arrange shrimp in a single layer, never crowd the pan, and cook 90 seconds per side until shells are golden and crispy with a brittle, audible crunch.
-
Cook aromatics
Lower to medium heat, push shrimp to one side, and add garlic, scallion whites, and chili to the cleared space. Stir 30 seconds until fragrant but not browned, watching so the garlic turns translucent rather than tan.
-
Season and toss
Sprinkle the salt-pepper mix over everything and toss 30 seconds to coat each shrimp evenly. The shells should look lightly speckled and the aroma should be savory with a gentle pepper lift.
-
Finish with oils
Drizzle 1 teaspoon toasted sesame oil, add scallion greens, and toss once more off heat to keep the sesame fragrance from turning bitter. The shrimp should glisten and the greens should stay bright.
-
Serve immediately
Transfer to a warm plate and serve immediately while the coating stays crisp and the internal temperature of the shrimp reaches 63°C / 145°F. Any rest beyond 5 minutes softens the shell under humid heat, so plate and eat right away.
Nutrition Facts
Servings 4
- Amount Per Serving
- Calories 250kcal
- % Daily Value *
- Total Fat 12g19%
- Saturated Fat 2g10%
- Cholesterol 160mg54%
- Sodium 480mg20%
- Total Carbohydrate 8g3%
- Dietary Fiber 1g4%
- Sugars 1g
- Protein 24g48%
* Percent Daily Values are based on a 2,000 calorie diet. Your daily value may be higher or lower depending on your calorie needs.
Note
- Storage: Refrigerate leftovers in an airtight container within 2 hours and use within 3 days; the coating softens but the meat stays safe and tender.
- Reheating: Reheat in a 10-inch skillet over medium heat with 1 teaspoon oil, turning 2 minutes per side until the internal temperature reaches 63°C / 145°F.
- Pro tip: Dry shrimp thoroughly before coating so they crisp instead of steam, and for a taco-style twist try our sheet pan tacos.
- Batch cooking: Use a 12-inch skillet or cook in two batches so the oil stays near medium-high and the shell crust forms properly.
