

A good pineapple cheesecake recipe balances bright fruit acidity against a dense, cool cream cheese base so neither one flattens the other. This version skips the oven entirely, which keeps the filling silky instead of cracked or dry. You get a make-ahead dessert that holds its shape on a warm day and slices cleanly straight from the fridge.
The crust uses crushed biscuits and butter for a firm base that won’t turn soggy under the fruit layer. Fresh pineapple is cooked down just enough to lose its raw bite while keeping a tangy note. If you follow the chilling times, the result is a structured bar-style cheesecake with a real tropical edge. If you enjoyed this, our coffee loophole is worth trying next. Making this pineapple cheesecake at home is surprisingly straightforward once you know the key steps.
Why You’ll Love These Pineapple Cheesecake
- No oven needed, so the kitchen stays cool and the filling stays smooth.
- Fresh pineapple gives a sharper, cleaner taste than canned syrup versions.
- Uses basic supermarket ingredients with no special pans or tools.
- Chills overnight, making it a strong make ahead option for parties.
Ingredients You’ll Need
- 200 g digestive biscuits, crushed fine — forms the base structure.
- 90 g unsalted butter, melted — binds the crumbs into a solid crust.
- 600 g cream cheese, full fat, room temperature — gives body and richness.
- 120 g powdered sugar — sweetens without graininess from crystals.
- 300 ml whipping cream, cold — whipped in for lightness and sliceability.
- 400 g fresh pineapple, diced small — the core fruit flavor and texture.
- 2 tsp gelatin powder — stabilizes the filling so it sets firm.
- 60 ml water, for blooming gelatin — prevents lumps in the mix.
- 1 tbsp lemon juice — lifts the fruit acidity slightly.
Ingredient Substitutions
Digestive biscuits: Replace with an equal weight of graham crackers for a slightly sweeter, sandier base. Graham crackers brown a touch lighter and compact a bit looser, so press the crust firmly for 2 minutes before chilling. The swap adds a milder wheat note that suits the fruit well. The pineapple cheesecake works well for weeknight cooking when time is limited.
Fresh pineapple: Use 350 g drained canned pineapple chunks if fresh is out of season. Canned fruit carries more syrup, so cut the powdered sugar to 90 g to avoid a cloying result. Expect a softer, less sharp flavor and a slightly wetter fruit layer. Storing leftover pineapple cheesecake correctly keeps it tasting good for days.
Whipping cream: Swap with an equal volume of cold coconut cream for a dairy-free lean. Coconut cream whips lower in volume, so the filling will be denser and carry a faint coconut scent. Chill the can overnight so the solid part separates cleanly. For the best results with this pineapple cheesecake, read through all the steps before starting.
Gelatin powder: Use 3 leaves of sheet gelatin soaked in cold water instead of powder. Sheet gelatin sets a little clearer and avoids any powdery taste if bloomed properly. Keep the same 60 ml water aside for the final melt step. For another easy option, check out our ground beef pork.
Step-by-Step Instructions
- Mix the crushed biscuits with melted butter until every crumb looks wet. Press into a 20 cm springform tin on medium-low heat none needed, just firm packing, then chill 20 minutes until hard.
- Bloom the gelatin in 60 ml water for 5 minutes until it looks spongy and swollen.
- Warm the bloomed gelatin on low heat until fully liquid, then stir in lemon juice and set aside to cool slightly.
- Beat cream cheese with powdered sugar on medium speed for 2 minutes until smooth with no lumps visible.
- Whip cold cream in a separate bowl to soft peaks that fold over but hold shape, about 2 minutes.
- Fold the cream into the cheese mix gently, then pour in gelatin stream while stirring to avoid streaks.
- Stir in diced pineapple so pieces spread evenly, not clumped at the bottom of the bowl.
- Pour filling over the crust and level with a spatula until the top looks flat and just set edges form after 25–30 minutes in fridge.
- Chill the whole tin up to 3 days covered, but at least 4 hours before slicing with a hot knife.
Pro Tips
Cut the pineapple pieces under 1 cm so they suspend in the filling instead of sinking to the base. Large chunks create air gaps that weaken the slice.
Run your knife under hot water between cuts for a clean face on each bar with no drag marks. Wipe the blade each time so fruit bits don’t smear.
Bloom gelatin in cold water only, since warm water from the start makes it clump and leave specks. See gelatin tips for temperature cues.
Let cream cheese sit out 20 minutes before beating so it blends without overworking the mixer. Cold blocks leave tiny lumps that stay visible after setting.
Common Mistakes to Avoid
Skipping the crust chill leads to a loose base that crumbles when lifted. The butter needs fridge time to solidify the biscuit layer.
Adding gelatin while too hot breaks the cream structure and gives a weepy top. Cool it to lukewarm before streaming in.
Overfolding the whipped cream deflates the air and yields a heavy brick. Use a wide spatula and 8 gentle turns max. You might also like our manhattan cocktail.
Serving Suggestions
Top each slice with a small caramelized pineapple round for a glossy finish that reads as intentional. A three bean salad on the side offsets the sweet with a vinegar snap at a buffet.
Pair with a chilled sparkling wine or plain soda if serving outdoors, since the fat in the cheese benefits from a bubbly cut. Keep plates cold so the bars don’t soften in 20 minutes of sun.
Storage and Reheating
Store covered in the fridge for up to 3 days in an airtight container to block fridge odors. This is a no-bake item, so never leave it out beyond 2 hours total.
Freeze individual slices wrapped tight for freeze for up to 2 months and thaw in the fridge overnight before serving. Do not microwave; the cream separates and turns grainy under heat.
Recipe Variations
Toasted Coconut Version
Add 40 g toasted desiccated coconut to the crust for a nutty crunch under the fruit. Toast it on medium-low heat for 3 minutes until pale gold before mixing. The slice gains a drier, beach-style note that pairs with the pineapple.
Spiced Rum Version
Stir 1 tbsp spiced rum into the gelatin mix for an adult edge and warmer aroma. Cut the lemon juice to 2 tsp so the alcohol note stays forward. The setting time stays the same but the flavor reads more like a tropical cocktail.
Passion Fruit Swirl
Spoon 3 tbsp passion fruit pulp over the top before the final chill and drag a knife through for a marbled look. The extra acid sharpens each bite and adds black seed specks. Use caesar dressing on a side salad to keep the menu cohesive if serving a crowd.
Ginger Crust Option
Replace 50 g of the biscuits with crushed ginger snaps for a spicy base that cuts the dairy weight. Press the mixed crumbs 2 minutes longer since snaps hold less butter. The result is a warmer, bakery-style base under the cool filling.
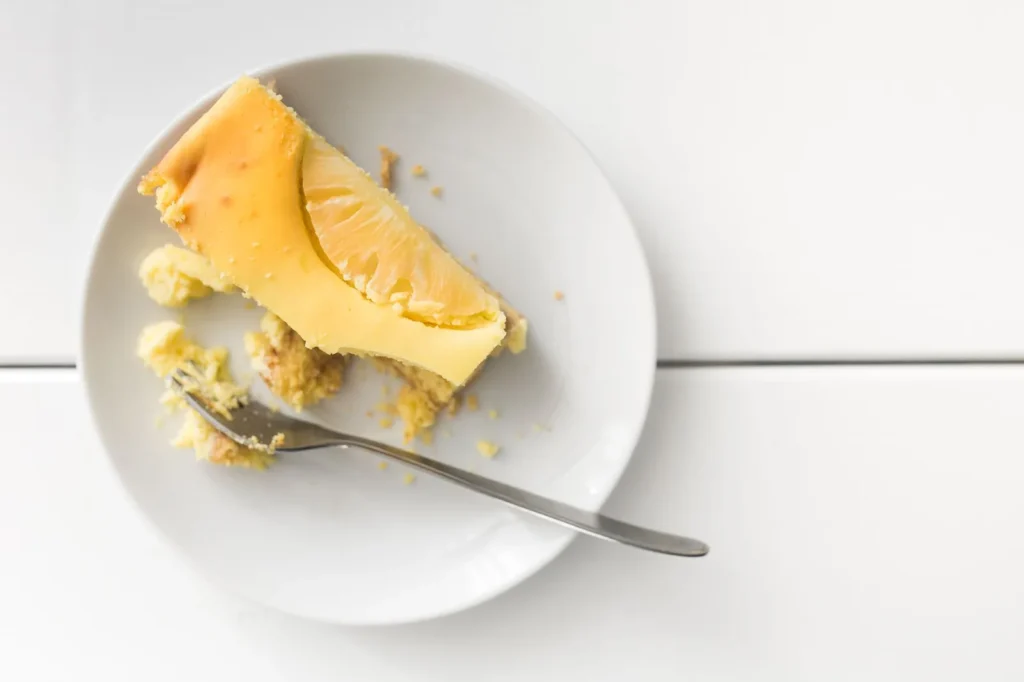

Pineapple Cheesecake
Description
A cool, oven-free pineapple cheesecake with a buttery biscuit crust and a silky cream cheese filling studded with fresh tangy pineapple. It sets firm in the fridge for clean slices and a real tropical edge on warm days.
Ingredients
Instructions
-
Mix and chill crust
Mix the crushed biscuits with melted butter in a bowl until every crumb looks wet and coated. Press the mixture into a 20 cm springform tin with firm packing on the base, then chill in the fridge for 20 minutes until the butter solidifies and the crust is hard to the touch.
-
Bloom the gelatin
Bloom the gelatin in 60 ml cold water for 5 minutes until it looks spongy and swollen with no dry powder left. This cold-only soak prevents clumps and specks later in the filling.
-
Melt gelatin mix
Warm the bloomed gelatin on low heat until fully liquid and clear, stirring gently to avoid scorching. Stir in the lemon juice and set aside to cool slightly to lukewarm so it will not break the cream structure when added.
-
Beat cream cheese
Beat the room-temperature cream cheese with powdered sugar on medium speed for 2 minutes until smooth with no lumps visible. Scrape the bowl sides once so the sweetener fully incorporates into a uniform base.
-
Whip the cream
Whip the cold whipping cream in a separate bowl to soft peaks that fold over but hold their shape, about 2 minutes. The cream should look billowy and leave a gentle ribbon when the whisk is lifted.
-
Combine filling base
Fold the whipped cream into the cheese mix gently with a wide spatula using up to 8 turns to keep the air. Pour the cooled gelatin in a thin stream while stirring so no streaks remain and the mix stays even.
-
Add pineapple
Stir the diced pineapple into the filling so pieces spread evenly and do not clump at the bottom of the bowl. Use pieces under 1 cm so they suspend in the mix instead of sinking and creating air gaps.
-
Fill and chill
Pour the filling over the chilled crust and level with a spatula until the top looks flat and just-set edges form after 25–30 minutes in the fridge. Chill the whole tin covered for at least 4 hours or up to 3 days before slicing with a hot knife for clean bars.
Nutrition Facts
Servings 12
- Amount Per Serving
- Calories 380kcal
- % Daily Value *
- Total Fat 28g44%
- Saturated Fat 17g85%
- Cholesterol 75mg25%
- Sodium 220mg10%
- Total Carbohydrate 26g9%
- Dietary Fiber 1g4%
- Sugars 18g
- Protein 5g10%
* Percent Daily Values are based on a 2,000 calorie diet. Your daily value may be higher or lower depending on your calorie needs.
Note
- Storage: Store covered in the fridge for up to 3 days in an airtight container to block fridge odors; never leave out beyond 2 hours total.
- Make ahead: Chill the whole tin up to 3 days, and for a themed menu try the pineapple drink alongside.
- Pro tip: Run your knife under hot water and wipe between cuts for a clean face on each bar with no smear.
- Freezing: Freeze slices wrapped tight up to 2 months and thaw in fridge overnight; do not reheat.
