

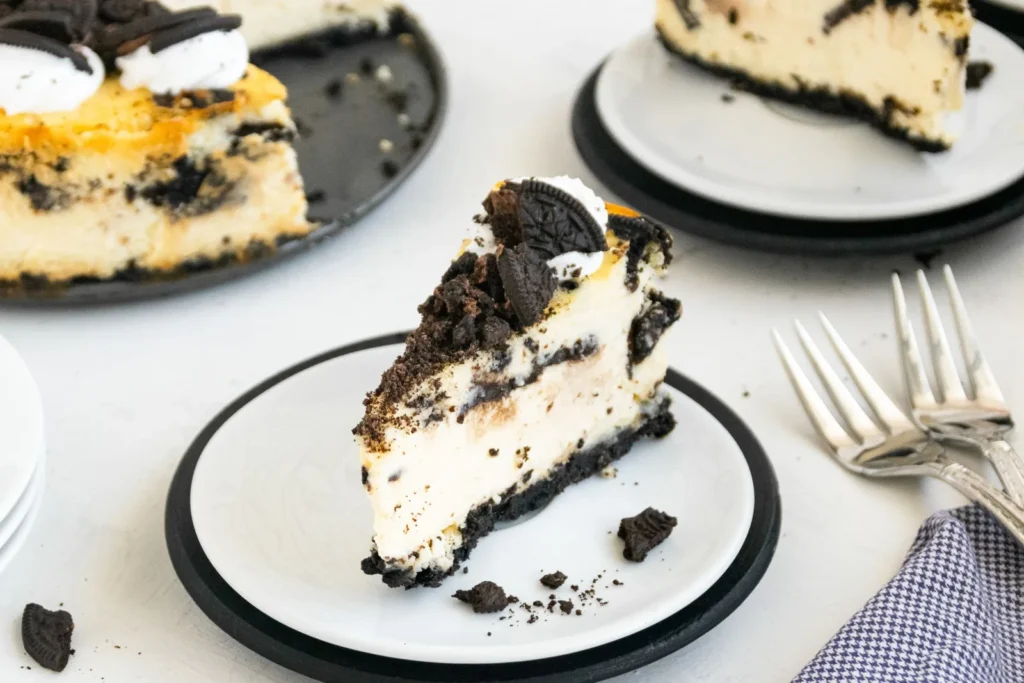
A no bake oreo cheesecake is the fastest way to get a thick, cookie-loaded dessert on the table without turning on the oven. The filling sets in the fridge from whipped cream and cream cheese, so the texture stays light instead of dense like a baked version. You get a crunchy cookie crust, a smooth vanilla-cream center, and chunks of Oreo throughout.
This recipe uses a springform pan so the sides release cleanly, and it walks through the few spots where the filling can break. If you like cold, make-ahead desserts, this one fits a busy schedule because it needs about fifteen minutes of active work. The result is a sliceable cheesecake with a pronounced cookie flavor in every bite. If you enjoyed this, our caesar chicken bake is worth trying next. Making this no bake oreo cheesecake at home is surprisingly straightforward once you know the key steps.
Why You’ll Love These No Bake Oreo Cheesecake
- The crust and filling both use real Oreos, so the cookie taste is consistent top to bottom.
- It sets in the refrigerator, which means no water bath and no cracked top to fix.
- You can build it the night before and keep it cold until guests arrive.
- The filling pipes and slices neatly, making it good for clean dessert plates.
- It scales to a 9-inch pan or halves easily for a smaller 6-inch pan.
Ingredients You’ll Need
- 36 Oreo cookies (about 14 oz / 400 g), divided — 28 for the crust, 8 coarsely chopped for the filling
- 5 tbsp (70 g) unsalted butter, melted, for binding the crust
- 16 oz (450 g) full-fat block cream cheese, softened to room temperature
- 1/2 cup (100 g) granulated sugar
- 1 tsp pure vanilla extract
- 1 1/4 cups (300 ml) cold heavy whipping cream
- 1/4 tsp fine salt
Ingredient Substitutions
Unsalted butter: Replace with an equal amount of refined coconut oil for a dairy-free crust binder. Coconut oil hardens firmly when chilled, so the crust will hold its shape but may taste slightly less rich than butter. Press the mixture in firmly and chill for a full 30 minutes before adding filling so it does not crumble when sliced. The no bake oreo cheesecake works well for weeknight cooking when time is limited.






Heavy whipping cream: Swap with an equal volume of cold coconut cream for a plant-based version. Coconut cream whips to a slightly softer peak and adds a faint coconut note that pairs with the cookies. You may need to whip 2 minutes longer to reach firm peaks that hold the filling up. Storing leftover no bake oreo cheesecake correctly keeps it tasting good for days.
Oreo cookies: Use a store-brand chocolate sandwich cookie in the same 14 oz weight for a lower-cost crust. Generic versions often have thinner wafers, so the crust can turn out a bit more brittle; add 1 tbsp melted butter if the crumbs feel dry. The filling chunks will still read as chocolate cookie with white creme. For the best results with this no bake oreo cheesecake, read through all the steps before starting.
Block cream cheese: Substitute an equal weight of mascarpone for a softer, milder filling. Mascarpone has more fat and less tang, so the cheesecake will taste less sharp and spread a little more when cut. Keep it cold and reduce sugar by 2 tbsp since mascarpone is naturally sweeter. For another easy option, check out our cinnamon sugar focaccia.
Step-by-Step Instructions
- Place 28 Oreo cookies in a food processor and pulse to fine crumbs. Pour in 5 tbsp melted butter and pulse 5 seconds until the crumbs look like damp sand.
- Tip the crumb mix into a 9-inch springform pan. Press it flat with the bottom of a glass, building a 1/4-inch rim up the sides. Chill the pan in the refrigerator while you make the filling.
- Beat 16 oz softened cream cheese with 1/2 cup sugar, 1 tsp vanilla, and 1/4 tsp salt on medium speed for 2 minutes until smooth with no lumps.
- In a separate bowl, whip 1 1/4 cups cold heavy cream on medium-high speed until stiff peaks form and the whisk leaves clear trails.
- Fold one-third of the whipped cream into the cream cheese base to loosen it. Add the remaining cream and 8 chopped Oreos, then fold just until combined with no white streaks.
- Scrape the filling into the chilled crust and smooth the top with a spatula. Cover with plastic wrap and refrigerate 6 hours or overnight until the center is firm to a light touch.
- Run a thin knife around the pan edge, release the springform, and slice with a warm knife for clean squares. Serve cold.
Pro Tips
Soften the cream cheese fully before beating; cold blocks leave tiny lumps that never smooth out once the cream is folded in. A room temperature dairy approach keeps the base silky.
Use a springform pan rather than a fixed-bottom tin so you can release the side without flipping the cake. If you only have a pie dish, line it with a wide strip of parchment to lift the set cheesecake out.
Chop the filling Oreos by hand instead of pulsing them so you keep pea-size chunks for texture. Pulverized cookies just tint the filling gray without the bite.
Whip the cream to stiff peaks and stop; under-whipped cream makes the filling slump in the fridge. If the bowl feels warm, rest it in the freezer 5 minutes before whipping.
Common Mistakes to Avoid
Skipping the chill time on the crust leads to a loose base that mixes into the filling. Always give the pressed crumbs a 30-minute rest so the butter firms the layer.
Overfolding the whipped cream collapses the air you just whipped in, yielding a dense slab. Use a wide spatula and turn from the bottom 8 to 10 times only.
Adding the chopped Oreos too early lets them bleed color into the cream. Fold them in last, right before the filling goes in the pan, to keep distinct cookie pieces. You might also like our pad thai better.
Serving Suggestions
Cut the cold cake into 12 slices and plate with a few extra cookie halves pressed upright on top for a clear visual cue. A thin drizzle of lemon eclair cake sauce on the side adds a tart contrast to the chocolate.
For a party board, pair slices with fresh strawberries and a small dish of no bake lemon cake bites so guests get two chilled desserts. Keep both on ice packs if the room is warm.
Storage and Reheating
Store the whole cheesecake or individual slices in an airtight container in the refrigerator for up to 4 days. The crust stays crisp for the first two days, then softens from the cream above it.
This dessert does not reheat; serve it cold straight from the fridge. You can freeze the unmolded cake wrapped in two layers of plastic for up to 2 months, then thaw overnight in the refrigerator before slicing.
Do not leave the pan out at room temperature for more than 2 hours because the dairy filling enters the spoilage risk zone. Return leftovers to the cold case promptly after serving.
Recipe Variations
Mint Version
Swap the vanilla extract for 1/2 tsp mint extract and add 1/4 cup finely crushed mint Oreos to the filling. The mint cuts the sweetness and gives a cool finish that reads clearly against the chocolate wafers.
Peanut Butter Swirl
Warm 1/3 cup peanut butter with 1 tbsp cream until pourable, then ribbon it through the filled pan with a knife. The swirl sets into soft pockets and adds a salty note to balance the sugar.
Chocolate Crust Swap
Replace 10 of the base Oreos with chocolate graham crackers for a less intense cookie crust. The filling stays the same, but the slice tastes closer to a classic chocolate-cheesecake hybrid with a firmer bite.
Mini Jars
Layer crumbs and filling in 8-oz mason jars for grab-and-go portions, using no egg cornbread style jars as a size reference. They chill in 3 hours and need no slicing.

No Bake Oreo Cheesecake
Description
A no bake Oreo cheesecake is the fastest way to get a thick, cookie-loaded dessert on the table without turning on the oven. The filling sets in the fridge from whipped cream and cream cheese, giving a light texture with a crunchy crust and chunks of Oreo throughout.
Ingredients
Instructions
-
Make cookie crumbs
Place 28 Oreo cookies in a food processor and pulse to fine crumbs. The crumbs should look evenly ground with no large wafer pieces remaining before moving to the next step.
-
Bind crust with butter
Pour in 5 tbsp melted butter and pulse 5 seconds until the crumbs look like damp sand. The mixture should clump when pressed between your fingers and hold its shape when scooped.
-
Press crust in pan
Tip the crumb mix into a 9-inch springform pan. Press it flat with the bottom of a glass, building a 1/4-inch rim up the sides so the base is even and compact.
-
Chill crust
Chill the pan in the refrigerator while you make the filling. Keep it cold for at least 30 minutes so the butter firms the layer and the base does not crumble when sliced.
-
Beat cream cheese base
Beat 16 oz softened cream cheese with 1/2 cup sugar, 1 tsp vanilla, and 1/4 tsp salt on medium speed for 2 minutes until smooth with no lumps. The base should be silky and free of any tiny cream cheese chunks before folding in cream.
-
Whip heavy cream
In a separate bowl, whip 1 1/4 cups cold heavy cream on medium-high speed until stiff peaks form and the whisk leaves clear trails. Stop whipping at this point so the cream stays airy and does not turn grainy.
-
Fold filling together
Fold one-third of the whipped cream into the cream cheese base to loosen it. Add the remaining cream and 8 chopped Oreos, then fold just until combined with no white streaks, using a wide spatula and turning from the bottom about 8 to 10 times only.
-
Fill and chill cheesecake
Scrape the filling into the chilled crust and smooth the top with a spatula. Cover with plastic wrap and refrigerate 6 hours or overnight until the center is firm to a light touch and the sides release cleanly from the pan.
-
Release and slice
Run a thin knife around the pan edge, release the springform, and slice with a warm knife for clean squares. Serve the cheesecake cold straight from the fridge for the best firm texture.
Nutrition Facts
Servings 12
- Amount Per Serving
- Calories 420kcal
- % Daily Value *
- Total Fat 28g44%
- Saturated Fat 16g80%
- Cholesterol 65mg22%
- Sodium 320mg14%
- Total Carbohydrate 38g13%
- Dietary Fiber 1g4%
- Sugars 26g
- Protein 5g10%
* Percent Daily Values are based on a 2,000 calorie diet. Your daily value may be higher or lower depending on your calorie needs.
Note
- Storage: Store the whole cheesecake or individual slices in an airtight container in the refrigerator for up to 4 days; return leftovers to the cold case within 2 hours of serving.
- Make it ahead: Build it the night before and chill overnight so the filling sets firmly for clean slices.
- Pro tip: Soften the cream cheese fully before beating so the base stays silky; if you want a baked companion, see our caesar chicken bake.
- Freezing: Freeze unmolded cake wrapped in two layers of plastic for up to 2 months, then thaw overnight in the fridge before slicing.
