

Individual oreo red velvet cheesecakes are the kind of dessert that solves the portion problem at parties without anyone fighting over the biggest slice. Each one sits in its own crust made from crushed chocolate sandwich cookies, topped with a tangy red-tinted filling that bakes up dense but creamy. You get the drama of red velvet with the convenience of a single-serve format that travels well and looks polished on a tray.
The recipe uses a water-bath-free method so you don’t wrestle with leaking pans or cracked tops. A short bake at moderate heat sets the centers while the cookie base stays crunchy at the edges. If you enjoy fruit smoothies as a light counterpoint, these cheesecakes pair nicely after a tropical dinner. Making this individual oreo red velvet cheesecakes at home is surprisingly straightforward once you know the key steps.
Why You’ll Love These Individual Oreo Red Velvet Cheesecakes
- Each dessert is pre-portioned, so no slicing or plate-sharing required.
- The Oreo crust adds a chocolate crunch that plain graham can’t match.
- They bake in under half an hour and need no water bath.
- Red velvet color makes them stand out on a holiday dessert table.
- They freeze cleanly, so you can bake ahead for events.
Ingredients You’ll Need
- 18 Oreo cookies (about 200 g), finely crushed
- 3 tbsp unsalted butter, melted
- 16 oz (450 g) cream cheese, room temperature
- 2/3 cup granulated sugar
- 2 large eggs, room temperature
- 1/3 cup sour cream, room temperature
- 2 tbsp unsweetened cocoa powder
- 1 tbsp red food coloring (gel preferred)
- 1 tsp vanilla extract
- 1/4 tsp salt
Ingredient Substitutions
Oreo cookies: Replace with an equal weight of chocolate wafer cookies if you want a less sweet base. Chocolate wafers lack the cream filling, so add 1 tbsp sugar to the crumb mix to keep the crust from tasting flat. The crust will be drier and more brittle, so press it firmly into the liner before baking. The individual oreo red velvet cheesecakes works well for weeknight cooking when time is limited.








Cream cheese: Use an equal weight of mascarpone for a softer, milder filling. Mascarpone holds more moisture, so bake 5 minutes longer and expect a looser set that benefits from overnight chill. The tang drops, making the cocoa and vanilla more prominent. Storing leftover individual oreo red velvet cheesecakes correctly keeps it tasting good for days.
Sour cream: Swap with an equal amount of full-fat Greek yogurt to cut cost. Greek yogurt is thicker and less fatty, so the filling firms faster and can taste slightly sharper. Reduce vanilla by half if the yogurt brand is very tangy. For the best results with this individual oreo red velvet cheesecakes, read through all the steps before starting.
Red food coloring: Use 2 tbsp beet powder plus 1 tbsp water for a natural tint. Beet powder gives a muted brick color rather than bright red and adds an earthy note. The bake time stays the same, but the visual pop is reduced.
Step-by-Step Instructions
- Heat the oven to 180°C / 350°F and line a 12-cup muffin tin with paper liners.
- Mix crushed Oreos with melted butter until the crumb feels like wet sand, then press 1 tbsp into each liner using a spoon bottom.
- Beat cream cheese on medium-low heat off the stove with a mixer for 2 minutes until smooth, then add sugar and beat 1 minute more.
- Add eggs one at a time on low speed, scraping the bowl, then blend in sour cream, cocoa, food coloring, vanilla, and salt until just set edges of color are even.
- Spoon filling over each crust, filling about 3/4 full, and bake 25–30 minutes until centers barely jiggle when tapped.
- Cool in the tin 15 minutes, then move to a rack and chill up to 3 days before serving cold.
Pro Tips
Start with room-temperature dairy so the batter stays lump-free without overbeating, which is the main cause of air pockets. A simple baking guide can help if you’re new to cheesecake texture.
Use gel food coloring instead of liquid for a deeper red without thinning the batter. If you like creamy pasta as a meal before, the same richness principle applies here.
Rest the filled tin on a cold baking sheet so the bottoms set faster and the crust stays crisp. Avoid opening the oven early to prevent sudden temperature drops that sink the tops.
Peel the liners after full chill; warm removal tears the crust. A nut sauce isn’t for this, but the chill rule matters.
Common Mistakes to Avoid
Overmixing after eggs enter the batter whips too much air and causes cracks; keep the mixer on low and stop at uniform color. This is the fix for sunken centers.
Skipping the room-temp step leaves clumps that bake into rubbery spots, so set ingredients out 30 minutes ahead. Cold cream cheese is the usual culprit.
Using thin liners without a firm press lets the crust slide; tamp each cup with a shot glass for a stable base. A nepa recipe shows similar pressing care.
Serving Suggestions
Top each cake with whipped cream and a mini Oreo for a clean presentation. Serve alongside grilled halibut if you want a savory contrast on a buffet.
A dusting of cocoa or red sprinkles marks them for Valentine or Christmas tables. Chilled plates keep the filling firm during warm room parties.
Storage and Reheating
Keep the cakes in an airtight container in the fridge for up to 3 days and never leave them out beyond 2 hours. For longer hold, freeze for up to 2 months in a sealed box with parchment between layers.
These are best enjoyed cold, so reheating isn’t needed; if frozen, thaw overnight in the fridge. A oven snapper dinner before makes a balanced menu.
Recipe Variations
Mint Version
Add 1/4 tsp peppermint extract to the filling and use mint Oreos for the crust. The result is a cool aftertaste that reads like a cookie shake in cake form, with no change to bake time.
White Chocolate Swirl
Melt 1/3 cup white chips and dot the filling before baking, then swirl with a toothpick. You get pale ribbons through the red and a sweeter bite that softens the cocoa edge.
Gluten-Free Base
Swap Oreos for a gluten-free chocolate cookie of equal weight and add 1 tbsp butter if the crumb is dry. The structure holds the same, but check the label so the dietary tag stays honest.
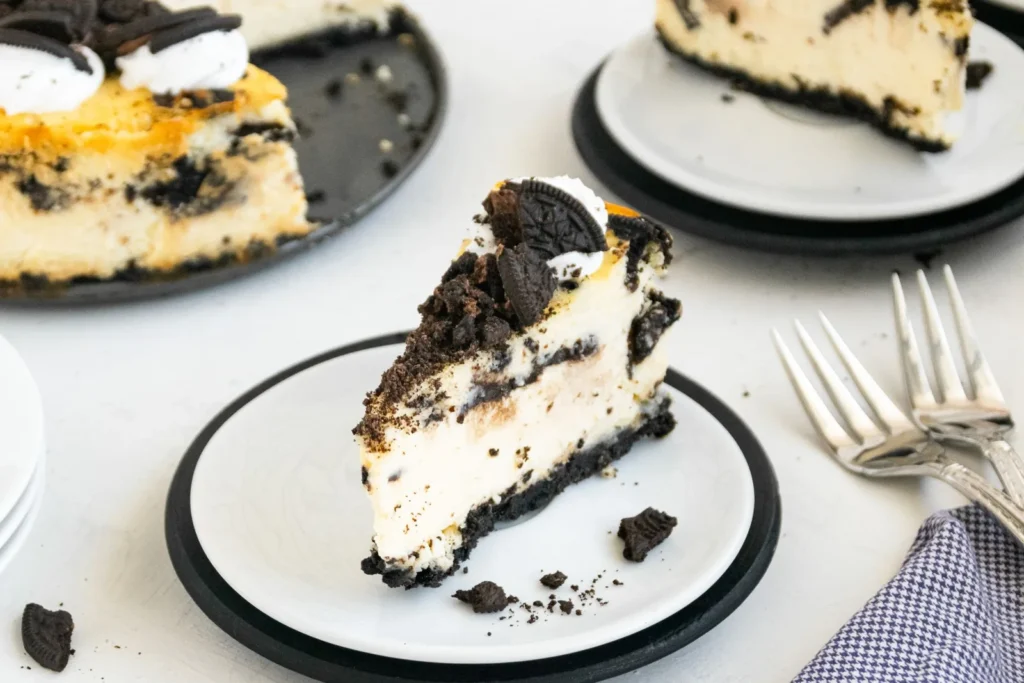

Individual Oreo Red Velvet Cheesecakes
Description
Individual Oreo red velvet cheesecakes solve the party portion problem with their own crunchy cookie crust and tangy red-tinted filling. They bake in under half an hour with no water bath and travel well on any dessert tray.
Ingredients
Instructions
-
Heat oven and line tin
Heat the oven to 180°C / 350°F and line a 12-cup muffin tin with paper liners. Make sure the liners sit flat so the crust stays even during baking.
-
Make the cookie crust
Mix crushed Oreos with melted butter until the crumb feels like wet sand, then press 1 tbsp into each liner using a spoon bottom. Tamp firmly so the base stays stable and does not slide when the filling is added.
-
Beat cream cheese and sugar
Beat cream cheese on medium-low speed with a mixer for 2 minutes until smooth, with the mixer off the stove. Add sugar and beat 1 minute more until the mixture is uniform and lump-free.
-
Add eggs and remaining mix
Add eggs one at a time on low speed, scraping the bowl, then blend in sour cream, cocoa, food coloring, vanilla, and salt until the color is evenly distributed. Keep mixing just until combined to avoid whipping excess air that can cause cracks.
-
Fill and bake cheesecakes
Spoon filling over each crust, filling about 3/4 full, and bake 25–30 minutes in the preheated oven. The centers should barely jiggle when tapped and the edges look set while the middle stays slightly soft.
-
Cool then chill
Cool in the tin for 15 minutes, then move to a rack and chill up to 3 days before serving cold. Full chilling firms the filling and makes peeling the liners clean without tearing the crust.
Nutrition Facts
Servings 12
- Amount Per Serving
- Calories 280kcal
- % Daily Value *
- Total Fat 18g28%
- Saturated Fat 10g50%
- Cholesterol 65mg22%
- Sodium 240mg10%
- Total Carbohydrate 26g9%
- Dietary Fiber 1g4%
- Sugars 18g
- Protein 4g8%
* Percent Daily Values are based on a 2,000 calorie diet. Your daily value may be higher or lower depending on your calorie needs.
Note
- Storage: Keep cakes in an airtight container in the fridge for up to 3 days and never leave them out beyond 2 hours.
- Make ahead: Freeze up to 2 months with parchment between layers; thaw overnight in the fridge before serving.
- Pro tip: Rest the filled tin on a sponge cake cold baking sheet so bottoms set faster and crust stays crisp.
- Serving: Peel liners only after full chill to avoid tearing the cookie base.
