

Making dried kiwi slices at home is one of the easiest ways to preserve ripe fruit and end up with a chewy, tangy snack. This method uses a standard food dehydrator or a low oven so you keep the bright green color and the sharp-sweet flavor intact. You’ll get a clean ingredient list, exact timing, and practical tips that stop the slices from turning brown or sticky.
The process works because kiwi is about 80% water and its fiber holds shape once the moisture leaves slowly at low heat. Unlike store versions with added sugar, these are just fruit, which makes them handy for lunchboxes, hiking, or topping yogurt. Below you’ll find everything from substitutions to storage so the batch turns out right the first time.
Why You’ll Love These Dried Kiwi Slices
- Only one ingredient needed — no sugar, preservatives, or special equipment beyond a dehydrator or oven.
- Chewy texture with a concentrated tartness that fresh kiwi doesn’t have.
- Long shelf life at room temperature, so they’re reliable for meal prep and travel.
- Naturally gluten free and vegan, fitting most snack restrictions without adjustment.
- Kids accept the sweet-sour bite more readily than many other dried fruits.
Ingredients You’ll Need
- 4 ripe but firm golden or green kiwi fruit (about 300 g total) — firmness prevents mush during slicing.
- 1 tablespoon lemon juice diluted in 250 ml water — a short soak limits browning without adding taste.
Ingredient Substitutions
Kiwi fruit: Replace with an equal weight of firm mango for a softer, sweeter dried slice. Mango has less acid so the finished piece is less tangy and more candy-like, and it dehydrates about 20% faster. Use the same lemon-water soak to slow surface darkening on the cut faces.
Lemon juice: Swap the 1 tablespoon for 1 tablespoon apple cider vinegar in the 250 ml water bath. The acidity protects color similarly, though you may notice a faint fermented note if slices sit longer than 3 minutes. Rinse quickly under cold water after the soak to keep the flavor clean.
Golden kiwi: Use green kiwi of equal weight if golden isn’t available; green carries more seed crunch and a sharper bite. The green skin edge tans more during drying, so trim the peel a touch thicker. Expect a slightly darker ring but the same chew.
Step-by-Step Instructions
- Wash the kiwi under cool running water and pat dry with a towel. Cut a thin slice off each end so the fruit sits flat on the board.
- Peel the kiwi with a small paring knife, removing just the brown skin and leaving as much green flesh as possible. Firm fruit makes this easier and reduces waste.
- Slice the fruit into rounds 4 mm thick using a sharp knife or mandoline for even drying. Place cuts in the lemon-water bath for 2 minutes, then lay them on a towel to remove surface moisture.
- Arrange slices in a single layer on dehydrator trays or a parchment-lined baking sheet, not touching. Overlap blocks airflow and creates damp spots that never crisp.
- Dry at 57°C / 135°F for 8–10 hours in a dehydrator, or 90°C / 195°F with the oven door ajar for 4–5 hours. They’re done when pliable but not sticky and no bead of moisture forms when bent.
- Cool the dried kiwi slices on the tray for 30 minutes before packing. Warm fruit trapped in a jar sweats and can mold within days.
Pro Tips
Rotate trays every 3 hours if your dehydrator lacks a fan, since corners dry slower than the center. This keeps thickness even across the batch.
A mandoline set to 4 mm thick beats freehand knife work for speed and uniform dryness. Uneven rounds mean some turn brittle while others stay leathery.
For a sweeter finish, dust cooled slices with a pinch of cinnamon before storage; the spice sticks to the slight surface tack. See dehydrating basics for broader temperature guidance.
Store a small no bake cake nearby as a wet contrast dessert when serving the slices to guests.
Common Mistakes to Avoid
Slicing too thin under 2 mm makes the pieces curl and scorch before the center dries, leaving a bitter edge. Keep to 4 mm thick for a relaxed chew.
Skipping the lemon-water soak lets enzymes brown the cut face within an hour, giving a dull tan ring. Even 2 minutes in the acid bath holds the green.
Packing while warm is the main cause of mold; condensation forms inside the jar and ruins the batch. Always wait the 30 minutes cool-down.
Using overripe kiwi that yields to thumb pressure turns to pulp on the mandoline and won’t hold a round. Choose fruit that springs back when pressed.
Serving Suggestions
Chop the dried kiwi slices over plain yogurt with granola for a breakfast that balances tang and crunch. The chew contrasts the soft dairy well.
Add a few pieces to a fruit mule garnish skewer for a tart note against ginger spice. They rehydrate slightly in the ice and taste brighter.
Thread them with almonds on a snack stick for road trips; the mix of protein and fruit sugar holds energy longer than crackers. Pair with a breakfast shot if you need a morning boost.
Storage and Reheating
Keep cooled slices in an airtight glass jar at room temperature for up to 1 month in a dry pantry. In humid homes, a silica packet in the jar prevents softening.
For longer hold, freeze in a zip bag for up to 6 months; they don’t need reheating, just thaw 5 minutes on the counter. No internal temperature rule applies since the fruit is raw and shelf-stable dry.
Don’t leave dried kiwi slices out of the container for more than 2 hours in warm weather or they pick up moisture from the air. Re-crisp limp pieces at 90°C / 195°F for 10 minutes.
Recipe Variations
Honey Glazed Version
Brush each round with a thin mix of 1 tsp honey and 1 tsp water before drying. The surface caramelizes slightly and reads sweeter, though it cuts the shelf life to 2 weeks refrigerated. Use this when the fruit is tart and you want a dessert bite.
Chili Lime Version
Sprinkle cut slices with a pinch of chili powder and lime zest after the lemon soak. The dry spice adheres during dehydration and gives a salty-sour heat that pairs with spicy margarita nights. Expect a darker, flecked edge.
Oven Only Method
If you lack a dehydrator, use the 90°C / 195°F oven with the door propped by a wooden spoon for airflow. Rotate the sheet at the 2-hour mark so the back corners don’t over-dry. Total time runs 4–5 hours and texture stays close to the slow method.
Kiwi Leather Strip
Puree peeled kiwi and spread 3 mm on a lined tray, drying at 57°C / 135°F for 6 hours until it peels off clean. This uses corn flour dusting to stop stick if your sheet is bare. The result is a roll-up rather than a round, good for smaller kids.
Trail Mix Batch
Combine finished dried kiwi slices with cashews and coconut flakes in a recipe search styled jar for gifting. The fat from nuts balances the fruit acid and the mix stays crisp for 3 weeks sealed. Portion into 30 g bags for hike fuel.
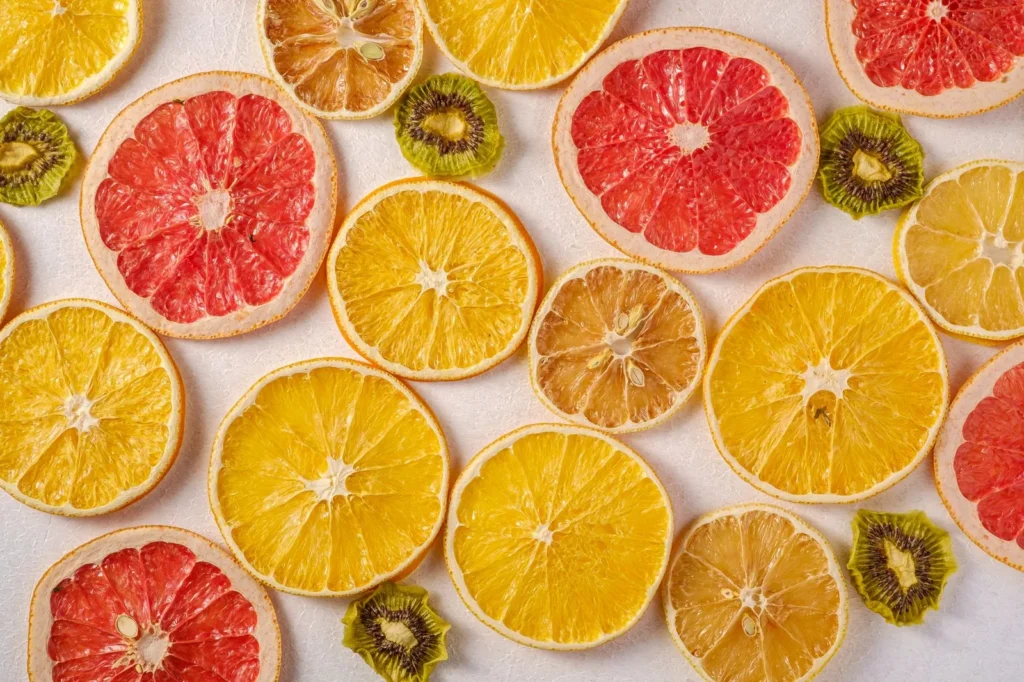

Dried Kiwi Slices
Description
Make bright green dried kiwi slices at home with just fruit and a quick lemon-water soak for a chewy, tangy snack.
Ingredients
Instructions
-
Wash and dry kiwi
Wash the kiwi under cool running water to remove any dirt from the skin. Pat each fruit completely dry with a clean towel so the peel slips off cleanly in the next step.
-
Trim and peel fruit
Cut a thin slice off each end so the fruit sits flat on the cutting board without rolling. Peel the kiwi with a small paring knife, removing just the brown skin and leaving as much green flesh as possible; firm fruit makes this easier and reduces waste.
-
Slice kiwi rounds
Slice the fruit into rounds 4 mm thick using a sharp knife or mandoline for even drying. Uniform thickness prevents some pieces turning brittle while others stay leathery during dehydration.
-
Soak in lemon water
Place the cuts in the lemon-water bath for 2 minutes to limit browning without adding taste. Then lay them on a towel to remove surface moisture before arranging for drying.
-
Arrange on trays
Arrange slices in a single layer on dehydrator trays or a parchment-lined baking sheet, making sure they are not touching. Overlap blocks airflow and creates damp spots that never crisp.
-
Dry the slices
Dry at 57°C / 135°F for 8–10 hours in a dehydrator, or 90°C / 195°F with the oven door ajar for 4–5 hours. They are done when pliable but not sticky and no bead of moisture forms when bent.
-
Cool before packing
Cool the dried kiwi slices on the tray for 30 minutes before packing. Warm fruit trapped in a jar sweats and can mold within days, so full cooling is essential.
-
Pack and store
Transfer the cooled slices to an airtight glass jar or zip bag for storage. Keep them at room temperature in a dry pantry or freeze for longer hold as described in the notes.
Nutrition Facts
Servings 4
- Amount Per Serving
- Calories 180kcal
- % Daily Value *
- Total Fat 1g2%
- Sodium 5mg1%
- Total Carbohydrate 43g15%
- Dietary Fiber 7g29%
- Sugars 33g
- Protein 2g4%
* Percent Daily Values are based on a 2,000 calorie diet. Your daily value may be higher or lower depending on your calorie needs.
Note
- Storage: Keep cooled slices in an airtight glass jar at room temperature for up to 1 month in a dry pantry; in humid homes add a silica packet to prevent softening.
- Re-crisp: Limp pieces can be re-crisped at 90°C / 195°F for 10 minutes to restore chew.
- Pro tip: Rotate trays every 3 hours if your dehydrator lacks a fan so corners dry evenly, and see focaccia tips for broader baking airflow ideas.
- Serving: Chop over yogurt with granola or thread with almonds for a road-trip snack stick.
