

Crispy brown rice is the easiest way to turn leftover cooked brown rice into a crunchy, nutty side that actually holds its texture. This stovetop method uses a hot, thin layer of oil and patient stirring so each grain separates and toasts instead of steaming. You get a practical technique you can reuse all week for bowls, salads, or a salty snack.
Brown rice has more bran and fiber than white rice, so it crisps with a deeper, almost popcorn-like aroma when the starches dry out. The recipe below is built for cooked rice that has been chilled, which matters more than the variety you started with. Short-grain, long-grain, and basmati brown all work if they are dry and cold. If you enjoyed this, our irish brown bread is worth trying next. Making this crispy brown rice at home is surprisingly straightforward once you know the key steps.
Why You’ll Love These Crispy Brown Rice
- Uses rice you already cooked, so zero waste and fast cleanup
- Real crunch from toasted grains, not just a soft fried texture
- Neutral base that takes soy, chili, herbs, or citrus without fighting them
- One pan, medium-high heat, and about 10 minutes of attention
- Works as a side, salad topping, or standalone snack with salt
Ingredients You’ll Need
- 3 cups cooked brown rice, chilled at least 4 hours (cold and dry is key)
- 2 tablespoons neutral oil (sunflower, grapeseed, or rice bran)
- 1/2 teaspoon fine sea salt
- 1/4 teaspoon freshly ground black pepper
- 1 tablespoon soy sauce (adds umami and helps browning)
- 2 scallions, thinly sliced (adds fresh bite at the end)
Ingredient Substitutions
Neutral oil: Replace with an equal amount of clarified butter (ghee) for a richer, more toasted flavor. Ghee has a higher smoke point than butter but will brown the rice faster, so watch the pan closely. Expect a deeper golden color and a slightly nuttier finish that pairs well with savory toppings. The crispy brown rice works well for weeknight cooking when time is limited.









Soy sauce: Use 1 tablespoon tamari for a gluten-free swap with nearly identical salt and umami levels. Tamari is a bit thicker, so it may cling more and darken the grains slightly. Keep the heat steady so the extra moisture evaporates before the rice crisps. Storing leftover crispy brown rice correctly keeps it tasting good for days.
Scallions: Swap for 2 tablespoons chopped fresh cilantro if you want a brighter, herbal note instead of onion flavor. Cilantro wilts faster, so stir it in off heat right before serving. The finished dish tastes lighter and works better with lime or citrus.
Fine sea salt: Replace with 1/2 teaspoon kosher salt, which has larger flakes and less density per spoon. You may need a small pinch more to match the seasoning. Kosher salt also gives a slight crunch on the surface if not fully dissolved. For another easy option, check out our scotch eggs juicy.
Step-by-Step Instructions
- Break up 3 cups chilled brown rice with your fingers so there are no clumps; spread it on a tray for 5 minutes to air-dry further if it looks wet.
- Place a 10-inch nonstick or cast-iron skillet on medium-high heat and add 2 tablespoons neutral oil; swirl to coat the base.
- Add the rice in an even layer and press lightly with a spatula; leave it undisturbed for 3 minutes so the bottom can form a toasted crust.
- Stir every 60 seconds for 6 to 8 minutes, breaking clusters, until most grains are golden and crispy with a few darker spots.
- Drizzle 1 tablespoon soy sauce around the pan, add 1/2 teaspoon salt and 1/4 teaspoon pepper, and toss for 1 minute until the liquid vanishes.
- Turn off heat, fold in 2 sliced scallions, and transfer to a plate; serve immediately for maximum crunch.
Pro Tips
Start with rice that has rested uncovered in the fridge, not straight from the cooker, because surface moisture is the main enemy of crunch. A dry grain toasts; a wet one steams and goes gummy.
Use a wide pan and never crowd the pan—if you double the batch, use two skillets or cook in rounds. Overlapping rice lowers the temperature and prevents the edges from crisping.
Let the first side sit before stirring; moving too early breaks the crust that gives you the best texture. You can learn more about toasting grains for similar techniques with other cereals.
Finish with acid or herbs off heat so they stay bright instead of wilting into the oil. A squeeze of lime or rice vinegar right before serving sharpens the nutty flavor.
Common Mistakes to Avoid
Using warm rice from the pot traps steam and yields chewy clumps instead of separate crispy grains. Always chill the cooked rice at least 4 hours before this recipe.
Pouring oil into a cold pan makes the rice absorb fat and turn greasy rather than fried. Preheat the skillet so the oil shimmers before the rice touches it.
Adding soy sauce too early draws out moisture and stalls browning; wait until the grains are already dry and toasted. Late addition gives color without softening the crunch.
Serving Suggestions
Spoon the crispy brown rice over a soft bowl of marry me tofu for contrast between creamy sauce and crunchy topping. The texture gap makes the whole bowl more satisfying.
Top a simple green salad with a handful of the warm rice to replace croutons; it stays crisp for about 10 minutes before softening. Add a fried egg and chili oil for a quick lunch.
Use it as a base under lamb lollipops instead of mashed potatoes when you want a lighter, drier side. The rice catches the juices without turning soggy immediately.
Storage and Reheating
Store leftovers in an airtight container in the fridge for up to 3 days, though the texture softens after the first day. Keep it uncovered for the first hour of cooling so trapped steam doesn’t make it limp.
Reheat in a dry skillet on medium-low heat for 3 to 4 minutes, tossing often, until the grains sound dry and crisp again. The microwave will only steam it, so avoid that method if you want crunch.
This dish does not freeze well because the toasted starches absorb humidity and turn chalky on thaw. Make a fresh batch instead of saving a cooked portion for later.
Recipe Variations
Chili Garlic Version
Stir 1 teaspoon chili flakes and 1 minced garlic clove into the oil during the last 2 minutes of cooking. The garlic should smell toasted, not burnt, and the heat level stays moderate. This version pairs well with a cooling puttanesca sauce on the side.
Citrus Herb Version
Skip soy sauce and finish with 1 teaspoon lime zest plus 2 tablespoons cilantro off heat. The rice stays lighter in color and tastes fresh rather than savory. Serve it under hamachi collar for a clean contrast.
Cheesy Version
Sprinkle 1/4 cup grated parmesan over the rice in the final minute and let it melt into the crispy bits. The cheese forms lacy, salty clusters that add umami. Watch the heat so the dairy doesn’t scorch before the grains finish.
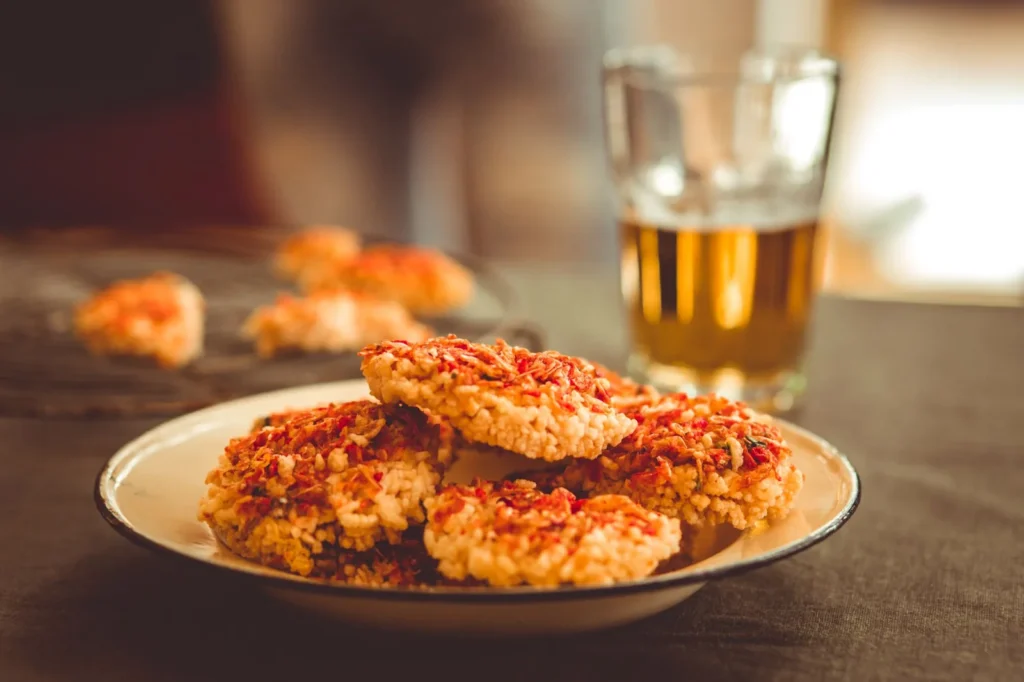

Crispy Brown Rice
Description
Crispy brown rice is a stovetop technique that transforms chilled cooked brown rice into separate, toasted, nutty grains with real crunch. It is a zero-waste side, salad topping, or snack that takes one pan and about ten minutes of attention.
Ingredients
Instructions
-
Break Up Chilled Rice
Break up 3 cups chilled brown rice with your fingers so there are no clumps. Spread it on a tray for 5 minutes to air-dry further if it looks wet, which helps each grain toast instead of steam.
-
Preheat Skillet With Oil
Place a 10-inch nonstick or cast-iron skillet on medium-high heat and add 2 tablespoons neutral oil, swirling to coat the base. The oil should shimmer before the rice touches it so the grains fry rather than absorb fat and turn greasy.
-
Press Rice And Toast
Add the rice in an even layer and press lightly with a spatula, then leave it undisturbed for 3 minutes so the bottom forms a toasted crust. You will see a golden, crisp base that releases easily when the crust has set.
-
Stir And Crisp Grains
Stir every 60 seconds for 6 to 8 minutes, breaking clusters, until most grains are golden and crispy with a few darker spots. The rice should sound dry and make a faint rattling noise in the pan when it is ready.
-
Add Seasonings And Toss
Drizzle 1 tablespoon soy sauce around the pan, add 1/2 teaspoon salt and 1/4 teaspoon pepper, and toss for 1 minute until the liquid vanishes. The soy should darken the grains without softening the crunch you built in the prior steps.
-
Fold Scallions And Serve
Turn off heat, fold in 2 sliced scallions, and transfer to a plate to serve immediately for maximum crunch. The scallions should stay bright and fresh against the warm toasted rice.
Nutrition Facts
Servings 4
- Amount Per Serving
- Calories 220kcal
- % Daily Value *
- Total Fat 9g14%
- Saturated Fat 1g5%
- Sodium 420mg18%
- Total Carbohydrate 32g11%
- Dietary Fiber 3g12%
- Sugars 1g
- Protein 4g8%
* Percent Daily Values are based on a 2,000 calorie diet. Your daily value may be higher or lower depending on your calorie needs.
Note
- Storage: Store leftovers in an airtight container in the fridge for up to 3 days, though texture softens after the first day; keep uncovered for the first hour of cooling so steam doesn't make it limp.
- Reheating: Reheat in a dry skillet on medium-low heat for 3 to 4 minutes, tossing often, until grains sound dry and crisp again; avoid the microwave which only steams.
- Pro tip: Start with rice that rested uncovered in the fridge, not straight from the cooker, because surface moisture is the enemy of crunch; for a bread pairing see our irish brown bread.
- Batch tip: Use a wide pan and never crowd it — if you double the batch, use two skillets or cook in rounds so the grains crisp instead of steam.
