

A chocolate peanut butter milkshake is the fastest way to satisfy a craving for something cold, sweet, and rich without turning on the stove. This version uses frozen milk cubes and a spoon of peanut butter so the drink stays thick instead of turning into a thin sippable soup. You get a blender-full of diner-style shake at home in under five minutes.
The texture comes from frozen dairy rather than extra ice, which keeps the peanut and cocoa flavors concentrated instead of watered down. It’s a drink that works as an after-dinner dessert or a mid-afternoon snack when you want something with real body. The method below is built so a first-timer gets a smooth pour on the first try. If you enjoyed this, our garlic butter salmon is worth trying next. Making this chocolate peanut butter milkshake at home is surprisingly straightforward once you know the key steps.
Why You’ll Love These Chocolate Peanut Butter Milkshake
- Thick enough to eat with a spoon yet smooth through a wide straw
- Five ingredients you probably already keep in the freezer and pantry
- Ready in one blender with no cooking and almost no cleanup
- Easy to scale up for two without changing the ratios
- Freezer-friendly base you can prep ahead for busy days
Ingredients You’ll Need
- 2 cups whole milk, frozen into cubes (about 16 cubes) – gives body without ice dilution
- 3 tablespoons creamy peanut butter – the flavor base and natural thickener
- 2 tablespoons unsweetened cocoa powder – deep chocolate note without extra sugar
- 3 tablespoons granulated sugar – balances cocoa bitterness and peanut saltiness
- 1 cup vanilla ice cream – rounds the texture and adds creaminess
Ingredient Substitutions
Whole milk: Replace with an equal volume of 2% milk frozen into cubes if that’s what you keep on hand. The shake will be slightly less rich and a touch lighter in mouthfeel because of the lower fat content. You may need to add 1 extra ice cream scoop to bring back the creamy weight, since 2% alone sets softer than whole milk when blended. The chocolate peanut butter milkshake works well for weeknight cooking when time is limited.








Creamy peanut butter: Swap with an equal amount of natural peanut butter (oil-on-top style, stirred) for a less sweet, more roasted taste. Natural versions blend thicker and can leave small flecks, so let the blender run 10 seconds longer. The salt level varies by brand, so taste before adding any extra sugar. Storing leftover chocolate peanut butter milkshake correctly keeps it tasting good for days.
Vanilla ice cream: Use an equal amount of frozen banana chunks for a dairy-light version that still feels creamy. Banana adds its own sweetness, so cut the granulated sugar to 1 tablespoon to avoid a cloying result. The color shifts toward tan and the peanut flavor reads a little brighter against the fruit.
Unsweetened cocoa powder: Replace with an equal amount of Dutch-process cocoa for a smoother, less acidic chocolate tone. Dutch cocoa is darker and milder, so the shake looks almost black and tastes rounder. Keep the sugar as written since the bitterness drop is small. For another easy option, check out our garlic butter baked.
Step-by-Step Instructions
- Pour 2 cups whole milk into an ice cube tray and freeze at least 4 hours or overnight until solid. Solid cubes are what give the shake its thickness, so don’t skip the freeze step.
- Add 16 frozen milk cubes, 3 tablespoons creamy peanut butter, 2 tablespoons cocoa powder, and 3 tablespoons sugar to a blender jar. Put the lid on tight before blending.
- Blend on medium-low speed for 20 seconds, then increase to high for 15 seconds until no white milk streaks remain. Stop if the motor strains; shake the jar and restart.
- Add 1 cup vanilla ice cream and pulse 5 times, then blend on medium speed for 10 seconds until the mix looks like soft-serve. The ice cream should be fully folded in with no lumps.
- Pour into two chilled glasses and serve immediately before the frozen base melts and thins. A thick shake loses structure fast at room temperature.
Pro Tips
Chill your glasses in the freezer for 10 minutes before pouring so the shake holds its dome longer. Warm glass walls melt the outer layer within a minute.
Use a tamper or stop to scrape the jar if the peanut butter clings to the side, since unblended pockets taste chalky. Scrape once mid-blend for an even mix.
For a firmer spoonable texture, drop one more frozen milk cube in at step 4 and blend 5 seconds extra. The extra cube tightens the body without changing the flavor ratio.
Read blender technique guides if your machine tends to cavitate, since a slow start prevents uneven chunks. Starting low then high is the reliable pattern.
Common Mistakes to Avoid
Using liquid milk instead of frozen cubes is the main reason a shake turns out thin. Liquid milk adds volume but no structure, so the drink pours like chocolate milk.
Adding ice cream before the dry base is blended leaves cocoa clumps stuck to the blade. Always combine powders and peanut butter with the frozen cubes first.
Over-blending on high from the start heats the mix and melts the cubes early. Begin low, then raise speed only after the chunks break down.
Serving Suggestions
Top each glass with a small swirl of peanut butter and a dust of cocoa for a diner look. The extra smear on the rim makes the drink feel built rather than dumped.
Serve alongside focaccia if you want a sweet-savory snack plate, since the bread’s salt balances the shake’s sugar. Keep portions small so the meal doesn’t run heavy.
Pour into a freezer mug next to fruity drink for a mixed dessert bar where guests pick creamy or tart. The contrast keeps the table interesting.
Storage and Reheating
This chocolate peanut butter milkshake is best fresh, but you can freeze leftovers in an airtight container for up to 2 months. The texture turns icy, so it won’t pour like new.
To reuse, scoop the frozen block into a blender with 2 fresh milk cubes and blend on medium speed for 20 seconds. Don’t microwave it; that separates the fat and leaves a grainy slip.
Don’t leave a finished shake out for more than 2 hours since the dairy base sits at room temperature. Toss it if it’s been sitting longer than that on a warm day.
Recipe Variations
Protein Version
Add one scoop of chocolate protein powder with the cocoa in step 2 and cut the sugar to 1 tablespoon. The powder thickens the blend slightly, so add 1 extra milk cube if it feels too stiff. You get a post-workout shake with the same peanut-chocolate base.
Mocha Version
Brew 2 tablespoons of strong espresso, freeze it into cubes, and swap 4 milk cubes for the coffee cubes. The coffee cuts the sweetness and adds a bitter edge that makes the cocoa taste deeper. Use the same peanut butter amount so the nut flavor still leads.
Salty Caramel Version
Drizzle 2 tablespoons caramel sauce into the glass after pouring and sprinkle flaky salt on top. The caramel folds in as you drink, giving a sweet-salt hit against the peanut base. Skip this if you already use salted peanut butter, since the shake will read too salty.
Vegan Version
Replace whole milk cubes with frozen oat milk and use olive oil free peanut butter with coconut ice cream. Oat milk blends softer, so freeze the cubes 6 hours to keep them firm. The result is dairy-free but still thick and creamy.
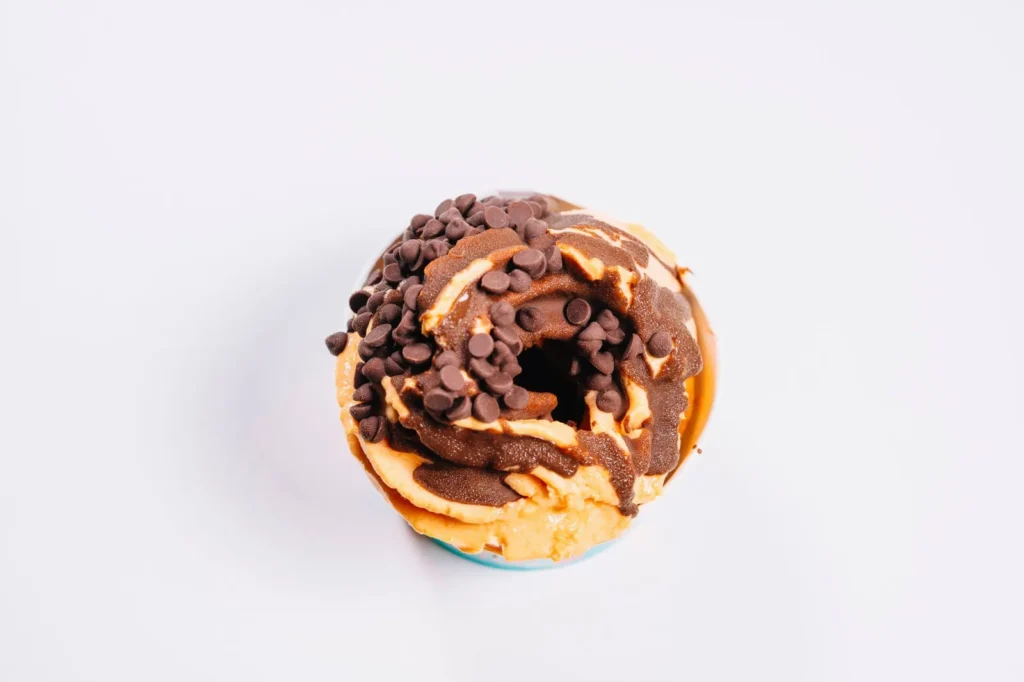

Chocolate Peanut Butter Milkshake
Description
A chocolate peanut butter milkshake made with frozen milk cubes and peanut butter for a thick, diner-style texture without ice dilution. It comes together in one blender in under five minutes using pantry and freezer staples.
Ingredients
Instructions
-
Freeze the milk cubes
Pour 2 cups whole milk into an ice cube tray and freeze at least 4 hours or overnight until solid. Solid cubes are what give the shake its thickness, so don't skip the freeze step and confirm cubes are hard before using.
-
Add base to blender
Add 16 frozen milk cubes, 3 tablespoons creamy peanut butter, 2 tablespoons cocoa powder, and 3 tablespoons sugar to a blender jar. Put the lid on tight before blending to avoid spills during the next step.
-
Blend dry base
Blend on medium-low speed for 20 seconds, then increase to high for 15 seconds until no white milk streaks remain. Stop if the motor strains; shake the jar and restart so the mixture becomes uniform and smooth.
-
Add ice cream and blend
Add 1 cup vanilla ice cream and pulse 5 times, then blend on medium speed for 10 seconds until the mix looks like soft-serve. The ice cream should be fully folded in with no lumps visible on the sides of the jar.
-
Pour and serve
Pour into two chilled glasses and serve immediately before the frozen base melts and thins. A thick shake loses structure fast at room temperature, so aim to drink within a few minutes of pouring.
Nutrition Facts
Servings 2
- Amount Per Serving
- Calories 420kcal
- % Daily Value *
- Total Fat 22g34%
- Saturated Fat 9g45%
- Cholesterol 35mg12%
- Sodium 220mg10%
- Total Carbohydrate 45g15%
- Dietary Fiber 3g12%
- Sugars 35g
- Protein 12g24%
* Percent Daily Values are based on a 2,000 calorie diet. Your daily value may be higher or lower depending on your calorie needs.
Note
- Storage: Best fresh, but freeze leftovers in an airtight container up to 2 months; thaw by blending with 2 fresh milk cubes, never microwave.
- Make it ahead: Freeze the milk cubes overnight so the base is ready; chill glasses in freezer 10 minutes before pouring to hold the dome.
- Pro tip: For a firmer spoonable texture, drop one more frozen milk cube in at the ice cream step and blend 5 seconds extra; pair this shake with our garlic butter salmon for a sweet-savory plate.
