

Homemade cheesy garlic bread is the kind of side that turns a plain bowl of soup into a meal worth sitting down for. This version uses a sturdy loaf, a real butter-garlic base, and two cheeses that melt without turning greasy. You get a crisp edge, a soft center, and a salty, savory bite from the first slice to the last.
The method below is built for repeatability. We toast the cut faces first, then layer the cheese so it browns instead of steaming. If you have made garlic knots before, the flavor base will feel familiar, but the slice-and-bake format is faster. Making this homemade cheesy garlic bread at home is surprisingly straightforward once you know the key steps.
Why You’ll Love These Homemade Cheesy Garlic Bread
- Uses one loaf and pantry staples, so no special shopping trip is needed.
- Butter-garlic layer goes on before cheese, which keeps the crumb from going soggy.
- Two cheeses give both stretch and a sharp, salty finish.
- Bakes in under 12 minutes once assembled, making it a fast side.
- Works as a snack, a dinner side, or a base for open-faced melts.
Ingredients You’ll Need
- 1 large Italian loaf (about 450g), split horizontally — a tight crumb holds cheese better than airy ciabatta.
- 115g unsalted butter, softened to room temperature so it spreads without tearing the bread.
- 6 garlic cloves, finely minced — fresh gives a cleaner bite than jarred paste.
- 2 tbsp fresh parsley, chopped, for a mild herbal note and color.
- 150g low-moisture mozzarella, shredded — this melts smooth without pooling oil.
- 60g Parmesan, finely grated — adds a salty, nutty crust on top.
- 1/4 tsp salt, adjusted to taste since Parmesan is already salty.
- 1/8 tsp black pepper, for a light edge.
Ingredient Substitutions
Unsalted butter: Replace with an equal weight of salted butter if that is what you keep on hand. Cut the added salt to a pinch because salted butter carries roughly 1.5% salt by weight and will push the loaf past savory into salty. The spread will taste fuller but browns a touch faster, so check the oven at the 8-minute mark. The homemade cheesy garlic bread works well for weeknight cooking when time is limited.









Low-moisture mozzarella: Swap for an equal weight of shredded fontina for a softer, more aromatic melt. Fontina releases more moisture than mozzarella, so the bread may need an extra 2 minutes uncovered to crisp the top. Expect a milder, creamier pull with less of the classic stretch. Storing leftover homemade cheesy garlic bread correctly keeps it tasting good for days.
Parmesan: Use an equal weight of aged Asiago if you want a deeper, almost hazelnut note on the crust. Asiago grates slightly coarser and browns quicker, so lower the rack one position to avoid dark spots. The finished top will be darker and a bit more brittle. For the best results with this homemade cheesy garlic bread, read through all the steps before starting.
Italian loaf: A rustic Pugliese works if you prefer an open crumb and chewier bite. Because it is less dense, the garlic butter soaks in faster, so brush lightly and shave 1 minute off the first toast. The result is airier but less sturdy for dipping.
Step-by-Step Instructions
- Heat the oven to 180°C / 350°F and place a rack in the middle. A steady moderate heat browns cheese without burning garlic.
- Split the loaf with a serrated knife and lay both halves cut-side up on a sheet pan. Even contact with the pan helps the base crisp.
- Mix softened butter, minced garlic, parsley, salt, and pepper in a small bowl until uniform. Soft butter coats the crumb instead of pooling.
- Spread the mixture evenly across both cut faces using the back of a spoon. Reach the corners so no dry rim remains.
- Toast the uncovered halves for 5 minutes until the surface looks dry and faintly golden. This step blocks sogginess under the cheese.
- Scatter mozzarella first, then Parmesan, pressing lightly so the layers adhere. Mozzarella under Parmesan protects the top from scorching.
- Bake again for 6 to 8 minutes until cheese is golden and bubbling at the edges. Pull it when spots turn brown, not black.
- Cool on the pan for 2 minutes, then slice into 4cm strips with a sharp knife. The short rest sets the cheese for clean cuts.
Pro Tips
Toast the cut faces before adding cheese so the crumb stays firm under the melt. A garlic butter shrimp dinner pairs well and uses the same base flavor.
Shred your own mozzarella rather than using pre-bagged strips. Block cheese has less starch coating, so it melts into a smoother layer instead of a clumpy sheet.
Keep an eye on the Parmesan because it goes from toasted to burnt in under a minute. If the cheese browns unevenly, rotate the pan halfway through the final bake.
Read about maillard reaction if you want to understand why the toasted butter layer builds so much flavor before the cheese even goes on.
Common Mistakes to Avoid
Skipping the first toast leads to a wet, doughy center under the cheese. The brief 5 minutes dry-out is what keeps the slice from collapsing when lifted.
Using cold butter makes you press hard and tear the loaf, leaving bare patches. Let the butter sit at room temperature for 30 minutes before mixing.
Overloading Parmesan causes bitter burnt spots because it is low-moisture and high-fat. Stick to the 60g listed and let mozzarella do the bulk melt.
Cutting immediately after baking drags the cheese off the bread. The 2 minutes rest lets the fats firm enough for neat strips.
Serving Suggestions
Slice the loaf into fingers and set it next to a tomato basil soup for dipping. The salt in the cheese balances a sweet roasted tomato base.
For a fuller table, add garlic parmesan salmon and a green salad so the bread soaks up the fish juices.
Serve warm on a wooden board with a small dish of olive oil and cracked pepper. The board keeps the crust from steaming against a plate.
Storage and Reheating
Store leftovers in an airtight container in the fridge for up to 3 days. The cheese firms but the crumb stays safe as long as it stays sealed.
Reheat in a 180°C / 350°F oven for 5 minutes rather than a microwave, which turns the crust soft. The oven restores the crisp edge.
You can freeze baked slices for freeze for up to 2 months in a zip bag. Reheat from frozen at the same temperature for 8 minutes.
Do not leave the finished bread out for more than 2 hours because the dairy layer enters the unsafe zone past that window.
Recipe Variations
Bacon Version
Add 80g cooked, crumbled bacon over the mozzarella before the Parmesan. The fat crisps the top further, so check at 6 minutes. Expect a smoky, salty bite that pairs with eggs at brunch.
Spicy Version
Mix 1/2 tsp chili flakes into the butter with the garlic for heat that sits in the base. The flakes toast during the first bake and taste warmer, not sharp. Good next to honey garlic noodles to balance sweet and heat.
Herb Swap
Replace parsley with 1 tbsp each of chopped oregano and thyme for a more woodsy profile. These herbs brown faster than parsley, so lower the oven 10 degrees. The loaf reads more like a Italian lard bread side.
Cheese-Only Crust
Skip mozzarella and use 120g aged provolone plus the Parmesan for a firmer, tangier top. Provolone needs 1 extra minute to melt through. The slice holds shape better for open-faced sandwiches.
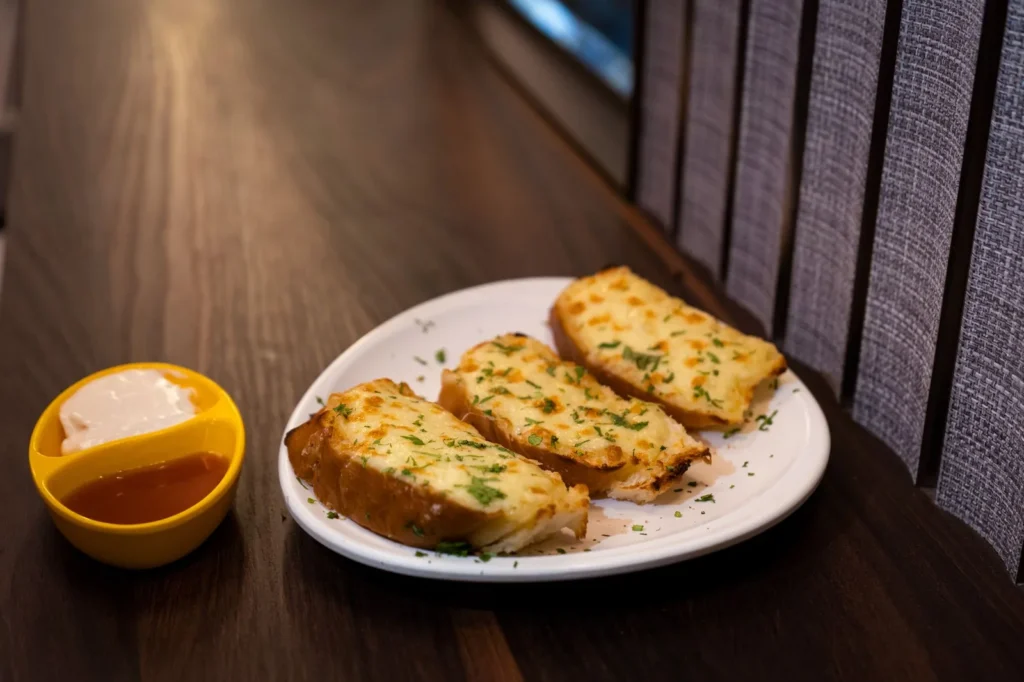

Homemade Cheesy Garlic Bread
Description
This homemade cheesy garlic bread uses a sturdy Italian loaf, a real butter-garlic base, and two cheeses that melt without turning greasy. You get a crisp edge, a soft center, and a salty savory bite from the first slice to the last.
Ingredients
Instructions
-
Heat oven and rack
Heat the oven to 180°C / 350°F and place a rack in the middle position. A steady moderate heat browns the cheese without burning the garlic, so confirm the oven light shows the correct temperature before proceeding.
-
Split and lay loaf
Split the loaf with a serrated knife and lay both halves cut-side up on a sheet pan. Even contact with the pan helps the base crisp, so press the halves flat so the whole cut face touches the metal.
-
Mix butter garlic base
Mix softened butter, minced garlic, parsley, salt, and pepper in a small bowl until uniform. Soft butter coats the crumb instead of pooling, so stir until no streaks of butter remain and the mixture looks like a green-flecked paste.
-
Spread cut faces
Spread the mixture evenly across both cut faces using the back of a spoon. Reach the corners so no dry rim remains, and you should see a thin opaque layer covering the entire surface with no bare bread showing.
-
First toast uncovered
Toast the uncovered halves for 5 minutes until the surface looks dry and faintly golden. This step blocks sogginess under the cheese, so pull the pan when the butter layer has set and the edges begin to look toasted, not browned.
-
Layer the cheeses
Scatter mozzarella first, then Parmesan, pressing lightly so the layers adhere. Mozzarella under Parmesan protects the top from scorching, and you should see an even blanket where the mozzarella peeks under a dusting of Parmesan.
-
Bake until golden
Bake again for 6 to 8 minutes until cheese is golden and bubbling at the edges. Pull it when spots turn brown, not black, and the cheese looks melted with toasted patches about the size of a dime along the rim.
-
Cool and slice
Cool on the pan for 2 minutes, then slice into 4cm strips with a sharp knife. The short rest sets the cheese for clean cuts, so wait until the cheese stops stretching like string and cuts leave neat edges.
Nutrition Facts
Servings 4
- Amount Per Serving
- Calories 350kcal
- % Daily Value *
- Total Fat 20g31%
- Saturated Fat 12g60%
- Cholesterol 55mg19%
- Sodium 650mg28%
- Total Carbohydrate 32g11%
- Dietary Fiber 2g8%
- Sugars 2g
- Protein 14g29%
* Percent Daily Values are based on a 2,000 calorie diet. Your daily value may be higher or lower depending on your calorie needs.
Note
- Storage: Store leftovers in an airtight container in the fridge for up to 3 days; do not leave finished bread out more than 2 hours.
- Reheating: Reheat in a 180°C / 350°F oven for 5 minutes rather than a microwave, which turns the crust soft.
- Pro tip: Shred your own mozzarella for a smoother melt, and for a full seafood pairing try our garlic parmesan salmon.
- Watch: Keep an eye on Parmesan because it goes from toasted to burnt in under a minute.
