

An apple pie stuffed cheesecake brings together a spiced apple layer and a dense cream cheese filling inside one pan. This recipe gives you a graham crust, a cinnamon apple middle, and a smooth baked cheesecake top. You get the comfort of pie and the richness of cheesecake without baking two separate desserts.
The method uses a cold crust, a pre-cooked apple layer, and a low oven temperature so the filling sets without cracking. It is a solid make-ahead option for holiday tables because it needs an overnight chill. Below you’ll find the exact ratios, swap ideas, and timing cues that keep the texture right. If you enjoyed this, our lemon chicken is worth trying next. Making this apple pie stuffed cheesecake at home is surprisingly straightforward once you know the key steps.
Why You’ll Love These Apple Pie Stuffed Cheesecake
- Two desserts in one slice: spiced apples plus tangy cream cheese.
- Bakes at a gentle temperature so the top stays flat and crack-free.
- Uses a canned apple pie filling shortcut if you’re short on time.
- Holds well in the fridge for up to four days after baking.
- Freezes cleanly, so you can bake it a month before a party.
Ingredients You’ll Need
- 200 g graham crackers, crushed fine (about 2 cups crumbs)
- 90 g unsalted butter, melted
- 800 g full-fat cream cheese, room temperature
- 150 g granulated sugar
- 3 large eggs, room temperature
- 120 ml sour cream, room temperature
- 2 tsp vanilla extract
- 2 tbsp all-purpose flour
- 420 g apple pie filling, homemade or canned
- 1 tsp ground cinnamon
- 1 tbsp lemon juice
Ingredient Substitutions
Graham crackers: Replace with an equal weight of digestive biscuits for a slightly sweeter, more crumbly base. Digestive biscuits hold the same butter ratio but brown faster, so drop the crust pre-bake by 2 minutes. Expect a softer bite and a deeper tan color on the edges. The apple pie stuffed cheesecake works well for weeknight cooking when time is limited.


Full-fat cream cheese: Swap with an equal weight of mascarpone for a milder, looser filling. Mascarpone has higher fat and less tang, so cut the sour cream to 80 ml to avoid a too-soft set. The baked center will feel silkier but won’t hold a clean slice as firmly. Storing leftover apple pie stuffed cheesecake correctly keeps it tasting good for days.
Sour cream: Use an equal amount of plain Greek yogurt to keep the tang while lowering fat. Greek yogurt is thicker, so add 1 tbsp milk to match the batter flow. The surface may show faint whey spots that disappear after the chill. For the best results with this apple pie stuffed cheesecake, read through all the steps before starting.
Apple pie filling: Trade the prepared filling for 400 g peeled diced apples cooked with 60 g sugar and 1 tsp cinnamon. This adds 10 minutes of stovetop time but gives firmer apple pieces and less syrup. Drain excess liquid before layering so the crust stays crisp. For another easy option, check out our register.
Step-by-Step Instructions
- Heat the oven to 160°C / 325°F. Mix crushed graham crackers with melted butter until the crumbs clump like wet sand.
- Press the crumb mix into a 9-inch springform pan bottom. Bake 8 minutes until the edge looks dry, then cool fully.
- Beat room-temperature cream cheese with sugar on medium-low heat off the stove for 2 minutes until smooth. Add eggs one at a time, mixing just set edges of batter between each.
- Stir in sour cream, vanilla, and flour until no streaks remain. Do not overmix or the filling will puff and crack.
- Spread half the batter over the cooled crust. Spoon the apple pie filling in an even layer, then top with the rest of the batter.
- Bake 55–60 minutes until the outer 2 inches look set and the center barely jiggles. Cool in the oven with the door ajar for 20 minutes.
- Chill the pan uncovered for 1 hour, then wrap and refrigerate up to 4 days before slicing with a hot knife.
Pro Tips
Room-temperature dairy blends without lumps, so pull the cream cheese, eggs, and sour cream out 45 minutes early. Cold ingredients force long beating that whips in air and causes cracks.
A water bath isn’t required here, but set the springform inside a larger pan to catch any butter leak from the crust. This keeps the oven clean and the base from burning.
For clean slices, dip a thin knife in hot water and wipe between cuts. The filling is dense and will tear if pulled with a cold blade.
Learn proper cheesecake baking temps from a larger dessert reference if your oven runs hot. An oven thermometer saves the top from browning too early.
Common Mistakes to Avoid
Skipping the crust cool-down lets the warm filling melt the butter layer, creating a soggy bottom. Always wait until the base feels room temperature to the touch.
Adding the apple layer too wet spreads syrup into the batter and prevents a clean set. Rest the batter for 5 minutes after mixing and use drained filling.
Opening the oven before the center firms drops the temperature fast and triggers cracking. Avoid opening the oven early during the first 40 minutes.
Serving Suggestions
Cut the cheesecake cold, then let slices sit 10 minutes for the apple aroma to lift. A spoon of pumpkin pie spiced whipped cream on the side matches the cinnamon note.
For a drink pair, a bourbon apple cider warms the same flavor line without extra sugar on the plate.
Storage and Reheating
Keep the pan covered in the fridge for up to 4 days; the sour cream layer stays safe that long under 4°C. Don’t leave a cut slice out more than 2 hours total.
To freeze, wrap the whole cake in two layers of film and a foil jacket; it holds freeze for up to 2 months. Thaw overnight in the fridge before serving cold.
Reheat a single slice only if you want a warm apple center: microwave 25 seconds on medium, not longer, or the cream cheese separates.
Recipe Variations
Caramel Version
Swirl 60 ml thick caramel sauce into the top batter before baking for a sweet ribbon. The surface browns a shade darker, so check at 50 minutes. Expect a softer top with pronounced butterscotch notes.
Pear Swap
Replace the apple filling with an equal weight of spiced pear slices for a milder, floral middle. Pears release more water, so rest the batter for 5 minutes after layering and bake 5 minutes longer. The slice stays light and less tart.
Ginger Crust
Add 1 tsp ground ginger to the crumb mix for a warming base that echoes the apple spice. The crust browns quicker, so drop the pre-bake to 6 minutes. This pairs well with a aperol spritz at a fall brunch.
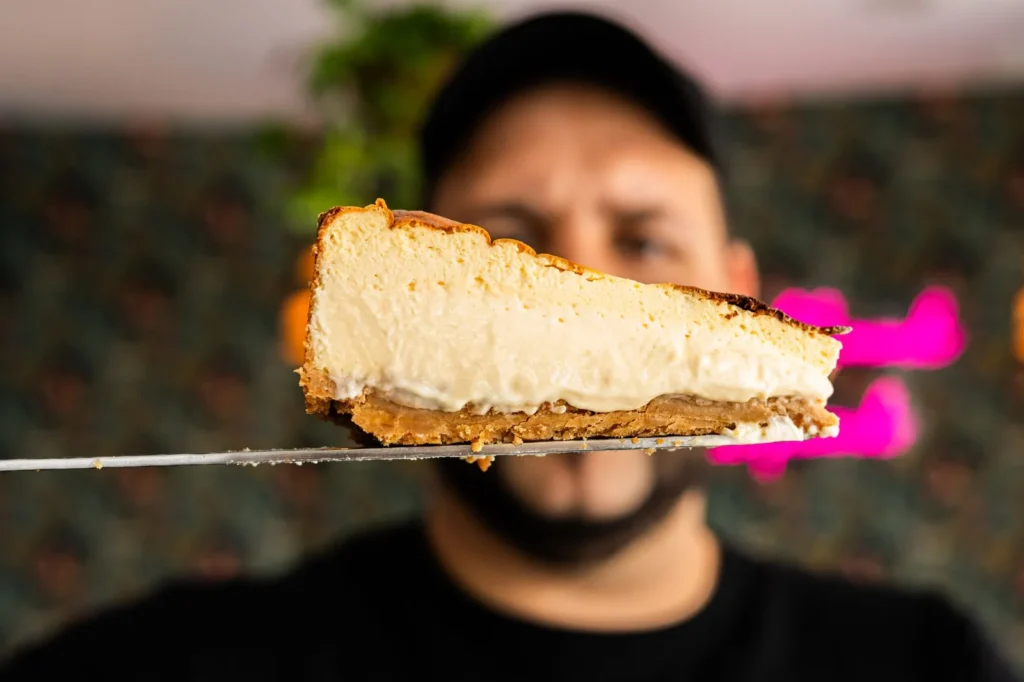

Apple Pie Stuffed Cheesecake
Description
This apple pie stuffed cheesecake combines a graham crust, a cinnamon apple middle, and a smooth baked cream cheese top for the comfort of pie and richness of cheesecake in one pan.
Ingredients
Instructions
-
Heat oven and prep
Heat the oven to 160°C / 325°F so it is fully preheated before the crust goes in. Pull the cream cheese, eggs, and sour cream out 45 minutes early if not already at room temperature, since cold dairy forces long beating that whips in air and causes cracks.
-
Mix and bake crust
Mix crushed graham crackers with melted butter until the crumbs clump like wet sand, using a 9-inch springform pan. Press the crumb mix into the pan bottom and bake for 8 minutes until the edge looks dry, then cool fully to room temperature so the warm filling does not melt the butter layer and create a soggy bottom.
-
Beat cream cheese base
Beat room-temperature cream cheese with sugar on medium-low heat off the stove for 2 minutes until smooth and lump-free. This gentle mixing prevents over-aeration that would make the filling puff and crack later in the bake.
-
Add eggs one at a time
Add eggs one at a time, mixing just until the edges of batter are set between each addition on medium-low speed. Stop as soon as each egg is incorporated so the batter stays dense and does not overmix.
-
Stir in remaining batter items
Stir in sour cream, vanilla, and flour until no streaks remain, using a spatula to keep the motion gentle. Do not overmix or the filling will puff and crack during baking; rest the batter for 5 minutes after mixing if your apple layer is very wet.
-
Layer crust batter apples
Spread half the batter over the cooled crust in an even layer using a spoon or offset spatula. Spoon the apple pie filling in an even layer on top, then cover with the rest of the batter so no apple shows through.
-
Bake the cheesecake
Bake for 55–60 minutes at 160°C / 325°F until the outer 2 inches look set and the center barely jiggles like set custard. Avoid opening the oven during the first 40 minutes or the temperature drop will trigger cracking.
-
Cool and chill overnight
Cool in the oven with the door ajar for 20 minutes to slow the temperature fall, then remove the pan. Chill uncovered for 1 hour, then wrap and refrigerate up to 4 days before slicing with a hot knife for clean pieces.
Nutrition Facts
Servings 12
- Amount Per Serving
- Calories 420kcal
- % Daily Value *
- Total Fat 28g44%
- Saturated Fat 16g80%
- Cholesterol 120mg40%
- Sodium 320mg14%
- Total Carbohydrate 36g12%
- Dietary Fiber 1g4%
- Sugars 24g
- Protein 7g15%
* Percent Daily Values are based on a 2,000 calorie diet. Your daily value may be higher or lower depending on your calorie needs.
Note
- Storage: Keep the pan covered in the fridge for up to 4 days; don't leave a cut slice out more than 2 hours total.
- Make ahead: Bake and chill a month early then freeze, or read our apple cake for another fall treat.
- Pro tip: Dip a thin knife in hot water and wipe between cuts so the dense filling does not tear.
- Reheat: Microwave a single slice 25 seconds on medium only if you want a warm apple center, or the cream cheese separates.
