

Apple pie ice cream brings the cozy spices of a baked fall dessert straight into a cold, creamy scoop you can make without a machine. This no-churn method uses whipped cream and condensed milk as the base, so you skip the custard cooking and ice cream churner entirely. You get a smooth, scoopable texture with cinnamon-apple chunks folded through every bite.
The recipe leans on real apple pieces cooked down with brown sugar and spice, then cooled and rippled into the cream. That contrast of cold vanilla base and soft, spiced fruit is what makes apple pie ice cream taste like the dessert it’s named for. Below you’ll find exact quantities, swap ideas, and the steps that keep the texture from turning icy. If you enjoyed this, our cream cheese fruit is worth trying next.
Why You’ll Love This Apple Pie Ice Cream
- No ice cream machine required—just a bowl, whisk, and freezer.
- Real apple filling, not artificial flavoring, gives honest fruit texture.
- Make-ahead friendly: freezes solid and scoops after a short rest.
- Customizable spice level with cinnamon, nutmeg, and clove control.
Ingredients You’ll Need
- 2 medium Granny Smith apples (about 300 g), peeled and diced small
- 50 g light brown sugar
- 1 tsp ground cinnamon
- 1/4 tsp ground nutmeg
- 1/8 tsp ground clove
- 1 tbsp unsalted butter
- 1 can (397 g) sweetened condensed milk
- 480 ml heavy whipping cream, cold
- 1 tsp pure vanilla extract
- 1/4 tsp fine salt
Ingredient Substitutions
Granny Smith apples: Replace with an equal weight of Honeycrisp or Braeburn apples for a sweeter, less tart filling. These varieties soften faster during cooking, so reduce the sauté time by about 2 minutes to keep some shape. The finished apple pie ice cream will taste milder and a touch sweeter, with less of the sharp contrast that Granny Smith gives.


Heavy whipping cream: Swap with an equal volume of coconut cream (chilled, solids only) for a dairy-free version. Coconut cream whips to a slightly lower peak and adds a faint tropical note that pairs oddly with clove, so cut clove to a pinch. Expect a softer set and a less neutral background flavor than dairy cream. Making this apple pie ice cream at home is surprisingly straightforward once you know the key steps.
Sweetened condensed milk: Use an equal weight of homemade canned apple pie filling blended smooth plus 60 g powdered sugar to control sweetness. This deepens the apple flavor but loosens the base, so freeze an extra hour before scooping. The color shifts more amber and the spice reads stronger.
Unsalted butter: Replace the 1 tbsp with 1 tbsp olive oil if avoiding dairy in the filling. Olive oil browns the apples less and gives a fruitier edge, though it won’t round the sauce the way butter does. Keep the heat at medium-low heat so the oil doesn’t smoke before the apples soften.
Step-by-Step Instructions
- Melt 1 tbsp unsalted butter in a 10-inch skillet over medium-low heat. Add diced apples, brown sugar, cinnamon, nutmeg, and clove. Cook 8–10 minutes, stirring often, until apples are tender and the sauce thickens to a glossy coat.
- Scrape the apple mixture onto a plate and cool to room temperature, then refrigerate 20 minutes so it doesn’t melt the cream later. Cold filling keeps the swirl distinct instead of dissolving into the base.
- In a large bowl, whisk sweetened condensed milk, vanilla, and salt until smooth. Set aside. This sweet base carries the flavor and prevents large ice crystals from forming.
- In a second bowl, whip 480 ml cold heavy cream with a hand mixer on high until stiff peaks form, about 3 minutes. Stop when the whisk leaves a clear ridge that holds its shape.
- Fold one-third of the whipped cream into the condensed milk mix to loosen it, then fold in the rest gently with a spatula. Do not overmix or the air whipped in will collapse and the texture turns dense.
- Pour half the cream base into a 9×5 loaf pan. Drop half the cooled apple filling in spoonfuls and swirl with a knife. Repeat with remaining base and filling for a second layer.
- Cover with plastic wrap pressed to the surface and freeze 6 hours or overnight. The loaf should feel firm and resist a light finger press before you scoop.
Pro Tips
Chill your mixing bowl and beaters in the freezer for 10 minutes before whipping cream; cold tools help the cream reach stiff peaks faster and hold them.
Cut apples to a 1/4-inch dice so they distribute evenly and stay tender after freezing—large chunks turn hard and unpleasant in the scoop.
For cleaner swirls, let the base sit 5 minutes after the first layer so it firms slightly before you add the top layer and second fruit ripple.
Read no-churn ice cream technique notes if you want to understand why condensed milk blocks ice crystals without a churner.
Rest the pint at room temperature 5 minutes before scooping so the apple bits soften and the spoon glides instead of shattering the slab.
Common Mistakes to Avoid
Adding warm apple filling to the cream base melts the whip and leaves a soupy, icy block. Always cool the filling fully in the fridge before layering.
Over-whipping the cream into butter separates the fat and ruins the smooth mouthfeel. Stop at stiff peaks and fold gently from that point on.
Skipping the plastic wrap on the surface lets freezer air dry the top into a frosty skin. Press wrap directly on the ice cream to keep it creamy.
Using a shallow wide dish instead of a loaf pan slows freezing and grows crystals. A cream cheese fruit dip bowl is too shallow; keep the 9×5 pan for even set.
Serving Suggestions
Scoop apple pie ice cream between two snapping ginger cookies for a frozen sandwich that echoes the spice in the fruit. The crisp cookie balances the cold cream.
Spoon a small scoop over warm Irish cream-spiked coffee cake for a temperature contrast at a fall gathering. Keep portions small since both are rich.
Top a bowl with toasted pecans and a drizzle of caramel to push the dessert toward pie à la mode. Serve within 10 minutes so the scoop holds its shape.
Storage and Reheating
Keep the loaf pan covered in the freezer for up to 2 months; after that the apple pieces darken and texture goes chalky. Label the wrap with the date so you track it.
This is a frozen dessert, so reheating doesn’t apply—if it hardens past scoopable, rest at room temp 5 minutes rather than microwaving, which melts the base unevenly.
Never leave the pan out over 2 hours total; dairy base thaws fast and collects freezer odors if the wrap slips. Return it promptly after serving.
For a party tray, pre-scoop balls onto a pasta side tray lined with parchment and keep frozen until guests arrive to avoid a melted puddle.
Recipe Variations
Caramel Swirl Version
Warm 60 ml store caramel sauce to a pourable line and ripple it with the apple layer in step six. The extra sugar softens the set slightly, so add 30 minutes to freeze time. Expect a sweeter, candy-like note against the tart fruit.
Glazed Donut Crunch
Crumble one plain glazed donut over the top layer before the final freeze for a bakery texture nod to the pie crust. The crumb stays chewy rather than crisp once frozen. Cut the salt in the base to a pinch since the donut adds sodium.
Boozy Harvest Edition
Stir 1 tbsp apple brandy into the cooled filling for a grown-up edge that also lowers the freeze point a touch. Freeze an extra hour to compensate for the alcohol softening. The flavor reads like mulled cider in cream form.
Maple Pecan Spin
Replace brown sugar with 40 ml maple syrup in the apple cook and fold 50 g chopped toasted pecans into the base. Maple browns the fruit faster, so watch the pan at medium-low heat. You get a nutty, woodsy version with more crunch than the original. For another easy option, check out our shrimp tacos cilantro.
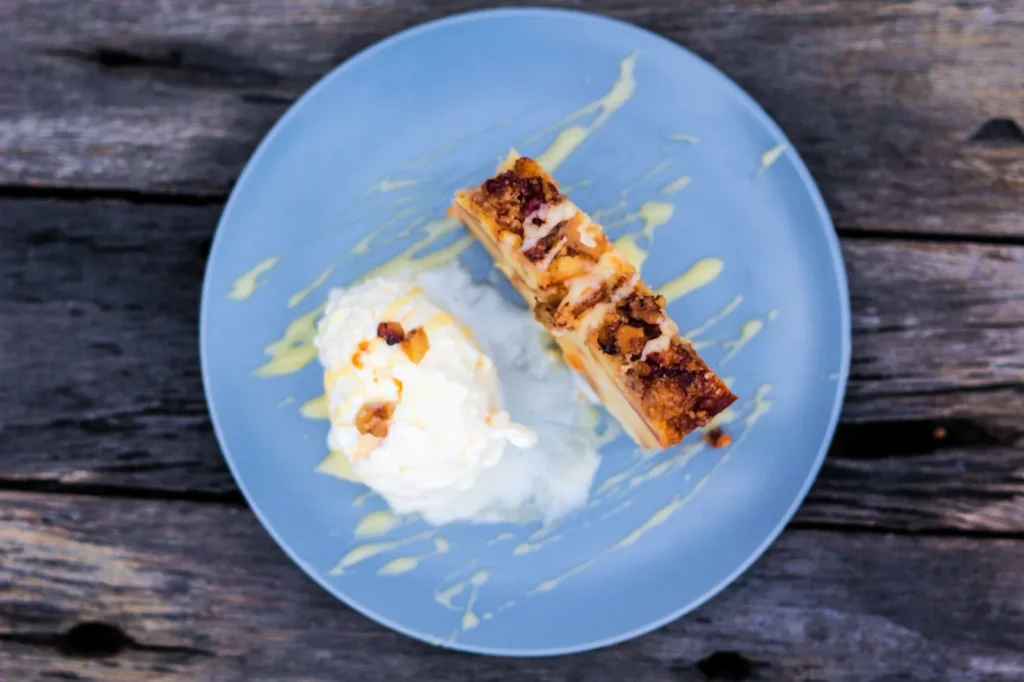

Apple Pie Ice Cream
Description
Apple pie ice cream brings the cozy spices of a baked fall dessert into a cold, creamy no-churn scoop made with whipped cream and condensed milk. Real cinnamon-apple chunks cooked with brown sugar are folded through for an honest fruit texture that tastes like the pie it's named for.
Ingredients
Instructions
-
Cook apple filling
Melt 1 tbsp unsalted butter in a 10-inch skillet over medium-low heat. Add diced apples, 50 g brown sugar, 1 tsp cinnamon, 1/4 tsp nutmeg, and 1/8 tsp clove, then cook for 8–10 minutes, stirring often, until apples are tender and the sauce thickens to a glossy coat that clings to the fruit.
-
Cool apple filling
Scrape the apple mixture onto a plate and cool to room temperature, then refrigerate for 20 minutes so it doesn't melt the cream later. Cold filling keeps the swirl distinct instead of dissolving into the base when layered.
-
Mix condensed base
In a large bowl, whisk 397 g sweetened condensed milk, 1 tsp vanilla, and 1/4 tsp salt until smooth. This sweet base carries the flavor and prevents large ice crystals from forming during freezing.
-
Whip heavy cream
In a second bowl, whip 480 ml cold heavy cream with a hand mixer on high until stiff peaks form, about 3 minutes. Stop when the whisk leaves a clear ridge that holds its shape and the cream stands without slumping.
-
Fold cream into base
Fold one-third of the whipped cream into the condensed milk mix to loosen it, then fold in the rest gently with a spatula. Do not overmix or the air whipped in will collapse and the texture turns dense rather than light and scoopable.
-
Layer and swirl
Pour half the cream base into a 9x5 loaf pan. Drop half the cooled apple filling in spoonfuls and swirl with a knife, then repeat with remaining base and filling for a second layer. The swirl should show distinct ribbons of fruit against the pale cream.
-
Freeze the ice cream
Cover with plastic wrap pressed to the surface and freeze for 6 hours or overnight. The loaf should feel firm and resist a light finger press before you scoop, indicating it is fully set.
-
Rest before scooping
Remove the pan and rest at room temperature for 5 minutes before scooping so the apple bits soften and the spoon glides instead of shattering the slab. This short rest makes the texture easier to serve without melting the base.
Nutrition Facts
Servings 8
- Amount Per Serving
- Calories 350kcal
- % Daily Value *
- Total Fat 22g34%
- Saturated Fat 14g70%
- Cholesterol 75mg25%
- Sodium 130mg6%
- Total Carbohydrate 34g12%
- Dietary Fiber 1g4%
- Sugars 31g
- Protein 5g10%
* Percent Daily Values are based on a 2,000 calorie diet. Your daily value may be higher or lower depending on your calorie needs.
Note
- Storage: Keep the loaf pan covered in the freezer for up to 2 months; after that the apple pieces darken and texture goes chalky. Return it promptly after serving and never leave the pan out over 2 hours total.
- Make ahead: Chill your mixing bowl and beaters in the freezer for 10 minutes before whipping cream to help it reach stiff peaks faster. For a complementary treat, try our cream cheese dip alongside.
- Pro tip: Cut apples to a 1/4-inch dice so they distribute evenly and stay tender after freezing rather than turning hard in the scoop.
- Serving: Rest the pint at room temperature 5 minutes before scooping so the apple bits soften and the spoon glides instead of shattering the slab.
