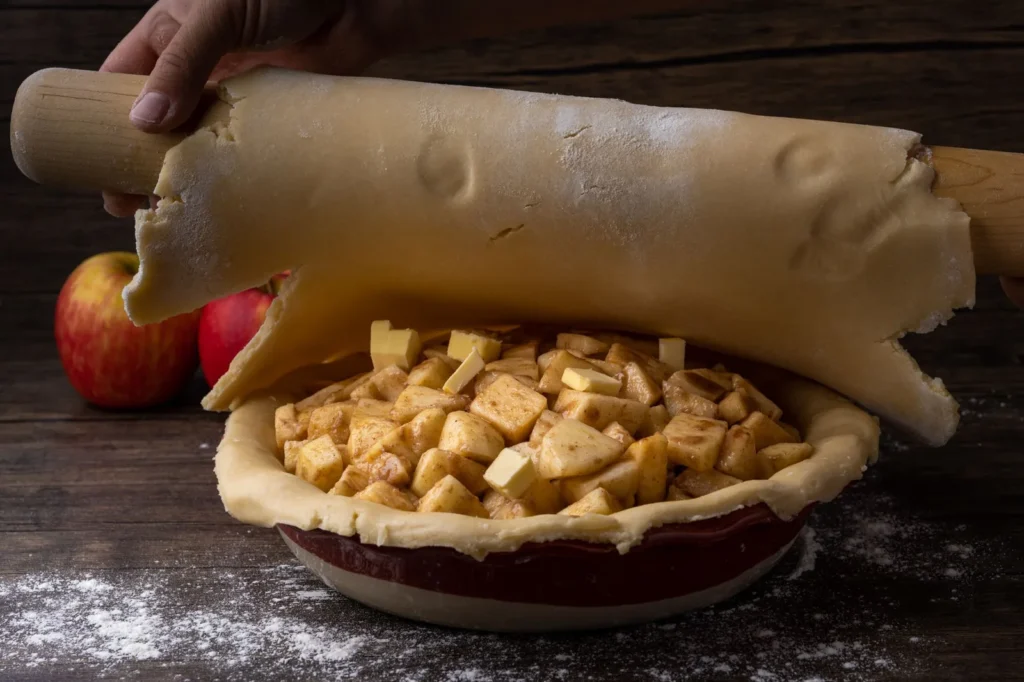
The apple pie and homemade pie crust with video below shows every step from cutting cold butter to crimping the top. You get a flaky, tender crust and a well-spiced apple filling that holds its shape when sliced. This version uses a standard double-crust method with a clear visual guide so you can see the texture at each stage.
A good pie starts with temperature control more than fancy equipment. Keeping the fat cold and the dough relaxed keeps the layers separate so the crust bakes up crisp instead of tough. The video walks through those moments so you don't have to guess what the dough should look like. If you enjoyed this, our loco moco gravy is worth trying next. Making this apple pie and homemade pie crust with video at home is surprisingly straightforward once you know the key steps.
Why You'll Love These Apple Pie And Homemade Pie Crust With Video
- Clear video guidance for every crust step, from cubing butter to lattice or full top.
- Flaky, buttery crust that stays crisp under the cooked apple filling.
- Balanced spice level that supports the apples without covering them.
- Make-ahead friendly dough that rests in the fridge before rolling.
- Reliable slice shape because the filling is thickened before baking.
Ingredients You'll Need
- 2 1/2 cups all-purpose flour, plus extra for rolling.
- 1 cup unsalted butter, cold and cut into small cubes.
- 1/2 cup ice water, added a tablespoon at a time.
- 1 tbsp granulated sugar for the dough.
- 1 tsp fine salt.
- 6 cups peeled and sliced apples, about 3 large baking apples.
- 3/4 cup granulated sugar for the filling.
- 2 tbsp lemon juice.
- 2 tbsp cornstarch.
- 1 tsp ground cinnamon.
- 1/4 tsp ground nutmeg.
- 1/4 tsp salt for the filling.
- 1 tbsp unsalted butter, cut into small pieces for the top.
- 1 egg, beaten, for the wash.
Ingredient Substitutions
Unsalted butter: Replace with an equal weight of leaf lard for a more traditional flaky crust. Lard has a different fat structure that gives a slightly shorter, more tender bite and a quieter dairy note. The dough handles the same way but browns a little less, so watch the edges near the end of bake time. The apple pie and homemade pie crust with video works well for weeknight cooking when time is limited.
Cornstarch: Use 3 tbsp of all-purpose flour instead of cornstarch to thicken the filling. Flour gives a more opaque, gently cloudy sauce and a softer set than cornstarch. You may need to bake 5 minutes longer for the starch to fully cook out any raw taste. Storing leftover apple pie and homemade pie crust with video correctly keeps it tasting good for days.
Baking apples: Swap the mixed apples for 6 cups of peeled pears if you want a milder, floral filling. Pears release more liquid, so raise cornstarch to 2 1/2 tbsp and lower filling sugar to 1/2 cup. The bake time stays close, but check that the center bubbles before removing. For the best results with this apple pie and homemade pie crust with video, read through all the steps before starting.
Ground cinnamon: Replace with 1 tsp of apple pie spice blend for a broader warm profile. The blend usually adds allspice and clove, so cut nutmeg to a pinch to avoid a heavy finish. The color stays similar and the filling smells more complex. For another easy option, check out our hot toddy non.
Step-by-Step Instructions
- Combine flour, 1 tbsp sugar, and 1 tsp salt in a bowl. Add cold cubed butter and cut it in until the mix looks like coarse crumbs with pea-sized pieces. Stream in ice water and stir just until the dough clumps; do not overmix.
- Divide dough in two, shape into disks, wrap, and chill 1 hour. Cold rest relaxes the gluten and firms the fat for cleaner rolling.
- Peel and slice apples. Toss with 3/4 cup sugar, lemon juice, cornstarch, cinnamon, nutmeg, and 1/4 tsp salt until coated and slightly glossy.
- Roll one disk on a floured surface to a 12-inch round. Fit it into a 9-inch pie plate, letting the edge hang slightly over.
- Add filling, mound the center, and dot with 1 tbsp butter pieces. Roll the second disk and place as a full top or cut into strips for lattice.
- Seal and crimp the edge. Cut vents if using a full top. Brush with beaten egg and sprinkle with sugar if desired.
- Bake at 180°C / 350°F for 50–60 minutes until the crust is golden and crispy and the center bubbles through the vents.
- Cool on a rack at least 2 hours so the filling sets before slicing.
Pro Tips
Keep your butter colder than you think by cubing it and returning it to the fridge while you measure dry items. Cold fat creates steam pockets that lift the layers during bake.
Use a blind baking method only if you prefer a firmer bottom; for this recipe a chilled raw shell bakes through with the filling. A metal pie plate conducts heat better than glass for a browner base.
Rest the filled pie in the fridge for 15 minutes before baking if your kitchen is warm. This firms the top crust so the vents hold their shape.
Brush the top with egg wash right before the oven, not earlier, or it can dry and patch unevenly. Sugar on top adds crunch but also browns faster, so shield edges with foil at 40 minutes if needed.
Common Mistakes to Avoid
Adding all ice water at once leads to a sticky dough that tears when rolled. Add it a tablespoon at a time and stop when the mass just holds together.
Skipping the cooling step makes the filling run when cut. The cornstarch needs time at room temperature to set into a sliceable gel.
Thin apple slices overcook to mush while the crust finishes. Aim for 1/4-inch slices so they keep a little bite under the top crust. You might also like our avocado smoothie.
Serving Suggestions
Slice warm pie with a scoop of vanilla ice cream so the cream melts into the spiced apples. The cold dairy balances the cinnamon heat.
For a lighter plate, pair with pumpkin pie at a holiday table so guests get two classic textures. Both keep well under the same storage rules.
Offer a small glass of apple cider cocktail alongside for a matching fruit note. The bourbon version suits adult gatherings in fall.
Storage and Reheating
Cover leftover pie and refrigerate in an airtight container for up to 4 days. The crust softens slightly but stays safe and tasty.
To reheat, warm a slice at 180°C / 350°F for 12–15 minutes until the center is hot. An internal temp near 60°C confirms it is warmed through.
You can freeze the baked pie for freeze for up to 2 months wrapped tight. Thaw overnight in the fridge before reheating to keep the crust from sweating.
Recipe Variations
Canned Fruit Version
Use canned apple pie filling instead of fresh sliced apples to skip peeling and spicing. Drain slightly and reduce cornstarch since the filling is already thickened. Expect a softer, sweeter result with less bake time at 40 minutes.
Lattice Top
Cut the second dough disk into 1-inch strips and weave a lattice over the filling. This lets more steam escape so the bottom bakes a touch crisper. Crimp the border well so the strips stay put during bake.
Crumb Top Option
Skip the top crust and add a streusel of flour, butter, and brown sugar over the filling. The top browns faster, so check at 45 minutes. You get a cookie-like cap instead of a flaky lid.