

An air fryer pork belly recipe gives you crisp, bubbled skin and a soft, fatty interior without standing over a hot stove or heating the oven for an hour. The circulating hot air renders the fat layer from the inside out while the surface dries enough to snap when you bite it. You get restaurant-style results from a single slab of pork and a few pantry spices.
This version keeps the seasoning simple so the pork itself stays the star. A short rest after cooking lets the juices settle, so every slice stays moist instead of weeping onto the plate. Once you see how little hands-on time it takes, this becomes a weeknight option rather than a weekend project. If you enjoyed this, our pork chops supreme is worth trying next. Making this air fryer pork belly at home is surprisingly straightforward once you know the key steps.
Why You’ll Love These Air Fryer Pork Belly
- Crisp skin forms in about 25 minutes with no deep oil bath.
- The meat stays tender because the air fryer holds a steady temperature.
- You only need salt, pepper, and a couple of aromatics from the pantry.
- Leftovers reheat without turning rubbery if you follow the storage steps.
- The same method works for a whole slab or pre-cut strips.
Ingredients You’ll Need
- 1 lb (450 g) pork belly, skin on, scored in 1-inch crosshatch lines
- 1 tsp fine sea salt
- 1/2 tsp black pepper, freshly ground
- 1 tsp garlic powder
- 1/2 tsp five-spice powder
- 1 tbsp neutral oil (such as grapeseed)
- 1 tsp rice vinegar, for rubbing on the skin
Ingredient Substitutions
Five-spice powder: Replace the 1/2 tsp with an equal amount of ground cumin if you want a warmer, smokier note. Cumin lacks the sweet anise edge of five-spice, so the finished crust tastes more like a barbecue rub than a Cantonese-style cure. The cook time stays the same, but expect a darker, less fragrant surface. The air fryer pork belly works well for weeknight cooking when time is limited.
Neutral oil: Use 1 tbsp of melted lard instead of grapeseed oil for a pork-forward flavor that boosts browning. Lard carries more saturated fat, so the skin crisps slightly faster and needs a 2-minute check near the end. Avoid olive oil here because its smoke point is lower than the air fryer’s working temperature. Storing leftover air fryer pork belly correctly keeps it tasting good for days.
Rice vinegar: Swap the 1 tsp for apple cider vinegar if that is what you keep in the pantry. The acid still helps dry the skin, though cider vinegar adds a faint fruitiness that shows up on the first bite. No change to timing or temperature is needed. For the best results with this air fryer pork belly, read through all the steps before starting.
Garlic powder: Use 2 tsp of minced fresh garlic pressed into a paste if you want a sharper bite. Fresh garlic can burn at 180°C / 350°F, so rub it only on the flesh side, not the skin. The interior will taste brighter, but the surface will not brown as evenly. For another easy option, check out our pork loin in.
Step-by-Step Instructions
- Pat the pork belly dry with paper towels, then rub the rice vinegar into the scored skin and let it sit at room temperature for 10 minutes so the surface loses moisture.
- Brush the flesh side with neutral oil and rub salt, pepper, garlic powder, and five-spice into the meat, keeping the seasoning off the skin to protect the crackle.
- Place the slab skin-side up in a 180°C / 350°F air fryer basket and cook for 25–30 minutes until the skin bubbles and turns golden and crispy.
- Flip the pork belly flesh-side up for the final 5 minutes at the same temperature to render remaining fat and deepen the color on the bottom.
- Rest the cooked slab on a cutting board for 5 minutes before slicing into 1/2-inch strips so the juices redistribute instead of running out.
Pro Tips
Score the skin down to the fat but not into the meat, because shallow cuts let heat reach the layer that crisps without drying the pork below. A sharp knife and a steady hand prevent slipping on the slick surface.
Dry the skin thoroughly before cooking; trapped surface water steams the pork instead of crisping it, leaving a pale, chewy top. Overnight uncovered in the fridge works even better than the vinegar rub alone.
Read the maillard reaction breakdown if you want to understand why steady air flow beats flipping the piece repeatedly. Constant movement lowers the skin temperature and slows browning.
Never crowd the pan by overlapping pieces, since blocked airflow creates soggy patches that will not recover in the last few minutes. Cook in two batches if your basket is small.
Common Mistakes to Avoid
Seasoning the skin directly causes the salt to draw out moisture and block crackling, so keep rub on the flesh side only. The vinegar step is enough to treat the top.
Slicing immediately after cooking loses up to a third of the juices on the board, leaving dry bites. The 5 minutes rest is short but makes the texture noticeably better.
Running the basket at too low a temperature renders fat slowly but never crisps the skin, producing soft, floppy pork. Stay at 180°C / 350°F or higher for the listed time.
Serving Suggestions
Slice the strips over steamed jasmine rice with quick pork belly ramen broth on the side for a lighter bowl. The crisp skin holds up for several minutes before softening.
Pair the pork with a sharp squash gnocchi to balance the richness, or plate it next to pickled cucumbers for acidity. A soft bun turns the slices into a sandwich with little effort.
Storage and Reheating
Refrigerate cooled pieces in an airtight container for up to 3 days, separated by parchment so the skin does not stick. Keep the container on a middle shelf, not the door, for a stable temperature.
Reheat in the air fryer at 180°C / 350°F for 5 minutes until the internal temperature reaches 74°C (165°F) for food safety. Microwaving warms the meat but softens the crackling, so use the oven method when texture matters.
This dish does not freeze well because the skin turns leathery after thawing, so plan to eat it within the fridge window. Discard any piece left unrefrigerated for more than 2 hours.
Recipe Variations
Spicy Version
Add 1 tsp of gochugaru to the flesh-side rub and brush the skin with a thin layer of chili oil before cooking. The heat builds slowly and the oil promotes faster bubbling, so check the pork at the 20-minute mark. Expect a redder crust and a tingle that cuts the fat.
Glazed Finish
Brush a mix of 1 tbsp honey and 1 tsp soy sauce on the flesh side during the final 5 minutes of cooking. The sugars caramelize quickly, so watch for smoking and pull the basket if it darkens too fast. The result is sticky, sweet, and best served with plain rice.
Sliced Strip Method
Cut the raw slab into 1-inch wide strips before seasoning to shorten the cook to 18–20 minutes at the same temperature. More surface area means more crisp edges per bite, though the center stays thinner. This works well when you want pork and pasta toppings without a long roast.
Herb Crust
Replace five-spice with 1 tsp dried rosemary and 1 tsp thyme rubbed on the flesh for a Mediterranean spin. The herbs crisp against the oil and give a piney aroma that pairs with roast vegetables. Keep the skin treatment unchanged so the top still cracks.
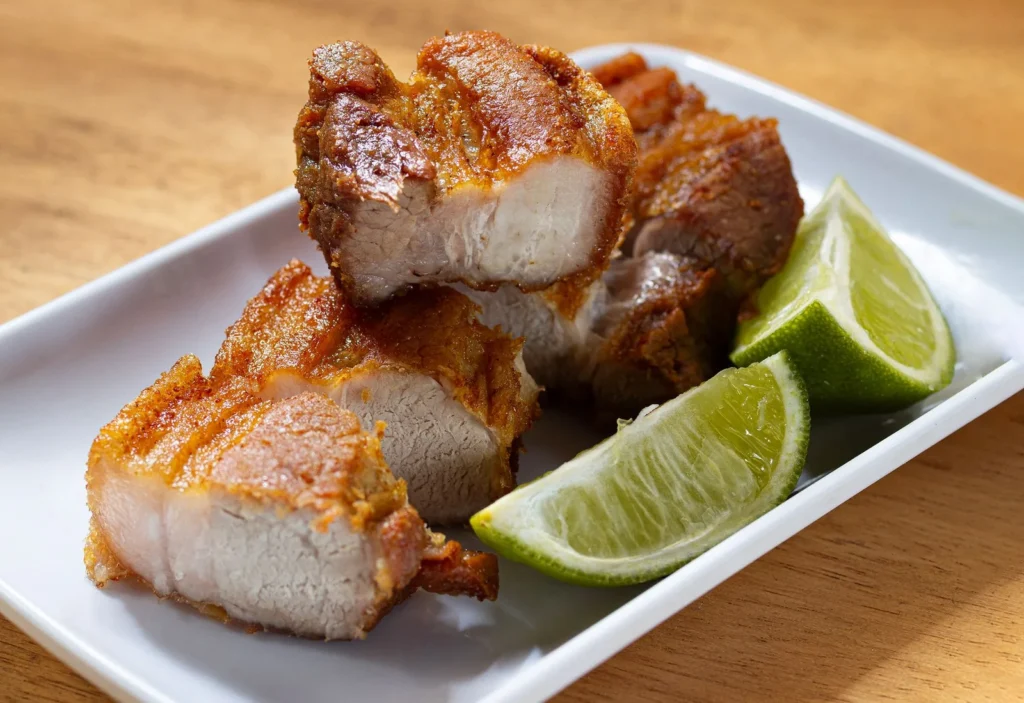

Air Fryer Pork Belly
Description
This air fryer pork belly gives you bubbled, crispy skin and a soft, fatty interior with almost no hands-on time. A simple pantry rub keeps the pork itself the star for an easy weeknight treat.
Ingredients
Instructions
-
Dry and Treat Skin
Pat the pork belly completely dry with paper towels so no surface water remains to steam the skin. Rub the 1 tsp rice vinegar into the scored skin and let it sit at room temperature for 10 minutes so the surface loses moisture and prepares for crackling.
-
Season Flesh Side
Brush the flesh side with the 1 tbsp neutral oil using a pastry brush for even coverage. Rub the 1 tsp fine sea salt, 1/2 tsp black pepper, 1 tsp garlic powder, and 1/2 tsp five-spice powder into the meat, keeping all seasoning off the skin to protect the crisp top.
-
Air Fry Skin Up
Place the slab skin-side up in a 180°C / 350°F air fryer basket without overlapping pieces to keep airflow clear. Cook for 25–30 minutes until the skin bubbles, turns golden, and snaps when pressed, showing the crackle is set.
-
Flip and Finish
Flip the pork belly flesh-side up for the final 5 minutes at the same 180°C / 350°F temperature to render remaining fat and deepen the bottom color. Watch for the flesh side to turn lightly browned and the internal temperature to reach 63°C (145°F) for a safe whole-cut pork doneness.
-
Rest Before Slicing
Rest the cooked slab on a cutting board for 5 minutes so the juices redistribute instead of running out onto the plate. The pork should feel firm yet springy and the internal temp hold at 63°C (145°F) with a 3-minute rest before slicing.
-
Slice and Serve
Slice the rested slab into 1/2-inch strips with a sharp knife to keep the crackling intact. Serve while the skin is still crisp and the interior reads 63°C (145°F) or warmer for food safety.
Nutrition Facts
Servings 4
- Amount Per Serving
- Calories 450kcal
- % Daily Value *
- Total Fat 38g59%
- Saturated Fat 14g70%
- Cholesterol 60mg20%
- Sodium 480mg20%
- Total Carbohydrate 2g1%
- Protein 22g44%
* Percent Daily Values are based on a 2,000 calorie diet. Your daily value may be higher or lower depending on your calorie needs.
Note
- Storage: Refrigerate cooled pieces in an airtight container for up to 3 days, separated by parchment, and discard any left out over 2 hours.
- Reheating: Reheat in the air fryer at 180°C / 350°F for 5 minutes until the internal temperature reaches 74°C (165°F) for safety; avoid microwaving to keep the crackle.
- Pro tip: Dry the skin overnight uncovered in the fridge for even better crispness than the vinegar rub alone, as noted in our pork and pasta topping method.
- Don't crowd: Cook in two batches if your basket is small so blocked airflow does not create soggy patches.
