

A good batch of roasted red pepper hummus starts with charred peppers and a well-emulsified tahini base. The roasting step pulls out a sweet, almost smoky note that plain red bell pepper never delivers raw. You end up with a dip that’s smoother and more layered than standard store-bought versions.
This recipe keeps the ingredient list short and the method forgiving. You’ll use a food processor to break the chickpeas down fully before adding oil, which prevents a grainy texture. The result is a spread that holds its shape on pita but loosens nicely with a little warm water.
We’ll cover the exact pepper prep, the order of mixing, and the small details that keep the color bright instead of muddy. If you’ve struggled with hummus that tastes flat, the cumin and lemon ratio here fixes that. If you enjoyed this, our roasted lemonade copycat is worth trying next.









Why You’ll Love These Roasted Red Pepper Hummus
- Uses pantry chickpeas and fresh peppers you can roast while prepping other items
- Smooth texture from processing chickpeas before adding liquids
- Naturally vegan and gluten free as written
- Freezes in portions for quick snacks later
- Customizable heat and smoke level with one extra ingredient
Ingredients You’ll Need
- 2 large red bell peppers (about 300g), roasted and peeled
- 1 can (400g) chickpeas, drained, 2 tbsp liquid reserved
- 3 tbsp tahini
- 2 tbsp fresh lemon juice
- 1 small garlic clove, roughly chopped
- 2 tbsp extra virgin olive oil, plus more for serving
- 1/2 tsp ground cumin
- 1/4 tsp salt, adjust to taste
- 2 tbsp ice-cold water, as needed for texture
Ingredient Substitutions
Red bell peppers: Replace with 2 jarred roasted red peppers (about 150g drained) for a faster version. Jarred peppers are softer and slightly vinegary, so cut the lemon juice to 1 tbsp to keep the acid balanced. The flavor is less fresh but the dip still blends smooth in under 5 minutes.
Tahini: Use 3 tbsp sunflower seed butter if you need a nut-free option. Sunflower butter is lighter and a bit sweet, so add an extra 1/4 tsp salt and 1 tsp lemon juice. The dip will be paler and less bitter than tahini-based hummus.
Chickpeas: Swap with 400g cooked white beans for a milder, softer spread. White beans break down faster, so reduce processing time by 30 seconds to avoid over-aeration. Expect a looser body that benefits from 1 extra tbsp olive oil.
Extra virgin olive oil: Replace with 2 tbsp avocado oil for a neutral taste. Avocado oil has a higher smoke point but less fruitiness, so finish the dish with a drizzle of olive oil on top. The base color stays the same with no flavor loss in the blend.
Step-by-Step Instructions
- Roast the peppers on medium-high heat in a dry skillet or under a broiler until skins blister black on all sides, about 10 minutes, then steam in a covered bowl for 5 minutes and peel.
- Add chickpeas, reserved liquid, garlic, cumin, and salt to a food processor. Process on high for 60 seconds until a fine meal forms with no whole skins visible.
- Scrape down the sides, add tahini and lemon juice, and process 30 seconds until the paste tightens and looks matte.
- With the motor running, stream in olive oil followed by ice water. Process 2 minutes until the roasted red pepper hummus is glossy and lifts off the sides in a ribbon.
- Add roasted peppers and process 45 seconds until fully incorporated and the color is even orange-red with no streaks.
- Transfer to a bowl, smooth the top, and drizzle with olive oil. Serve immediately or chill up to 3 days.
Pro Tips
Process the chickpeas dry first so the cell walls break before fat enters; this is the main fix for gritty homemade dips. For deeper background on emulsification, see food science resources on seed pastes.
Use ice water instead of room temperature to keep the tahini from seizing during the long blend. Cold liquid also helps the dip stay thick rather than oily.
Peel peppers while still warm but not hot; the skin slips off cleaner than after full cooling. Leaving char on adds bitterness, so rinse quickly under cool water.
Rest the finished roasted red pepper hummus for 10 minutes before serving so the garlic mellows. The flavor reads sharper straight from the processor.
Common Mistakes to Avoid
Adding oil too early leaves whole chickpea skins intact and creates a rough mouthfeel. Always build the dry base first as listed in the steps.
Using unpeeled roasted peppers drops dark flecks into the dip and adds a burnt note. Take the extra 5 minutes to remove skins completely.
Over-processing after peppers go in can whip too much air and lighten the color to pink. Stop at an even blend and check the sides of the bowl.
Skipping the salt makes the cumin taste dusty rather than warm. Taste at the end and adjust by 1/8 tsp increments.
Serving Suggestions
Spread the roasted red pepper hummus on toasted sourdough with cucumber slices for a light lunch. The dip also works as a base under egg sandwich fillings to add moisture.
Pair with warm fresh bread for a Mediterranean-style starter. A side of pizza slice is not traditional but works at parties.
Use as a wrap sauce with grilled vegetables or as a salad dressing thinned with 1 tbsp water. The sweet pepper note complements bitter greens like radicchio.
Storage and Reheating
Keep the dip in an airtight container in the fridge for up to 4 days. Surface darkening is normal; stir and top with oil before use.
Freeze in 1/2 cup portions for up to 2 months; thaw overnight in the fridge then stir. Do not leave the container out more than 2 hours total.
No reheating is needed since it’s served cold, but if you prefer warm, heat to 60°C / 140°F in a small pan on low heat. Avoid boiling or the tahini will split.
Recipe Variations
Smoky Version
Add 1/2 tsp smoked paprika with the cumin for a campfire edge. The peppers already carry some char, so this doubles down without extra heat. Expect a deeper red-brown color and stronger aroma.
Spicy Version
Blend in 1 small seeded jalapeño with the roasted peppers for clean heat. Keep the garlic at one clove so the chili stays forward. The dip pairs well with cooling mushroom toppings.
White Bean Version
Replace chickpeas with 400g cannellini beans for a softer, milder spread. Cut processing time by 30 seconds and add 1 tbsp oil. The body is looser and the taste less nutty than the original roasted red pepper hummus.
Lemon-Herb Version
Stir 1 tbsp chopped parsley and 1 tsp extra lemon zest after blending. This brightens the sweet pepper without changing texture. Serve with smoothie for a contrast snack plate.
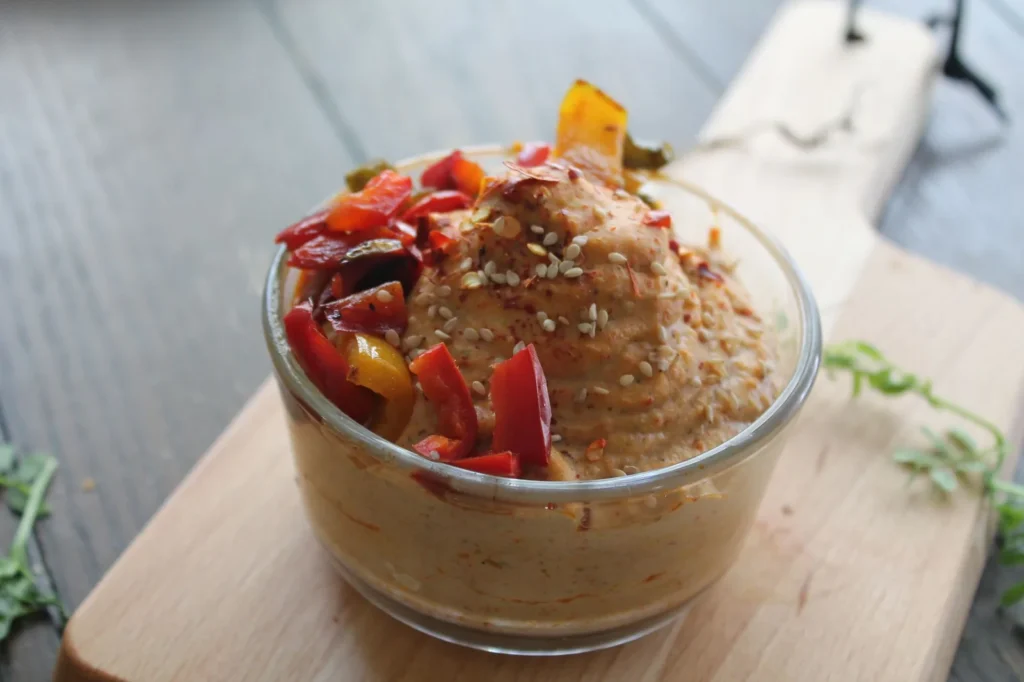

Roasted Red Pepper Hummus
Description
This roasted red pepper hummus uses charred peppers and a dry-processed chickpea base for a smooth, layered dip that beats store-bought versions. It is naturally vegan, gluten-free, and freezes well for quick snacks.
Ingredients
Instructions
-
Roast and peel peppers
Roast the peppers on medium-high heat in a dry skillet or under a broiler until skins blister black on all sides, about 10 minutes. Steam them in a covered bowl for 5 minutes then peel while still warm but not hot, rinsing quickly under cool water to remove char and avoid bitterness.
-
Process dry chickpea base
Add chickpeas, reserved liquid, garlic, cumin, and salt to a food processor. Process on high for 60 seconds until a fine meal forms with no whole skins visible, scraping down the sides to ensure even breakdown.
-
Add tahini and lemon
Scrape down the sides, then add tahini and lemon juice to the processor. Process for 30 seconds until the paste tightens and looks matte, which shows the seed paste is emulsifying properly.
-
Stream oil and water
With the motor running, stream in olive oil followed by ice water. Process for 2 minutes until the hummus is glossy and lifts off the sides in a ribbon, using cold liquid to keep the tahini from seizing.
-
Incorporate roasted peppers
Add the roasted peeled peppers to the processor. Process for 45 seconds until fully incorporated and the color is even orange-red with no streaks, stopping before over-aeration lightens it to pink.
-
Transfer and serve
Transfer the hummus to a bowl and smooth the top, then drizzle with olive oil. Serve immediately or chill up to 3 days for a make-ahead option.
-
Rest before serving
Rest the finished hummus for 10 minutes before serving so the garlic mellows from its sharp straight-from-processor state. This short wait improves the overall flavor balance.
Nutrition Facts
Servings 4
- Amount Per Serving
- Calories 180kcal
- % Daily Value *
- Total Fat 12g19%
- Saturated Fat 2g10%
- Sodium 240mg10%
- Total Carbohydrate 16g6%
- Dietary Fiber 4g16%
- Sugars 4g
- Protein 5g10%
* Percent Daily Values are based on a 2,000 calorie diet. Your daily value may be higher or lower depending on your calorie needs.
Note
- Storage: Keep in an airtight container in the fridge for up to 4 days; stir and top with oil before use, and discard if left out more than 2 hours total.
- Reheating: No reheating needed served cold, but if preferred warm heat to 60°C / 140°F in a small pan on low and avoid boiling so tahini does not split.
- Pro tip: Process chickpeas dry first so cell walls break before fat enters, the main fix for gritty dips; see garlic mashed potatoes for another emulsion method.
- Pepper prep: Peel peppers while warm and rinse quickly to avoid burnt flecks and bitter notes in the final dip.
