

A protein balls recipe with peanut butter is one of the simplest ways to keep a filling snack within arm’s reach on a busy day. These no-bake bites mix oats, nut butter, and a sweetener into a dough you roll by hand, then chill until firm. You get a chewy, salty-sweet bite that holds its shape and travels well in a lunchbox or gym bag.
The version here uses pantry staples and takes about fifteen minutes of active work. There’s no oven, no special equipment beyond a bowl and spoon, and the texture stays soft for a week in the fridge. If you like a smoothie bowl for breakfast, these pair with it as a crunch-and-protein add-on. Making this protein balls recipe with peanut butter at home is surprisingly straightforward once you know the key steps.
Why You’ll Love These Protein Balls Recipe With Peanut Butter
- Ready in 15 minutes with zero baking or stovetop time.
- Uses four core pantry items plus two mix-ins you can swap.
- Holds shape at room temperature for a couple of hours, so it’s portable.
- Each ball lands near 110 calories with about 5 grams of protein.
- Naturally gluten free if you use certified oats.
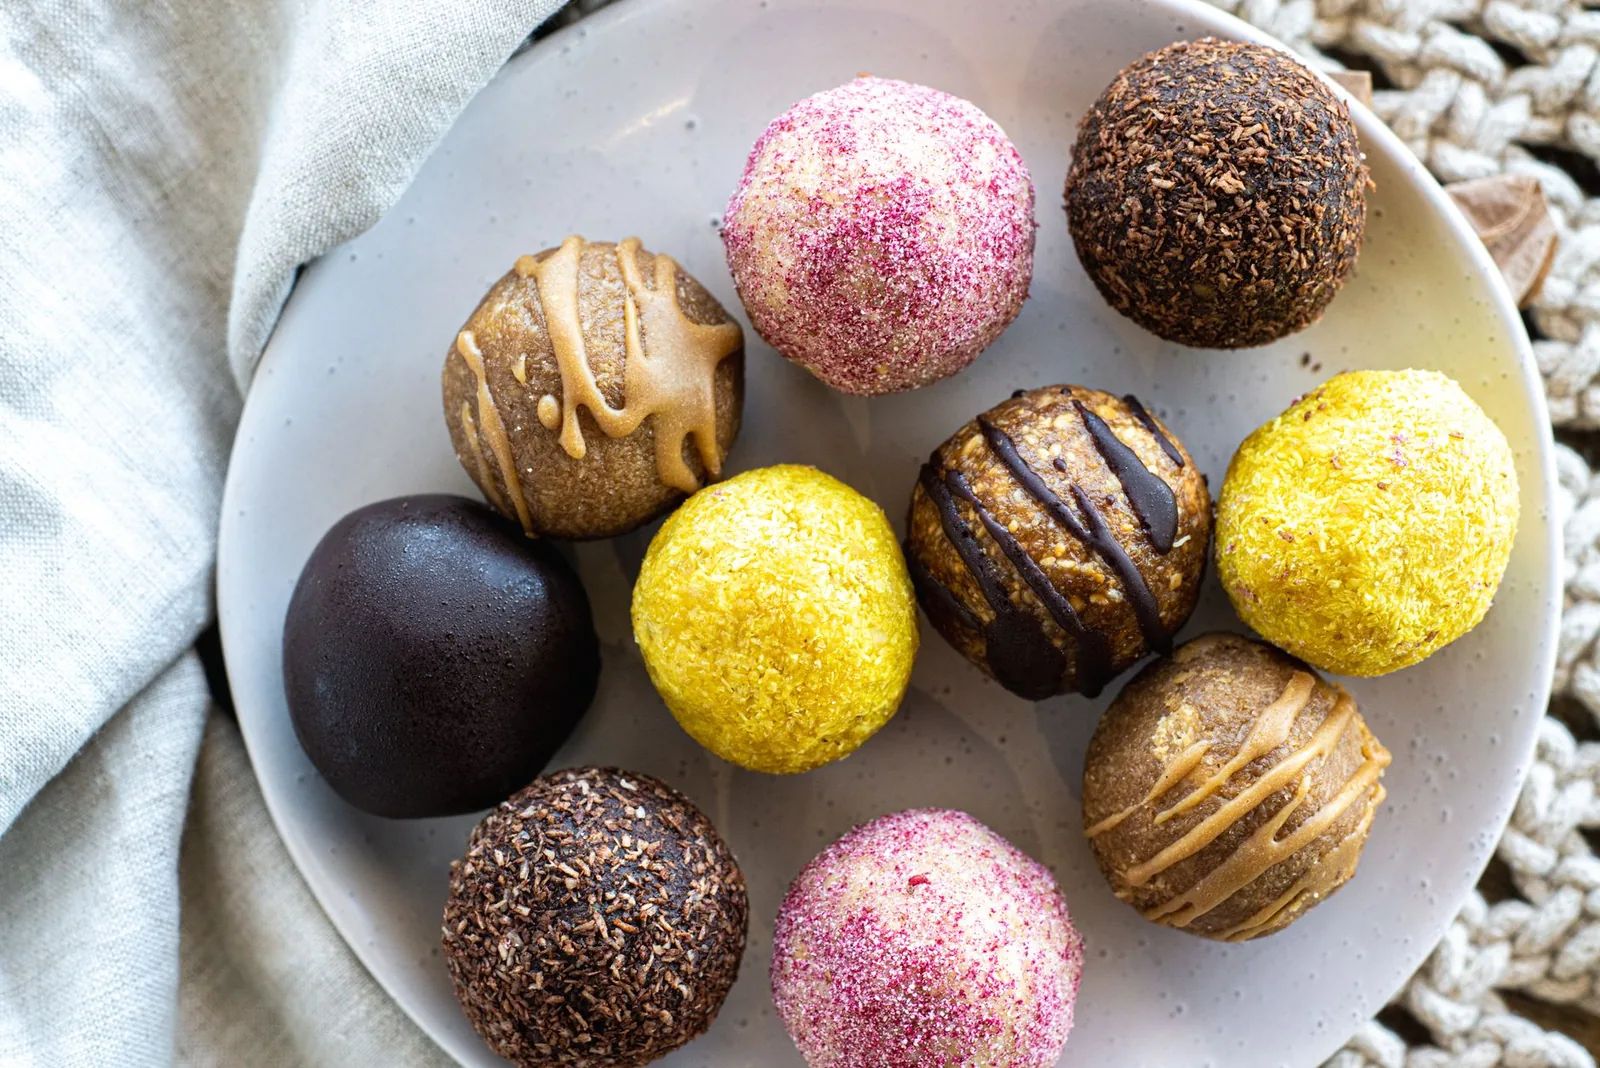
Ingredients You’ll Need
- 1 cup rolled oats (use certified gluten-free if needed) — gives structure and chew.
- 1/2 cup creamy peanut butter — binds the dough and adds fat and protein.
- 1/3 cup honey — sweetens and helps the oats stick.
- 1/4 cup ground flaxseed — adds fiber and helps firm the mix.
- 2 tbsp chia seeds — hold moisture and add a slight crunch.
- 1/4 cup mini chocolate chips — optional, for sweetness and contrast.
- 1 tsp vanilla extract — rounds the flavor.
Ingredient Substitutions
Creamy peanut butter: Replace with an equal amount of almond or cashew butter for a milder, slightly sweeter base. Nut butters vary in oil content, so if the swap looks dry, add 1 tsp of water at a time until the dough clumps. The balls will taste less roasty and a bit softer, but the rolling method stays the same. The protein balls recipe with peanut butter works well for weeknight cooking when time is limited.




Honey: Use an equal volume of maple syrup for a vegan version with a lighter, woodsy sweetness. Maple syrup is thinner than honey, so the dough may need an extra tablespoon of oats to firm up. Expect a slightly less sticky ball that chills a little faster in the fridge. Storing leftover protein balls recipe with peanut butter correctly keeps it tasting good for days.
Ground flaxseed: Swap with an equal amount of additional oat flour if you don’t have it. You lose some fiber and the mixture will be a touch less binding, so rest the dough 10 minutes before rolling. The texture stays close, though the balls won’t have the same slight grit. For the best results with this protein balls recipe with peanut butter, read through all the steps before starting.
Mini chocolate chips: Leave them out or use chopped dried cranberries for a fruit-forward bite with no melted chocolate risk. Without chips the balls are less sweet, so add 1 tbsp honey if you want the same level. Cranberries add chew and a tart note that cuts the peanut butter richness. If you enjoyed this, our paccheri pasta butter is worth trying next.
Step-by-Step Instructions
- Add 1 cup rolled oats, 1/2 cup peanut butter, 1/3 cup honey, 1/4 cup ground flaxseed, 2 tbsp chia seeds, 1/4 cup mini chocolate chips, and 1 tsp vanilla to a medium bowl. Stir with a spatula on medium speed by hand until no dry oats remain and the mix forms a shaggy clump.
- Cover the bowl and rest it in the fridge for 20 minutes so the chia and flax absorb moisture and the dough firms enough to roll.
- Scoop a level tablespoon of dough and roll between your palms into a 1-inch ball. If it cracks, press firmly; the heat from your hands softens the peanut butter and seals the surface.
- Place each ball on a parchment-lined tray with a little space between them. You should get about 18 balls from the batch.
- Chill the tray uncovered for 30 minutes until the outsides feel set and no longer sticky to a light touch. Transfer to a sealed container and keep refrigerated.
Pro Tips
Measure the peanut butter by packing the cup so the dough binds instead of crumbling. Loose scoops leave you with a dry mix that won’t hold a round shape.
Use rolled oats rather than instant, because they keep a distinct chew instead of turning pasty after chilling.
Wet your palms with a few drops of water before rolling if the dough sticks. This keeps the balls smooth and stops them from picking up loose oat bits.
If the kitchen is warm, roll the balls straight from the fridge and return them quickly, since soft peanut butter loses shape fast above 70°F.
For even sizing, use a small cookie scoop so each ball bakes-free at the same firmness and looks uniform in the container.
Common Mistakes to Avoid
Skipping the rest time makes the dough too loose to roll, so you end up with lumps instead of balls. The 20 minutes chill is what lets chia and flax do their work.
Using natural peanut butter with separated oil without stirring it back in gives a greasy, slack dough. Stir the jar fully so the solids and oil are one paste before measuring.
Overloading chocolate chips past 1/4 cup pushes the balls apart as they chill and they crumble when bitten. Stick to the measured amount for a stable bite. For another easy option, check out our brown butter chocolate.
Serving Suggestions
Pack three balls with a piece of fruit for a post-workout snack that covers protein and quick carbs. The salt from the peanut butter balances a sweet apple or banana.
Crumble one over energy bites style yogurt bowls for texture, or set a bowl beside a high protein casserole at a brunch spread. They read as a treat while still carrying oats and seed fiber.
Storage and Reheating
Keep the balls in an airtight container in the fridge for up to 7 days, layered with parchment so they don’t stick. They are eaten cold, so there’s no reheating step.
For longer hold, freeze them on a tray then bag them for up to 3 months. Thaw a few at room temperature for 15 minutes before eating. Don’t leave a batch unrefrigerated beyond 2 hours in a warm room. You might also like our garlic butter salmon.
Recipe Variations
Coconut Version
Roll each chilled ball in 2 tbsp shredded unsweetened coconut after step four. The coating adds a dry grip and a mild sweetness that pairs with the peanut base. Expect a slightly firmer outside and a tropical note.
Protein Boost
Add 2 tbsp unflavored or vanilla protein powder with the dry oats and cut honey to 1/4 cup. The powder absorbs liquid, so add 1 tsp water if the dough feels tight. Each ball gains roughly 2 grams of protein but tastes a bit more chalky.
Spiced Cocoa
Stir 1 tbsp unsweetened cocoa and 1/4 tsp cinnamon into the bowl before mixing. The cocoa deepens the chocolate chips and the cinnamon warms the peanut flavor. Skip extra chips if you want a darker, less sweet bite.
Date Sweetened
Replace honey with 1/3 cup blended soft dates and 1 tsp water for a less sharp sweet. The dough gets denser and sticks more, so wet palms help. The balls carry a caramel-like note and hold firm when chilled.


protein balls recipe with peanut butter
Description
These no-bake peanut butter protein balls mix oats, nut butter, and sweetener into a chewy, salty-sweet dough you roll by hand and chill until firm. They are portable, gluten-free friendly, and ready in about fifteen minutes of active work.
Ingredients
Instructions
-
Combine dry and wet ingredients
Add 1 cup rolled oats, 1/2 cup peanut butter, 1/3 cup honey, 1/4 cup ground flaxseed, 2 tbsp chia seeds, 1/4 cup mini chocolate chips, and 1 tsp vanilla to a medium bowl. Stir with a spatula by hand until no dry oats remain and the mix forms a shaggy clump that holds together when pressed.
-
Rest dough in fridge
Cover the bowl and rest it in the fridge for 20 minutes so the chia and flax absorb moisture and the dough firms enough to roll. The mixture should feel less sticky and more cohesive when you touch it after chilling.
-
Roll into balls
Scoop a level tablespoon of dough and roll between your palms into a 1-inch ball. If it cracks, press firmly; the heat from your hands softens the peanut butter and seals the surface so the ball stays round.
-
Place on tray
Place each ball on a parchment-lined tray with a little space between them. You should get about 18 balls from the batch, all roughly the same size for even chilling.
-
Chill to set
Chill the tray uncovered for 30 minutes until the outsides feel set and no longer sticky to a light touch. The balls should hold their shape when lifted and not leave residue on your finger.
-
Transfer and store
Transfer to a sealed container and keep refrigerated for up to 7 days. Layer with parchment if stacking so they don't stick together before the next snack.
Nutrition Facts
Servings 18
- Amount Per Serving
- Calories 110kcal
- % Daily Value *
- Total Fat 6g10%
- Saturated Fat 1g5%
- Sodium 40mg2%
- Total Carbohydrate 12g4%
- Dietary Fiber 2g8%
- Sugars 7g
- Protein 5g10%
* Percent Daily Values are based on a 2,000 calorie diet. Your daily value may be higher or lower depending on your calorie needs.
Note
- Storage: Keep balls in an airtight container in the fridge for up to 7 days, layered with parchment so they don't stick, and don't leave unrefrigerated beyond 2 hours in a warm room.
- Make it ahead: Rest the dough 20 minutes before rolling so chia and flax firm it; if the kitchen is warm, roll straight from the fridge to avoid slack shapes.
- Pro tip: Pair these with a smoothie bowl for a crunch-and-protein breakfast add-on.
- Freezing: Freeze on a tray then bag for up to 3 months; thaw 15 minutes at room temperature before eating.
