

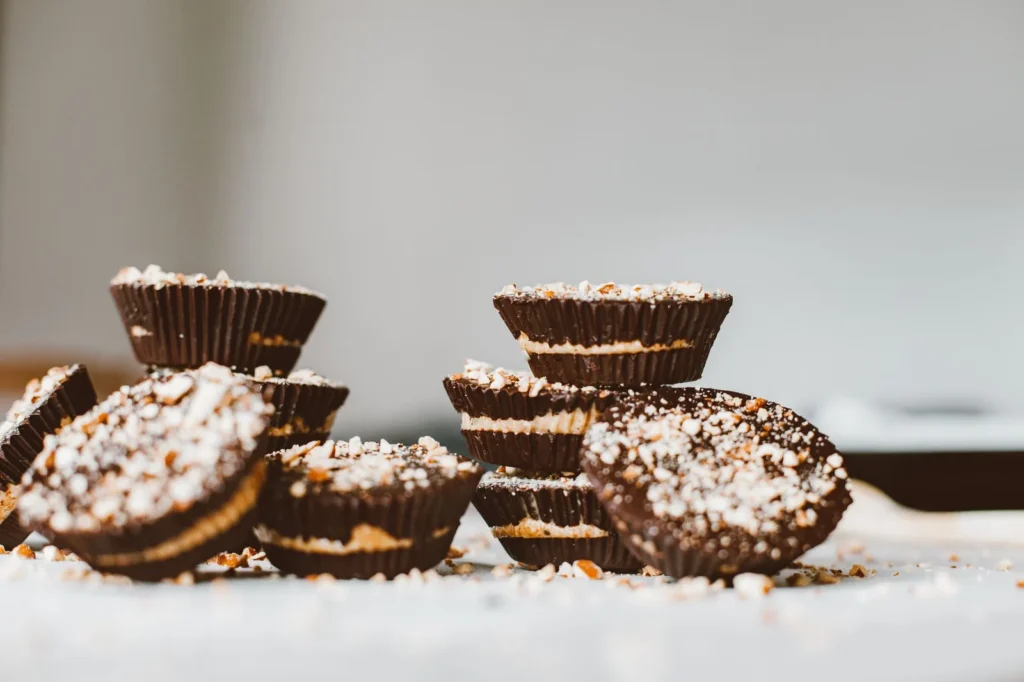
A peanut butter cup recipe homemade gives you full control over sweetness, chocolate thickness, and filling texture. You melt chocolate, layer peanut butter, and cap with more chocolate to build small cups that set firm in the fridge. This version uses a no-bake method so you get a candy with a soft center and a clean snap on the outside.
The base formula is flexible enough for trays of mini cups or a few large ones. You only need a microwave or double boiler, a muffin pan, and paper liners to start. Below you’ll find exact amounts, swap options, and the small details that keep the chocolate from seizing or the filling from leaking. If you enjoyed this, our paccheri pasta butter is worth trying next. Making this peanut butter cup recipe homemade at home is surprisingly straightforward once you know the key steps.
Why You’ll Love These Peanut Butter Cup Recipe Homemade
- Short active time: about 15 minutes of melting and spooning before the fridge does the rest.
- Adjustable sweetness: cut the sugar in the filling by a third without changing the structure.
- No special equipment: a standard 12-cup muffin tin and liners handle the shape.
- Clean ingredient list: chocolate, peanut butter, butter, sugar, salt, vanilla — nothing obscure.
- Freezer friendly: they hold texture for two months if wrapped well.
Ingredients You’ll Need
- 300 g semi-sweet chocolate chips — forms the shell and top layer.
- 120 g creamy peanut butter — the center; use no-stir for a firm fill.
- 30 g unsalted butter — softens the filling and helps it set sliceable.
- 60 g powdered sugar — sweetens and stiffens the peanut butter center.
- 2 g fine salt — balances the chocolate and peanut flavors.
- 3 ml vanilla extract — rounds the filling aroma.
- 12 paper muffin liners — holds each cup during molding.
Ingredient Substitutions
Semi-sweet chocolate chips: Replace with an equal weight of dark chocolate (70%) for a less sweet, more bitter shell. Dark chocolate melts thinner and sets harder, so you may need an extra 5 g per cup to fully coat the liner. The finished cup will have a sharper cocoa note and a louder snap when bitten. The peanut butter cup recipe homemade works well for weeknight cooking when time is limited.








Creamy peanut butter: Swap with an equal weight of almond butter for a nuttier, slightly looser center. Almond butter is often oilier, so add 10 g more powdered sugar to keep the fill from spreading under the top chocolate. Expect a lighter color and a softer bite that reads less salty. Storing leftover peanut butter cup recipe homemade correctly keeps it tasting good for days.
Unsalted butter: Use an equal weight of coconut oil to make the filling dairy-free and a touch glossier. Coconut oil stays softer at room temperature, so the cups must stay refrigerated or they will slump. The center will taste faintly of coconut rather than creamy dairy. For the best results with this peanut butter cup recipe homemade, read through all the steps before starting.
Powdered sugar: Replace with an equal weight of granulated sugar blended fine in a spice grinder for a near-identical fill. Granulated sugar that is not fully ground will feel gritty between teeth and may not bind the butter as smoothly. Keep the same 60 g measure to hold the firmness. For another easy option, check out our garlic butter baked.
Step-by-Step Instructions
- Place 12 paper liners into a standard 12-cup muffin tin. Melt 150 g of the chocolate chips in a bowl over medium-low heat using a double boiler, stirring until fully liquid and smooth.
- Spoon about 12 g of melted chocolate into each liner. Tilt the tin so chocolate climbs the sides to form a thin wall. Chill the tray for 10 minutes until the shell looks matte and firm.
- Beat 120 g peanut butter, 30 g butter, 60 g powdered sugar, 2 g salt, and 3 ml vanilla with a fork until no dry spots remain and the mix holds a soft peak.
- Divide the filling across the cups, about 18 g each, pressing gently to flatten below the chocolate rim. Keep the fill 3 mm from the top edge so the cap seals cleanly.
- Melt the remaining 150 g chocolate chips over medium-low heat and spoon over each cup until the peanut butter is covered. Tap the tin twice on the counter to remove air pockets.
- Refrigerate the tray for 25–30 minutes until the tops are just set edges and no longer glossy. Unmold by peeling the paper away from the chocolate side.
Pro Tips
Warm your spoon under hot water before portioning the filling so it releases without tearing the chocolate wall. This keeps the rim neat instead of ragged.
Use a candy melting guide to check chocolate temperatures if your kitchen runs above 24°C and the shell feels soft after chill.
Layer a pinch of flaky salt on the filling before the cap for a sweet-salty contrast that reads more like a craft candy than a mass-market cup.
Make a double batch and pour into a loaf pan lined with film for a sliced bar version; cut with a warm knife for clean edges. Pair the small cups with a peanut butter smoothie bowl for a themed snack plate.
Common Mistakes to Avoid
Overheating the chocolate on high heat turns it grainy and it won’t coat the liner. Keep the bowl off direct flame and stir often so the mass stays around 45°C.
Using stir-natural peanut butter with separated oil makes the center weep and the top chocolate crack. Choose a stable no-stir product or stir the oil back in fully before measuring.
Skipping the side-wall step leaves thin bottom-only cups that leak filling when bitten. Tilt the tin during the first chill so the chocolate climbs at least 10 mm up the paper.
Serving Suggestions
Plate the cups on a cold slate board with a few chocolate chip cookies for a mixed dessert tray at room-chilled temperature. The cups hold shape for about 40 minutes outside the fridge before softening.
Chop one cup over vanilla ice cream to make a quick sundae with melted ribbons of chocolate and peanut. For a drink side, a fruity party drink balances the rich candy with acid and fizz.
Storage and Reheating
Keep cups in an airtight container in the fridge for up to 3 weeks since the chocolate and peanut fill stay stable when cold. Wrap pairs in film if you plan to freeze them for freeze for up to 2 months.
Do not leave finished cups on the counter beyond 2 hours in a warm room or the shell will bloom and the center will loosen. These are not reheated; serve cold or let sit 5 minutes for a softer bite.
Recipe Variations
Mini Bite Version
Use a 24-mini muffin tin and cut each chocolate and filling measure in half. The smaller cups set in 15 minutes and are easy to pack into lunch boxes without a knife.
Dark Salted Edition
Swap the semi-sweet chips for 70% dark and add 1 g extra salt to the filling for a sharper profile. The shell will be harder and the cup reads less sweet, closer to a European chocolate bar.
White Chocolate Top
Cap the cups with 150 g melted white chocolate instead of the remaining semi-sweet for a two-tone look. White chocolate is softer, so extend the chill by 10 minutes and store away from strong fridge odors.
Crunch Layer
Press 3 g of crushed pretzel into the filling before the cap for a salty crunch line. The pretzel stays crisp for up to 3 days then softens, so build these closest to serving time. A garlic butter shrimp plate nearby makes a sweet-savory party spread.

peanut butter cup recipe homemade
Description
A peanut butter cup recipe homemade gives you full control over sweetness, chocolate thickness, and filling texture using a simple no-bake method. Melt chocolate, layer peanut butter, and cap with more chocolate to build small cups that set firm in the fridge with a soft center and clean snap.
Ingredients
Instructions
-
Place liners in tin
Place 12 paper liners into a standard 12-cup muffin tin so each cup has a holder for molding. Make sure the liners sit flat and evenly spaced so the chocolate walls form cleanly later.
-
Melt first chocolate
Melt 150 g of the chocolate chips in a bowl over medium-low heat using a double boiler, stirring until fully liquid and smooth. Keep the bowl off direct flame and stir often so the mass stays around 45°C and does not turn grainy.
-
Form chocolate shells
Spoon about 12 g of melted chocolate into each liner. Tilt the tin so chocolate climbs the sides to form a thin wall at least 10 mm up the paper.
-
Chill the shells
Chill the tray for 10 minutes until the shell looks matte and firm to the touch. The chocolate should release slightly from the paper and hold its shape when tilted.
-
Make peanut filling
Beat 120 g peanut butter, 30 g butter, 60 g powdered sugar, 2 g salt, and 3 ml vanilla with a fork until no dry spots remain and the mix holds a soft peak. The filling should be spreadable but stiff enough to hold shape when pressed.
-
Add filling to cups
Divide the filling across the cups, about 18 g each, pressing gently to flatten below the chocolate rim. Keep the fill 3 mm from the top edge so the cap seals cleanly without leaking.
-
Cap with chocolate
Melt the remaining 150 g chocolate chips over medium-low heat and spoon over each cup until the peanut butter is covered. Tap the tin twice on the counter to remove air pockets so the top layer sits flush.
-
Refrigerate to set
Refrigerate the tray for 25–30 minutes until the tops are just set at the edges and no longer glossy. Unmold by peeling the paper away from the chocolate side when the cups feel firm and cool.
Nutrition Facts
Servings 12
- Amount Per Serving
- Calories 220kcal
- % Daily Value *
- Total Fat 14g22%
- Saturated Fat 6g30%
- Cholesterol 8mg3%
- Sodium 90mg4%
- Total Carbohydrate 20g7%
- Dietary Fiber 2g8%
- Sugars 15g
- Protein 4g8%
* Percent Daily Values are based on a 2,000 calorie diet. Your daily value may be higher or lower depending on your calorie needs.
Note
- Storage: Keep cups in an airtight container in the fridge for up to 3 weeks; freeze wrapped pairs for up to 2 months.
- Make ahead: Build the cups a day before and chill overnight so they unmold with a clean edge.
- Pro tip: Warm your spoon under hot water before portioning filling so it releases without tearing the chocolate wall; see our chip cookies for another cold-tray dessert idea.
- Serving: Cups hold shape about 40 minutes outside the fridge before softening, so plate close to serving time.
