

Our oven baked fried chicken gives you the crackly, golden crust of deep-fried pieces without a pot of hot oil on the stove. The method relies on a seasoned flour dredge, a buttermilk soak, and a hot oven so the coating sets and crisps while the meat stays tender. You get a weeknight-friendly version of a comfort-food favorite that won’t leave your kitchen greasy.
This recipe is built for consistency. We use bone-in, skin-on thighs and drumsticks because they hold up to the heat and stay moist, and we coat them twice for a thicker shell. If you’ve struggled with soggy oven chicken before, the steps below fix the usual problems. Making this oven baked fried chicken at home is surprisingly straightforward once you know the key steps.
Why You’ll Love These Oven Baked Fried Chicken
- Crunchy coating that holds up for hours, not just minutes after baking.
- Less oil than pan-frying, so cleanup is a single sheet pan.
- Bone-in pieces stay juicy at the center while the outside browns.
- Simple pantry spices, no special equipment beyond your oven.
Ingredients You’ll Need
- 2 lbs bone-in, skin-on chicken thighs and drumsticks
- 1 cup buttermilk
- 1 cup all-purpose flour
- 1/2 cup cornstarch
- 2 tsp paprika
- 1 tsp garlic powder
- 1 tsp onion powder
- 1 tsp salt
- 1/2 tsp black pepper
- 1/4 tsp cayenne pepper
- 2 tbsp olive oil
- 1/2 cup panko breadcrumbs
Ingredient Substitutions
Buttermilk: Replace with 1 cup whole milk mixed with 1 tbsp lemon juice if you don’t keep buttermilk. The acid still tenderizes the meat, though the flavor is slightly less tangy and the crust a bit less rich. Let the mix sit for 5 minutes before using so it thickens slightly. The oven baked fried chicken works well for weeknight cooking when time is limited.
All-purpose flour: Swap with an equal weight of rice flour for a gluten-free coating that crisps sharply. Rice flour browns faster, so check the pieces at the 30-minute mark instead of 40. The texture is lighter and a little more brittle than wheat flour. Storing leftover oven baked fried chicken correctly keeps it tasting good for days.
Panko breadcrumbs: Use crushed cornflakes in the same 1/2 cup amount for a sweeter, rougher crunch. Cornflakes darken quickly, so drop the oven by 10°C if you swap. The shell will sound louder when you bite it but may loosen near the bone. For the best results with this oven baked fried chicken, read through all the steps before starting.
Cayenne pepper: Omit it and add 1 tsp smoked paprika if you want zero heat with a deeper wood-smoke note. The color stays red but the back-of-throat burn disappears. This is a good move for kids or mild palates.
Step-by-Step Instructions
- Place the chicken in a bowl with buttermilk and 1/2 tsp salt. Cover and refrigerate for at least 4 hours or overnight so the meat absorbs moisture and the surface breaks down for better grip.
- Heat the oven to 200°C / 400°F and set a rack on a rimmed sheet pan. The rack lifts the pieces so hot air hits all sides and the bottom doesn’t steam.
- Mix flour, cornstarch, paprika, garlic powder, onion powder, remaining salt, black pepper, and cayenne in a shallow dish. Stir in panko and olive oil until the crumbs look pebbly and separate.
- Take each piece from the buttermilk, let extra drip off, then press firmly into the dry mix until fully coated. Rest coated pieces on a plate for 5 minutes so the layer adheres.
- Arrange the chicken on the rack with space between each piece. Never crowd the pan or the steam will soften the crust before it sets.
- Bake for 25–30 minutes until the thickest part reads 74°C / 165°F and the coating is golden and crispy. Flip halfway so both faces brown evenly.
Pro Tips
Dry the chicken skin with paper towels before the buttermilk bath so the liquid coats instead of sliding off. A damp surface weakens the bond between meat and crust.
Use a wire rack rather than a flat tray; the lifted air flow is the main reason this chicken milanese style works in the oven. Closed surfaces trap moisture under the breading.
Check doneness with a probe thermometer instead of cutting in early; opening the oven drops heat and slows crisping. The oven roasting guides at Food Network confirm 74°C / 165°F as the safe poultry mark.
Add the olive oil to the crumb mix so the panko toasts instead of drying to a pale shell. Without that fat the top stays soft even after full bake time.
Common Mistakes to Avoid
Skipping the rest after coating leads to bare patches where the breading slides off during the flip. Give the chicken parmigiana style layer those few minutes to set.
Using skinless pieces means less fat under the crust, so the coating can taste dry. Skin-on thighs render slowly and feed the crisp from beneath.
Baking at too low a temperature steams the flour instead of browning it. Stay at 200°C / 400°F or the shell turns grey and chewy rather than snappy.
Serving Suggestions
Plate the chicken with twice baked potato for a full comfort meal, or slice and lay over a simple slaw. A squeeze of lemon cuts the fried richness. For a lighter plate, pair with artichoke hearts roasted with the same spices.
Storage and Reheating
Refrigerate leftovers in an airtight container for up to 3 days. Keep the pieces in a single layer so the crust doesn’t trap steam and go soft. Reheat in a 180°C / 350°F oven for 12–15 minutes until the center hits 74°C / 165°F again. Freezing works for up to 2 months if wrapped tight; thaw overnight before reheating.
Recipe Variations
Spicy Nashville Style
After baking, brush the hot pieces with a mix of 2 tbsp melted butter and 1 tbsp cayenne. The surface turns deep red and carries a steady burn that builds after the first bite. Serve with white bread underneath to catch the drips.
Herb Lemon Version
Add 1 tbsp dried thyme and the zest of one lemon to the flour mix. The crust smells brighter and the citrus keeps the fat from feeling heavy. This pairs well with garlic salmon style sides.
Cheese Crust Swap
Blend 1/4 cup grated parmesan into the panko for a salty, browned shell. The cheese crisps faster than breadcrumbs, so check at 25 minutes. You get a result close to caesar chicken bakes without the sauce step.
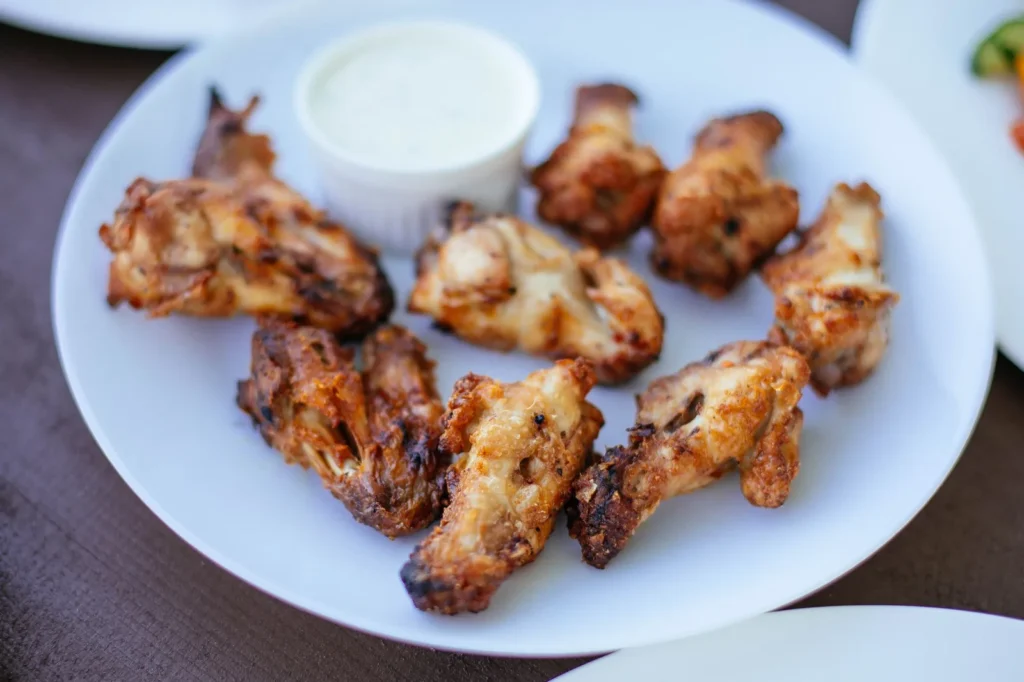

Oven Baked Fried Chicken
Description
This oven baked fried chicken delivers a crackly, golden crust and juicy meat using a buttermilk soak and double coating. It's a weeknight-friendly comfort food that stays crisp for hours with easy sheet-pan cleanup.
Ingredients
Instructions
-
Buttermilk Soak Chicken
Place the chicken in a bowl with the buttermilk and 1/2 tsp salt. Cover and refrigerate for at least 4 hours or overnight so the meat absorbs moisture and the surface breaks down for better grip on the coating.
-
Preheat and Rack Setup
Heat the oven to 200°C / 400°F and set a wire rack on a rimmed sheet pan. The rack lifts the pieces so hot air hits all sides and the bottom doesn't steam during baking.
-
Mix Dry Coating
Mix flour, cornstarch, paprika, garlic powder, onion powder, remaining salt, black pepper, and cayenne in a shallow dish. Stir in panko and olive oil until the crumbs look pebbly and separate for a crisper shell.
-
Coat Chicken Pieces
Take each piece from the buttermilk, let extra drip off, then press firmly into the dry mix until fully coated on all surfaces. Use your hands to pack the crumbs so the layer adheres well before the next step.
-
Rest Coated Chicken
Rest coated pieces on a plate for 5 minutes so the layer adheres and won't slide off later. This short pause sets the breading before it hits the hot oven air.
-
Arrange on Rack
Arrange the chicken on the rack with space between each piece so air flows freely. Never crowd the pan or the steam will soften the crust before it sets and browns.
-
Bake and Flip
Bake for 25–30 minutes at 200°C / 400°F until the thickest part reads 74°C / 165°F and the coating is golden and crispy. Flip halfway through so both faces brown evenly and the center reaches the safe temperature.
Nutrition Facts
Servings 4
- Amount Per Serving
- Calories 350kcal
- % Daily Value *
- Total Fat 12g19%
- Saturated Fat 4g20%
- Cholesterol 60mg20%
- Sodium 480mg20%
- Total Carbohydrate 38g13%
- Dietary Fiber 3g12%
- Sugars 6g
- Protein 22g44%
* Percent Daily Values are based on a 2,000 calorie diet. Your daily value may be higher or lower depending on your calorie needs.
Note
- Storage: Refrigerate leftovers in an airtight container in a single layer for up to 3 days; keep within 2 hours of cooking.
- Reheating: Reheat in a 180°C / 350°F oven for 12–15 minutes until the center hits 74°C / 165°F and do not reheat the same portion more than once.
- Pro tip: Dry the chicken skin with paper towels before the buttermilk bath so the liquid coats instead of sliding off.
- Side idea: Pair with artichoke hearts roasted with the same spices for a lighter plate.
