

An oreo ice cream recipe should be the easiest win in your freezer, not a project that needs an ice cream machine or a dozen steps. This version uses four supermarket ingredients and a two-stage whip that traps air so the texture stays scoopable instead of turning into a brick. You get a dense, cold cookies-and-cream base where the wafer stays crunchy and the filling melts into the dairy like a built-in swirl.
The method below skips the custard stage entirely, which matters because egg-free ice cream holds its softness longer once frozen. We use sweetened condensed milk as the structural sweetener and whipped cream as the air pocket source, a combination that sets firm but never glassy. If you have a loaf pan and a hand mixer, you already own every tool the process requires. If you enjoyed this, our irish cream liqueur is worth trying next. Making this oreo ice cream at home is surprisingly straightforward once you know the key steps.
Why You’ll Love These Oreo Ice Cream
- Four ingredients only, none of them specialty items or hard-to-find additives.
- No ice cream machine, so cleanup is one bowl and one pan.
- Wafer pieces stay crisp for weeks because they’re folded in last, not cooked.
- Ratio scales cleanly — double everything and you fill a 9×5 pan with no formula change.
- Kid-safe texture since there’s no raw egg or alcohol in the base.
Ingredients You’ll Need
- 2 cups cold heavy whipping cream (36–40% fat), straight from the fridge
- 1 can (14 oz / 397 g) sweetened condensed milk, room temperature
- 22 standard Oreo cookies (about 245 g), 16 crushed, 6 left chunky
- 1 tsp pure vanilla extract, not imitation for cleaner dairy note
The cold cream whips faster and holds peaks longer than cream warmed to room temp, which is why temperature is listed and not optional. Condensed milk is the only sweetener, so don’t substitute granulated sugar without changing the freeze structure entirely. The oreo ice cream works well for weeknight cooking when time is limited.






Ingredient Substitutions
Heavy whipping cream: Replace with an equal volume of coconut cream whipped from a chilled can for a dairy-free base. Coconut cream whips looser than dairy, so reduce condensed milk by 2 tbsp to keep the pan from softening too much in the freezer. Expect a faint coconut note that sits behind the vanilla rather than a neutral cream taste. Storing leftover oreo ice cream correctly keeps it tasting good for days.
Sweetened condensed milk: Swap for 1 cup maple syrup plus 1/3 cup powdered milk if you want a less processed sweetener. The water content in maple raises freeze time by about 90 minutes and the scoop will be stickier at room temp. Color shifts slightly amber but the cookie crunch reads the same.
Oreo cookies: Use any chocolate sandwich cookie at equal weight if Oreos are unavailable. Store-brand wafers are thinner, so crush 18 instead of 16 to keep the same cookie-to-cream ratio. Avoid filled chocolate wafers without the cream center because you lose the signature tangy middle.
Vanilla extract: Replace with 1/2 tsp almond extract for a nutty background that pairs well with the cocoa wafer. Almond is stronger than vanilla, so halve the amount or the cookie flavor gets buried. The finished scoop smells like a cookies-and-cream macaron rather than plain cream. For another easy option, check out our prawn pil pil.
Step-by-Step Instructions
- Pour 2 cups cold heavy cream into a chilled metal bowl and whip on medium-high speed for 3 to 4 minutes until stiff peaks hold when the beater lifts. Stop at stiff, not curdled, or the base turns grainy.
- Add 14 oz condensed milk and 1 tsp vanilla to a separate bowl and stir 30 seconds until smooth and uniform with no streaks.
- Fold one-third of the whipped cream into the condensed milk with a spatula to loosen it, then fold in the remaining cream in two additions until no white streaks remain. Use a light hand so the air stays trapped.
- Crush 16 cookies into pea-sized pieces and fold in, then add 6 roughly broken cookies for larger chunks distributed through the mix.
- Scrape the base into a 9×5 loaf pan, smooth the top with a spatula, and cover tightly with foil.
- Freeze 6 hours on a flat shelf until the center resists a finger press. A tilted pan gives you uneven thaw lines, so keep it level.
Pro Tips
Chill the mixing bowl and beater in the freezer for 10 minutes before whipping so the fat stays solid and peaks form faster. Warm bowls are the main reason home whipped cream weeps after freezing.
Crush cookies in a zip bag with a rolling pin instead of a food processor so you control the shard size and avoid cookie dust. Dust dissolves into the base and leaves you with gray specks instead of crunch.
For cleaner slices, run a knife under hot water and wipe between cuts so the wafer pieces don’t drag through the scoop. This matters most if you serve squares rather than rounded scoops.
Read the no-churn technique if you want to see how condensed milk ratios behave across other frozen desserts. The same air-vs-sugar balance applies when you swap mix-ins.
Common Mistakes to Avoid
Using cream at room temperature makes whipping take twice as long and the peaks collapse when folded, giving a dense slab. Keep the carton in the fridge until the minute you pour.
Overfolding the cream after the cookies go in breaks the air cells and pushes the wafer dust to the bottom. Stop as soon as the mix looks uniform and resist the urge to smooth it more.
Freezing in a container deeper than 9×5 adds 2 to 3 hours to set time and the center stays soft while the edges harden. Match the pan depth to the batch or cut the recipe down.
Skipping the foil lid lets freezer odor soak into the dairy and forms ice crystals on top. Press the foil directly onto the surface, not just over the rim.
Serving Suggestions
Scoop into a waffle cone and press an extra cookie half on the side so the crunch echoes the mix-in. A dole whip alongside adds a fruit contrast that cuts the cocoa richness on a hot day.
Layer quenelles between almond rings for a plated dessert that looks structured without baking. The neutral nut base lets the cookies-and-cream flavor lead.
For a party bar, set the pan beside fruit dip and let guests build sundae cups with fresh berries. The tart dip balances the sweet condensed milk base.
Storage and Reheating
Keep the covered pan in the freezer for up to 2 weeks before the wafer softens past a pleasant chew. After that the cookies taste stale even though the dairy is still safe.
Do not refreeze melted portions because the emulsion separates and turns icy. If it softens at a party, scoop what you need and return the rest within 30 minutes.
There’s no reheating step — this is a frozen dessert. Let a scoop sit at room temp for 2 minutes before serving if your freezer runs cold and the spoon won’t cut cleanly.
Recipe Variations
Mint Version
Add 1/4 tsp peppermint extract with the vanilla and swap 6 cookies for mint Oreos if available. The cool note makes the cocoa read like a thin-mint scoop without changing freeze time.
Boozy Scoop
Stir 2 tbsp coffee liqueur into the condensed milk before folding for a grown-up base that stays slightly softer. The alcohol lowers the freeze point, so add 45 minutes to set time.
Double Chocolate
Fold 2 tbsp unsweetened cocoa into the whipped cream at the stiff-peak stage for a darker base behind the cookies. Use regular Oreos, not double-stuffed, or the sweetness tips too high.
Peanut Butter Swirl
Warm 3 tbsp peanut butter and ribbon it through the pan with a knife after step five for salty veins. The swirl stays distinct because the base is already cold and firm enough to hold lines. Pair a scoop with turkey burgers at a cookout for a salty-sweet close.
Yes, this oreo ice cream recipe freezes solid for up to 2 weeks without an ice cream machine. The condensed milk base keeps it scoopable because it holds less free water than a custard made with milk alone.
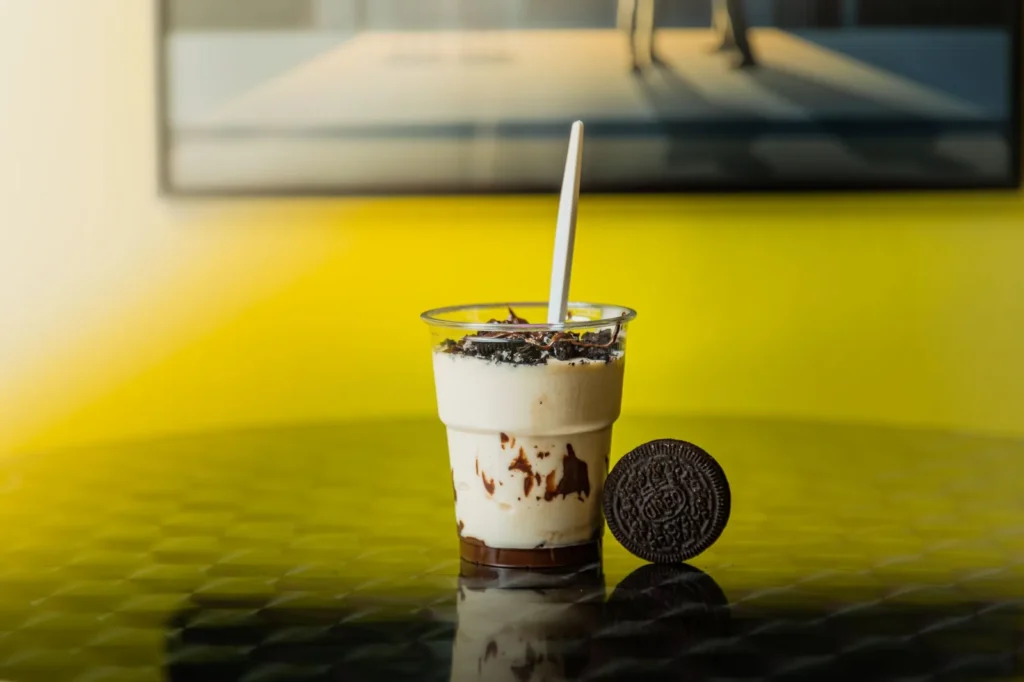

Oreo Ice Cream
Description
This easy no-churn Oreo ice cream uses just four supermarket ingredients and a two-stage whip to trap air for a scoopable, egg-free frozen dessert.
The wafer stays crunchy while the filling melts into the dairy like a built-in swirl, all without an ice cream machine.
Ingredients
Instructions
-
Whip the cold cream
Pour 2 cups cold heavy cream into a chilled metal bowl and whip on medium-high speed for 3 to 4 minutes until stiff peaks hold when the beater lifts. Stop at stiff, not curdled, or the base turns grainy and loses its airy structure.
-
Mix condensed milk base
Add 14 oz condensed milk and 1 tsp vanilla to a separate bowl and stir for 30 seconds until smooth and uniform with no streaks. This room-temperature sweetened base will hold the freeze structure without any custard stage.
-
Fold in whipped cream
Fold one-third of the whipped cream into the condensed milk with a spatula to loosen it, then fold in the remaining cream in two additions until no white streaks remain. Use a light hand so the air stays trapped and the texture stays scoopable rather than dense.
-
Crush and fold cookies
Crush 16 cookies into pea-sized pieces and fold in, then add 6 roughly broken cookies for larger chunks distributed through the mix. Folding the wafers in last keeps them crisp instead of dissolving into gray specks.
-
Pan and cover
Scrape the base into a 9x5 loaf pan, smooth the top with a spatula, and cover tightly with foil pressed to the surface. Keep the pan level on a flat freezer shelf so you avoid uneven thaw lines and ice crystals on top.
-
Freeze until set
Freeze for 6 hours on a flat shelf until the center resists a finger press and feels firm throughout. A tilted pan gives uneven texture, so confirm the surface is level before walking away.
Nutrition Facts
Servings 8
- Amount Per Serving
- Calories 350kcal
- % Daily Value *
- Total Fat 22g34%
- Saturated Fat 14g70%
- Cholesterol 70mg24%
- Sodium 180mg8%
- Total Carbohydrate 34g12%
- Dietary Fiber 1g4%
- Sugars 27g
- Protein 5g10%
* Percent Daily Values are based on a 2,000 calorie diet. Your daily value may be higher or lower depending on your calorie needs.
Note
- Storage: Keep the covered pan in the freezer for up to 2 weeks; return softened portions within 30 minutes and do not refreeze melted scoops.
- Make ahead: Chill the mixing bowl and beater for 10 minutes before whipping so peaks form faster and the cream does not weep.
- Serving tip: Pair a scoop with our fruit dip at a party bar for a tart balance to the sweet base.
- Pro tip: Run a knife under hot water and wipe between cuts for clean squares that don't drag wafer pieces.
