

A good lemonade popsicles recipe gives you a frozen treat that hits the right balance of tart and sweet without needing an ice cream machine. These popsicles use real lemon juice, a light simple syrup, and water so the ice crystals stay small and the texture stays smooth instead of chalky. You’ll end up with a make-ahead dessert that takes about ten minutes of active work and freezes solid in a standard pop mold.
The method here skips concentrated store lemonade because those mixes leave a waxy aftertaste and uneven sweetness. By building the base from squeezed lemons, sugar dissolved on the stove, and cold water, you control the acid level and avoid the bitter pith note that over-steeped zest can cause. This lemonade popsicles recipe scales cleanly whether you’re filling six molds or two dozen. If you enjoyed this, our roasted lemonade copycat is worth trying next.
Why You’ll Love These Lemonade Popsicles
- Only four ingredients, none of which need a special trip to a specialty store.
- Small ice crystals from a quick stir during freezing keep the pop from turning icy.
- Adjustable sweetness by tasting the base before it goes into the molds.
- Naturally freeze for up to 2 months without texture loss if wrapped well.
- Kid friendly to pour and a calm alternative to slushy drinks on hot days.
Ingredients You’ll Need
- 1 cup fresh lemon juice (about 4 to 6 lemons), strained to remove pulp and seeds.
- 3/4 cup granulated sugar for the simple syrup base.
- 3/4 cup water used to dissolve the sugar into a light syrup.
- 2 cups cold filtered water to dilute the concentrate into pop base.
- 1 tbsp lemon zest, finely grated, optional for stronger aroma.
Ingredient Substitutions
Granulated sugar: Replace with an equal weight of honey if you want a rounder, floral sweetness. Honey is about 20 percent water, so cut the cold filtered water by 2 tablespoons to keep the base from freezing too soft. The pop will taste slightly less sharp and will brown the mold surface less, though honey can mask delicate lemon notes if you use more than the swap ratio. Making this lemonade popsicles at home is surprisingly straightforward once you know the key steps.
Fresh lemon juice: Use bottled 100 percent lemon juice at a 1-to-1 volume swap when fresh fruit is out of season. Bottled juice lacks the volatile oils from the peel, so add the optional zest or the pop reads flat. Expect a cleaner but less complex sour edge and a paler yellow color in the finished mold. The lemonade popsicles works well for weeknight cooking when time is limited.
Filtered water: Swap with chilled peach lemonade for a fruit-layer twist instead of plain dilution. The added peach solids mean you should strain twice so the mold doesn’t clog with fiber. Freeze time stays the same but the pop carries a soft stone-fruit finish behind the lemon.
Lemon zest: Replace with 1 tsp finely crushed dried lemon peel if fresh zest isn’t available. Dried peel is more concentrated, so use half the amount to avoid a perfume-heavy bite. The aroma stays bright but the texture gets mildly speckled rather than uniformly pale.
Step-by-Step Instructions
- Combine 3/4 cup sugar and 3/4 cup water in a small saucepan over medium-low heat. Stir until the sugar fully dissolves and the liquid turns clear, about 3 minutes, then remove from heat and let cool to room temperature.
- Juice the lemons and strain the liquid through a fine mesh sieve into a pitcher. You need exactly 1 cup of juice with no seeds or large pulp pieces.
- Add the cooled syrup, 2 cups cold filtered water, and optional zest to the pitcher. Stir and taste; the base should be tart but not mouth-puckering before freezing.
- Pour the mixture into pop molds leaving 1/4 inch headspace at the top because liquid expands as it freezes. Place sticks in according to mold instructions.
- Freeze for 1 hour, then open the mold and slide sticks straight if they lean. This prevents frozen-in crooked handles that break on unmolding.
- Continue freezing 4 to 6 hours until the pop is solid and doesn’t give under light finger pressure. Unmold under warm running water for 10 seconds before serving.
Pro Tips
Stir the base once at the 1-hour mark and again at 2 hours to break early crystal clusters; this is the main difference between a smooth pop and a brittle one. The technique is similar to how cooking methods for granita work by interrupting freeze structure.
Use a pitcher with a spout so you don’t splash acid onto the mold rim where it sticks and stains plastic. A measured pour also keeps headspace even across all cavities.
If your mold has no built-in stick guide, cover the top with foil and poke sticks through; this holds them centered while the base firms. Centered sticks make the pop easier to grip for small hands.
Chill the base in the fridge for 30 minutes before pouring so the mold doesn’t warm and slow the first freeze stage. Cold start means the outer layer sets before sediment sinks.
Common Mistakes to Avoid
Adding sticks immediately and walking away leads to tilted handles because the liquid is still loose. The fix is the mid-freeze straighten step described above so the stick sets vertical in semi-solid base.
Over-zesting the lemon into the white pith brings bitterness that concentrates as water freezes out. Stay with the yellow outer layer only and weigh the zest if you’re scaling the lemonade popsicles recipe past two batches.
Skipping the simple syrup and dumping dry sugar into cold water leaves gritty grains that never dissolve in the frozen pop. Always heat the sugar solution first even though the rest of the method is no-cook. For another easy option, check out our pineapple upside down.
Serving Suggestions
Unmold the pops right before eating and serve on a chilled tray so they don’t weep at room temperature during a backyard meal. A light roasted lemonade pitcher beside them gives guests a drink-and-pop pair with the same citrus thread.
For a dessert plate, lay the pop beside mini egg cookies so the sweet bakery note offsets the sour ice. Keep the cookies in a separate dish since condensation from the pop will soften them.
Storage and Reheating
These are a frozen product, so reheating doesn’t apply; store unmolded pops in a single layer inside an airtight container with up to 2 months freezer life. Wrap each pop in wax paper before bagging to stop them fusing into a block.
Keep molded but uncut pops in the freezer for up to 3 days if you plan to serve within the week, though flavor stays best in the first month. Never leave finished pops unrefrigerated for more than 2 hours or they soften and pick up freezer odors.
Recipe Variations
Herb Version
Add 4 lightly crushed mint leaves to the warm syrup and steep 5 minutes before straining. The pop gets a cool backnote that reads clean rather than perfumed if you remove the leaves early. Skip the zest in this version so the herb stays the only secondary aroma.
Berry Swirl
Pour half the plain base, add a spoon of peach lemonade concentrate, then top with remaining base for a two-tone freeze. The fruit layer stays slightly softer so cut freeze time by 30 minutes on the final set. Use a toothpick to draw one line through the layers before they firm.
Less Sweet Option
Drop the syrup sugar to 1/2 cup and add 1 tbsp corn syrup to limit ice crystal size without raising sweetness. The pop stays tart and firm because corn syrup interferes with crystallization at low sugar levels. Taste before freezing since less sugar means the lemon front note is more aggressive.
Sparkling Style
Replace 1 cup of cold filtered water with chilled club soda poured gently to keep bubbles. Freeze extra 1 hour since carbonation slows solid set at the edges. The texture turns lightly porous and the sour note feels brighter from the CO2.
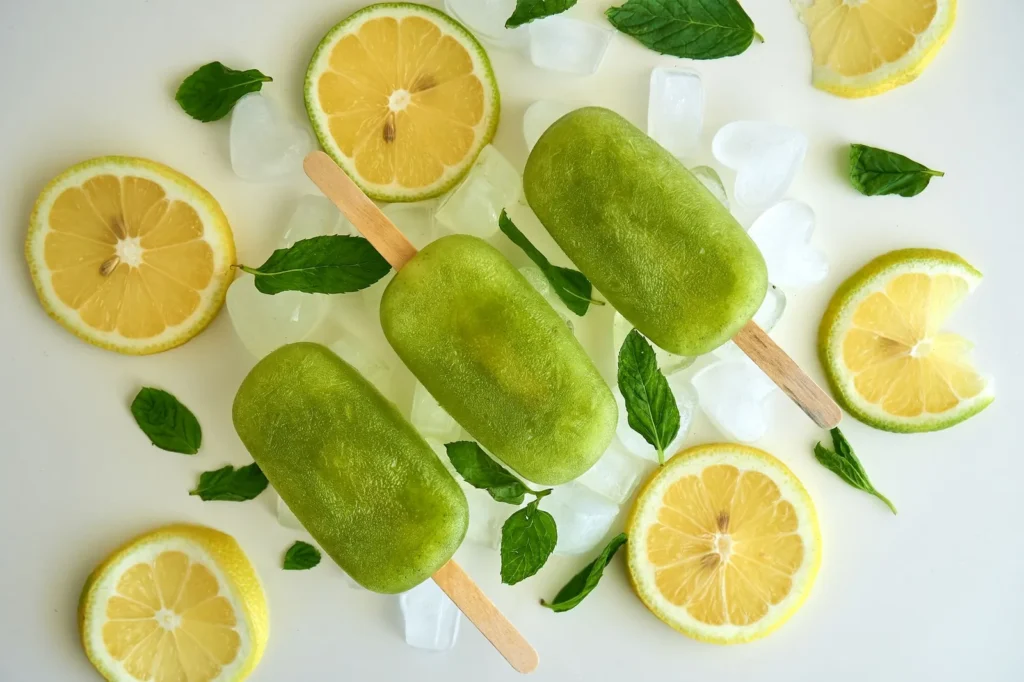

Lemonade Popsicles
Description
These lemonade popsicles use real lemon juice and a light simple syrup for a smooth, non-chalky frozen dessert. They take about ten minutes of active work and freeze solid in a standard pop mold without any special equipment.
Ingredients
Instructions
-
Make simple syrup
Combine 3/4 cup sugar and 3/4 cup water in a small saucepan over medium-low heat. Stir until the sugar fully dissolves and the liquid turns clear, about 3 minutes, then remove from heat and let cool to room temperature before using.
-
Juice and strain lemons
Juice the lemons and strain the liquid through a fine mesh sieve into a pitcher. You need exactly 1 cup of juice with no seeds or large pulp pieces for the base to stay smooth.
-
Mix pop base
Add the cooled syrup, 2 cups cold filtered water, and optional 1 tbsp zest to the pitcher with the lemon juice. Stir and taste; the base should be tart but not mouth-puckering before freezing so adjust sweetness if needed.
-
Fill pop molds
Pour the mixture into pop molds leaving 1/4 inch headspace at the top because liquid expands as it freezes. Place sticks in according to mold instructions so they are positioned for easy unmolding later.
-
Initial freeze
Freeze for 1 hour in a standard pop mold until the base is partially set but not solid. This stage prepares the pop for stick straightening and early crystal control.
-
Straighten sticks
Open the mold and slide sticks straight if they lean after the first hour of freezing. This prevents frozen-in crooked handles that break on unmolding when the pop is fully solid.
-
Continue freezing
Continue freezing 4 to 6 hours until the pop is solid and doesn't give under light finger pressure. The longer time ensures no soft center remains in the mold.
-
Unmold and serve
Unmold under warm running water for 10 seconds before serving to release the pop cleanly. Serve immediately on a chilled tray so they don't weep at room temperature.
Nutrition Facts
Servings 6
- Amount Per Serving
- Calories 120kcal
- % Daily Value *
- Sodium 5mg1%
- Total Carbohydrate 31g11%
- Sugars 28g
* Percent Daily Values are based on a 2,000 calorie diet. Your daily value may be higher or lower depending on your calorie needs.
Note
- Storage: Keep molded uncut pops in the freezer up to 3 days, or wrap unmolded pops and freeze up to 2 months in an airtight container.
- Make ahead: Chill the base 30 minutes before pouring so the mold doesn't warm and slow the first freeze stage.
- Pro tip: Stir the base once at the 1-hour and again at 2-hour mark to break crystal clusters, like our peach lemonade twist suggests for smooth texture.
- Food safety: Never leave finished pops unrefrigerated more than 2 hours or they soften and pick up freezer odors.
