

Healthy greek yogurt pancakes are the weekday breakfast fix when you want something warm, filling, and quick without reaching for a box mix. They use plain yogurt as the main liquid, which cuts the need for buttermilk and adds protein in every bite. This version lands at about 12 grams of protein per serving and cooks in one nonstick skillet.
The batter comes together in one bowl and rests while the pan heats, so you’re flipping in under ten minutes. You get a tender crumb with lightly crisp edges, not the rubbery texture people fear from yogurt bakes. Below is the exact method that keeps them lifty instead of flat. If you enjoyed this, our marry me tofu is worth trying next. Making this healthy greek yogurt pancakes at home is surprisingly straightforward once you know the key steps.
Why You’ll Love These Healthy Greek Yogurt Pancakes
- Five staple ingredients you likely already keep in the fridge and pantry.
- Around 12 grams of protein per serving from egg and yogurt alone.
- No refined sugar needed; the toppings carry the sweetness.
- One bowl, one skillet, and roughly 20 minutes start to finish.
- Freezes cleanly, so a double batch covers busy mornings.
Ingredients You’ll Need
- 1 cup plain Greek yogurt (whole or 2% works best for texture)
- 2 large eggs
- 1/2 cup all-purpose flour
- 1 teaspoon baking powder
- 1/4 teaspoon fine salt
- 1 tablespoon maple syrup (optional, for slight sweetness)
- 1 tablespoon butter for the pan
The yogurt brings moisture and acid that reacts with baking powder for lift. Eggs hold the structure, while flour keeps the batter thick enough to mound on the spoon. The healthy greek yogurt pancakes works well for weeknight cooking when time is limited.



Ingredient Substitutions
Plain Greek yogurt: Replace with an equal weight of plain skyr for a thicker, tangier result. Skyr holds more protein but less water, so the batter stiffens and you may need 1 tablespoon of milk to loosen it. Expect a denser pancake with a sharper dairy note and slower browning. Storing leftover healthy greek yogurt pancakes correctly keeps it tasting good for days.
All-purpose flour: Swap with an equal weight of oat flour for a gluten-free version. Oat flour absorbs liquid faster, so rest the batter 5 minutes longer before cooking. The crumb turns softer and slightly sandy, and the surface browns a shade darker.
Maple syrup: Use an equal amount of honey if you prefer a floral note. Honey weighs more per spoon, so the batter spreads a bit thinner and crisps quicker at the edges. Skip it entirely for a savory pancake that pairs with tzatziki sauce.
Butter for the pan: Replace with 1 tablespoon of neutral oil to lower saturated fat. Oil prevents sticking the same way but won’t add the toasty flavor butter gives the first side. Watch the heat closely since oil smokes sooner than butter.
Step-by-Step Instructions
- Whisk 1 cup plain Greek yogurt with 2 large eggs in a medium bowl until smooth and no streaks remain.
- Add 1/2 cup all-purpose flour, 1 teaspoon baking powder, 1/4 teaspoon fine salt, and 1 tablespoon maple syrup if using. Stir do not overmix until just combined with a few small lumps.
- Rest the batter 5 minutes so the baking powder activates and the flour hydrates. The batter should look thick and scoopable.
- Heat a nonstick skillet on medium-low heat and add 1 tablespoon butter, swirling to coat the base.
- Scoop 2 tablespoons of batter per pancake, leaving space between each. Cook until just set edges and bubbles break the surface, about 2 minutes.
- Flip and cook the second side until golden and crispy, about 90 seconds more. Keep finished pancakes warm in a low oven.
Pro Tips
Rest the batter even if you’re in a rush; that pause is what gives healthy greek yogurt pancakes their height. A thin batter spreads and bakes flat, so treat the five-minute wait as non-negotiable.
Use a measured scoop so every pancake finishes at the same time. A 2-tablespoon cookie scoop drops even rounds that brown evenly instead of ragged edges cooking faster.
Keep the skillet at medium-low heat throughout. Yogurt batter browns on the outside before the center sets if the pan runs hot, leaving a gummy middle.
Wipe the pan with a fresh butter dab between batches so the next pancake doesn’t stick to leftover browned bits. For more on heat control, see pan cooking techniques from Bon Appetit.
Common Mistakes to Avoid
Overmixing the batter after the flour goes in develops gluten and yields chewy pancakes. Stop stirring the moment streaks disappear and accept a few lumps.
Crowding the skillet drops the temperature and steams the bottoms instead of crisping them. never crowd the pan; cook in batches with an inch of space around each round.
Skipping the rest step lets the baking powder fizz out before it hits the heat. You’ll end up with dense discs rather than the open crumb these pancakes should have.
Serving Suggestions
Stack three pancakes and top with sliced banana and a drizzle of maple syrup for a balanced sweet breakfast. A spoon of yogurt parfait on the side adds fruit and crunch.
For a savory plate, skip the syrup and serve with soft scrambled eggs and a few cherry tomatoes. The tang of the pancake matches salty eggs better than a sweet version would.
Pair a short stack with almond smoothie when you need breakfast on the run. The drink carries protein and the pancakes carry the fork-and-knife comfort.
Storage and Reheating
Cooled pancakes keep in an airtight container in the fridge for up to 3 days. Layer them with parchment so they don’t fuse together when chilled.
Freeze stacked pancakes with parchment between each for freeze for up to 2 months. Reheat from frozen in a toaster on medium until steam rises and the center feels hot.
Do not leave cooked pancakes out longer than 2 hours at room temperature. Dairy in the batter makes them a faster spoiler than standard flour-only versions.
Recipe Variations
Blueberry Fold
Gently fold 1/2 cup fresh blueberries into the rested batter before cooking. The berries burst under heat and add pockets of tart juice, so reduce any syrup topping to avoid oversweetening. Cook medium-low heat a tad longer to ensure the fruit-side sets.
Protein Boost
Add 1 scoop unflavored whey to the dry mix for an extra 20 grams of protein per batch. The powder drinks liquid, so add 1 tablespoon milk if the batter looks stiff. Expect a firmer bite and a lighter color.
Savory Herb
Stir 1 tablespoon chopped dill and 1/4 cup grated zucchini into the batter, and skip the maple syrup. The pancake turns moist with a green fleck and pairs with caprese flatbread for brunch. Squeeze lemon on top before serving.
Cocoa Version
Replace 1 tablespoon of flour with unsweetened cocoa powder for a chocolate breakfast pancake. The acid in yogurt smooths the cocoa’s bitterness, so a drizzle of oatmeal cookie smoothie on the side works as the sweet. Watch browning; cocoa darkens fast.
Vegan Swap
Use coconut yogurt and a flax egg (1 tablespoon ground flax plus 3 tablespoons water) in place of dairy yogurt and eggs. The pancake loses some lift and browns slower, so give it 25–30 minutes rest. Texture stays tender but slightly more fragile when flipped.

Healthy Greek Yogurt Pancakes
Description
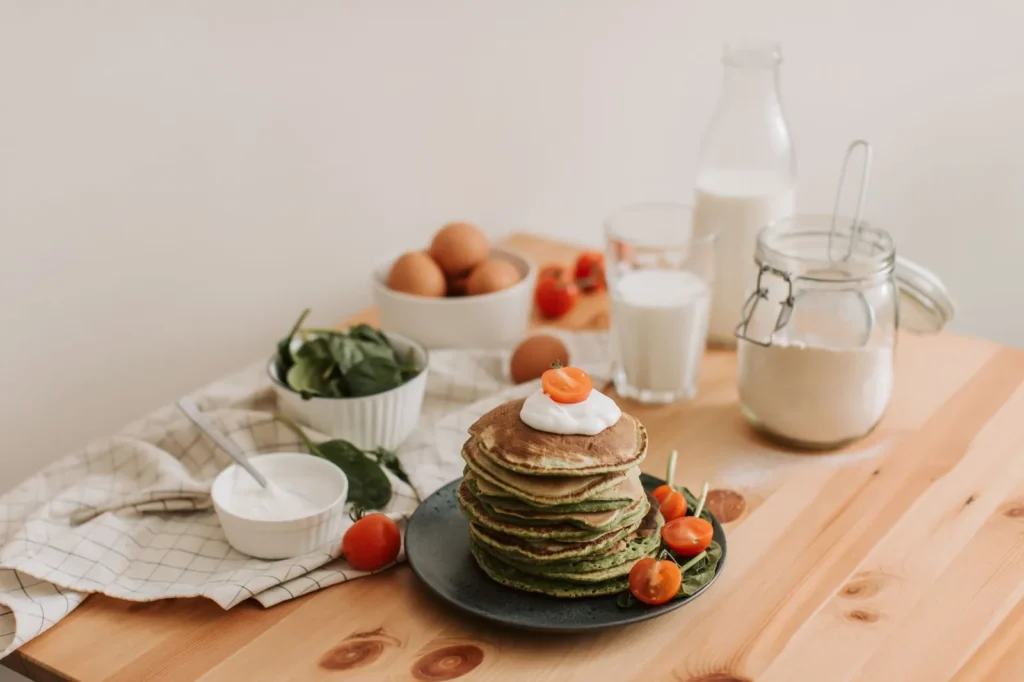
Healthy Greek yogurt pancakes are a quick weekday breakfast using plain yogurt as the main liquid for protein and lift.
They cook in one nonstick skillet with a tender crumb and lightly crisp edges, ready in under ten minutes of flipping.
Ingredients
Instructions
-
Whisk yogurt and eggs
In a medium bowl, whisk 1 cup plain Greek yogurt with 2 large eggs until the mixture is smooth and no streaks remain. This base gives the pancakes their protein and moisture, so take about 30 seconds to fully blend it.
-
Add dry and wet mix
Add 1/2 cup all-purpose flour, 1 teaspoon baking powder, 1/4 teaspoon fine salt, and 1 tablespoon maple syrup if using. Stir gently and do not overmix until just combined with a few small lumps visible in the thick batter.
-
Rest the batter
Let the batter rest for 5 minutes so the baking powder activates and the flour hydrates fully. The batter should look thick and scoopable, holding its shape on the spoon when ready to cook.
-
Heat skillet with butter
Place a nonstick skillet on medium-low heat and add 1 tablespoon butter, swirling to coat the base evenly. The butter should melt and foam slightly without browning before you add the batter.
-
Scoop pancakes into pan
Scoop 2 tablespoons of batter per pancake into the skillet, leaving space between each round. The mounds should hold their shape and not spread thin across the pan.
-
Cook first side
Cook on medium-low until the edges are just set and bubbles break the surface, about 2 minutes. The bottom should be lightly golden when you peek with a spatula before flipping.
-
Flip and cook second side
Flip each pancake and cook the second side until golden and crispy, about 90 seconds more. The pancake is done when both sides are firm and the center springs back lightly to touch.
-
Keep pancakes warm
Move finished pancakes to a low oven to keep them warm while you cook remaining batches. Wipe the pan with a fresh butter dab between batches so the next pancake does not stick to browned bits.
Nutrition Facts
Servings 4
- Amount Per Serving
- Calories 220kcal
- % Daily Value *
- Total Fat 10g16%
- Saturated Fat 5g25%
- Cholesterol 110mg37%
- Sodium 320mg14%
- Total Carbohydrate 18g6%
- Dietary Fiber 1g4%
- Sugars 4g
- Protein 12g24%
* Percent Daily Values are based on a 2,000 calorie diet. Your daily value may be higher or lower depending on your calorie needs.
Note
- Storage: Cooled pancakes keep in an airtight container in the fridge for up to 3 days; layer with parchment so they don't fuse.
- Make ahead: Rest the batter 5 minutes is non-negotiable for height, and a caprese flatbread pairs well for brunch.
- Pro tip: Keep the skillet at medium-low heat so yogurt batter sets inside before browning outside.
- Reheating: Reheat from frozen in a toaster on medium; do not leave cooked pancakes out longer than 2 hours.
