

Garlic chili infused olive oil is a pantry staple that turns plain weeknight cooking into something with real depth. This version uses gentle heat so the garlic softens without browning and the chili wakes up the oil without scorching. You end up with a pourable condiment that works on bread, pasta, roasted vegetables, and proteins.
The method matters more than the ingredient count. Too much heat produces bitter garlic and a harsh chili note, while too little leaves raw flavors behind. Below you’ll find exact ratios, timing cues, and storage rules so the bottle stays safe and tasty for weeks. Making this garlic chili infused olive oil at home is surprisingly straightforward once you know the key steps.
Why You’ll Love These Garlic Chili Infused Olive Oil
- Ready in under 30 minutes with one pan and basic pantry items.
- Customizable heat level by swapping chili type or seed quantity.
- Shelf-stable in the fridge for up to 1 month when stored properly.
- Adds instant savory punch to eggs, grains, and grilled meats.
- Cheaper than store-bought flavored oils with cleaner ingredient control.
Ingredients You’ll Need
- 250 ml extra virgin olive oil – use a mild fruity bottle since harsh oil tastes sharp after heating.
- 8 garlic cloves, peeled and thinly sliced – slicing exposes more surface for flavor transfer.
- 2 dried red chilies, broken into pieces – stems removed to avoid bitterness.
- 1 teaspoon crushed red pepper flakes – adds steady background heat.
- 1 small sprig fresh rosemary (optional) – gives an herbal note that pairs with roasted dishes.
- 1/4 teaspoon fine sea salt – helps preserve and rounds the raw edge off garlic.
Ingredient Substitutions
Extra virgin olive oil: Replace with an equal amount of refined olive oil if you want a more neutral base. Refined oil has a higher smoke point, so you can infuse at a slightly higher temperature without off-flavors. Expect less fruitiness and a lighter color, which some prefer for drizzling on white fish. The garlic chili infused olive oil works well for weeknight cooking when time is limited.





Dried red chilies: Use 1 tablespoon gochugaru for a sweeter, smoky Korean-style heat. Gochugaru disperses fine particles, so strain the oil twice for a clear pour. The flavor reads fruitier than Mediterranean chili and pairs well with chicken noodles. Storing leftover garlic chili infused olive oil correctly keeps it tasting good for days.
Fresh rosemary: Swap for 2 fresh thyme sprigs to get a lemony, less piney aroma. Thyme leaves are small and slip through strainers, so use a coffee filter for the final pass. The finished oil suits mashed potatoes better than rosemary does. For the best results with this garlic chili infused olive oil, read through all the steps before starting.
Crushed red pepper flakes: Replace with 1/2 teaspoon ground cayenne for a tighter, faster heat. Cayenne clouds the oil more than flakes, so let it settle overnight before decanting. Use less if you plan to cook with the oil rather than just finish dishes.
Step-by-Step Instructions
- Pour 250 ml olive oil into a small heavy saucepan and add sliced garlic, chili pieces, pepper flakes, and salt. Place over medium-low heat and watch for the first tiny bubble around the garlic edge.
- Maintain medium-low heat for 12 minutes, stirring every 2 minutes so slices don’t stick. The garlic should turn pale gold and smell toasted, not brown.
- Drop in the rosemary sprig, turn off the burner, and let the pan sit 10 minutes as residual warmth extracts the herb without frying it.
- Strain the mixture through a fine mesh sieve into a heatproof jug, pressing garlic gently with a spoon to release oil. Discard solids or save garlic for mashed potatoes.
- Let the liquid cool to room temperature, about 25 minutes, before pouring into a clean 300 ml glass bottle with a tight lid.
- Label the bottle with the date and place it in the refrigerator. The oil will cloud when cold but clear at room temperature within 15 minutes.
Pro Tips
Keep the pan size small so the oil layer stays shallow; a wide pan evaporates moisture from garlic too fast and risks burning. Use a thermometer if unsure and hold 85°C / 185°F as your target for gentle infusion.
Always cool the oil fully before bottling or the trapped steam condenses and speeds spoilage. A clean bottle run through a dishwasher hot cycle is enough for safe storage.
Save the strained garlic slices and spread them on garlic knots or stir into cooked beans for zero waste.
For deeper technique on safe oil infusions, consult Food Network guides on flavored oil preparation before scaling up batches.
Common Mistakes to Avoid
Heating the oil too high is the main error; garlic browns in seconds past medium-low and turns the batch bitter. If you see brown edges, start over because the taste won’t recover.
Skipping the strain causes bits of garlic to sit in oil at room temperature, which creates botulism risk. Even fridge storage needs solids removed within the same day.
Using old dried chilies that have lost aroma gives a flat heat with no fragrance. Crush one and smell it first; if there’s no pungent note, replace it before cooking.
Serving Suggestions
Drizzle a spoonful over shrimp pasta just before serving to keep the raw garlic brightness intact. The oil floats on top and carries chili across each bite.
Use it as a bread dip with cracked black pepper or brush it on grilled bread before toasting. A little salt on the bread balances the fruitiness of the oil.
Spoon over soft scrambled eggs or white beans for a fast lunch. The heat builds slowly, so start with a small amount and add more at the table.
Storage and Reheating
Refrigerate the sealed bottle and use within up to 1 month for best flavor and safety. Olive oil solidifies when cold but liquefies on the counter without quality loss.
Do not leave the finished oil at room temperature beyond 2 hours total, counting cooling time, since garlic-in-oil is a known hazard if mishandled. Label with the make date so older bottles get used first.
There is no reheating step; bring to room temp and pour. If you want warm oil for a dish, measure what you need and warm 30 seconds in a microwave-safe cup rather than the whole bottle.
Recipe Variations
Lemon Version
Add 3 strips of lemon peel with the garlic at step one and remove before straining. The citrus oil cuts the chili heat and lifts the garlic aroma. Expect a brighter finish that suits fish and steamed greens.
Smoked Chili Version
Replace dried red chilies with 1 teaspoon smoked paprika and 1 chipotle pod for a barbecue-style note. Keep heat at medium-low heat since paprika burns faster than whole chilies. The oil turns deep red and pairs with garlic salmon.
Herb-Heavy Version
Double the rosemary and add 1 bay leaf during the off-heat steep. Strain both after cooling for a woodsy oil that stands up to roasted potatoes and lamb. The flavor is stronger after 2 days in the fridge as herbs settle.
Garlic-Only Version
Omit chili and pepper flakes for a pure pil pil style base. Use 12 garlic cloves for a sweeter, mellow result that’s good on bread alone. The oil stays clear gold and stores the same way.

Garlic Chili Infused Olive Oil
Description
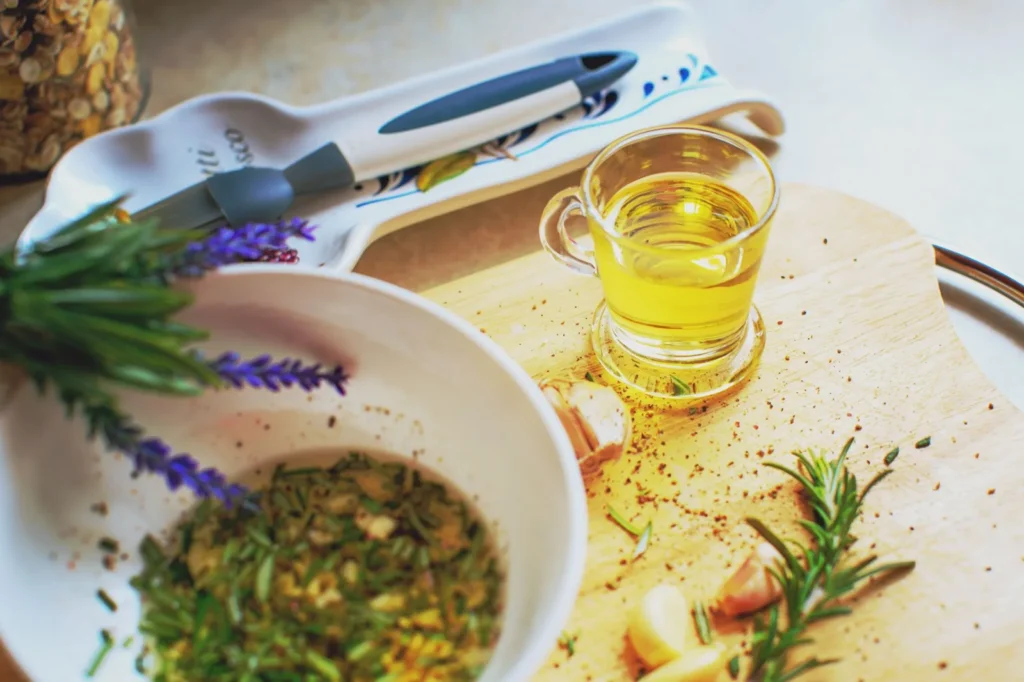
A pourable pantry condiment made by gently infusing olive oil with sliced garlic, dried chilies, and pepper flakes for savory depth. It adds instant punch to bread, pasta, eggs, and roasted vegetables and keeps safely in the fridge for up to a month.
Ingredients
Instructions
-
Combine base ingredients
Pour 250 ml olive oil into a small heavy saucepan and add the sliced garlic, broken chili pieces, pepper flakes, and salt. Use a small pan so the oil layer stays shallow and the garlic moisture does not evaporate too fast. The mixture should look like pale slices suspended in green-gold oil before any heat is applied.
-
Heat gently with bubbles
Place the saucepan over medium-low heat and watch for the first tiny bubble around the garlic edge as your cue to start timing. Hold the temperature near 85°C / 185°F for a gentle infusion that will not scorch the garlic. You should see slow occasional bubbles but no rapid boiling or sizzling.
-
Maintain and stir
Maintain medium-low heat for 12 minutes, stirring every 2 minutes so the slices do not stick to the pan bottom. The garlic should turn pale gold and smell toasted but not brown at any point. If you see brown edges, the batch is bitter and must be started over.
-
Off-heat herb steep
Drop in the rosemary sprig, turn off the burner, and let the pan sit 10 minutes as residual warmth extracts the herb without frying it. The oil will smell lightly piney and the rosemary should look wilted but not crisp. This step builds an herbal note that pairs with roasted dishes.
-
Strain the mixture
Strain the mixture through a fine mesh sieve into a heatproof jug, pressing garlic gently with a spoon to release oil. Discard the solids or save the garlic for mashed potatoes. The strained oil should be clear with a faint red tint from the chili pieces.
-
Cool to room temp
Let the liquid cool to room temperature, about 25 minutes, before bottling so trapped steam does not condense and speed spoilage. The oil will feel neutral to the touch and no longer emit warmth from the jug. Full cooling is required before any lid is tightened.
-
Bottle and label
Pour the cooled oil into a clean 300 ml glass bottle with a tight lid, using a bottle run through a dishwasher hot cycle for safe storage. Label the bottle with the date you made the oil. The filled bottle should leave a small headspace and seal without air leaks.
-
Refrigerate the oil
Place the labeled bottle in the refrigerator where the oil will cloud when cold but clear at room temperature within 15 minutes. Use within up to 1 month for best flavor and safety. Never leave the finished oil at room temperature beyond 2 hours total including cooling time.
Nutrition Facts
Servings 12
- Amount Per Serving
- Calories 450kcal
- % Daily Value *
- Total Fat 45g70%
- Saturated Fat 6g30%
- Sodium 100mg5%
- Total Carbohydrate 4g2%
- Dietary Fiber 1g4%
- Sugars 1g
- Protein 1g2%
* Percent Daily Values are based on a 2,000 calorie diet. Your daily value may be higher or lower depending on your calorie needs.
Note
- Storage: Refrigerate the sealed bottle and use within up to 1 month; never leave at room temperature beyond 2 hours total counting cooling time.
- Pro tip: Use a thermometer to hold 85°C / 185°F for gentle infusion and avoid bitter burnt garlic. For a paired dinner try shrimp pasta with a drizzle.
- Zero waste: Save strained garlic slices and spread on garlic knots or stir into cooked beans instead of discarding.
- Safety: Always cool oil fully before bottling and run the bottle through a hot dishwasher cycle to prevent spoilage.
