

A garlic butter wings recipe should give you crisp skin and a glossy, savory coating without deep frying or a long ingredient list. These wings are baked on a rack so the fat renders and the skin tightens into a light, brittle crust. You end up with a weeknight-friendly batch that tastes like it came off a grill but stays clean in the kitchen.
The method below uses a short dry rest, a moderate oven, and a two-stage butter sauce so the garlic stays sweet instead of burnt. You’ll get a reliable result whether you use drumettes, flats, or a mix of both. The sauce clings because the wings are tossed while still hot, which helps the butter set as it cools slightly. Making this garlic butter wings at home is surprisingly straightforward once you know the key steps.
Why You’ll Love These Garlic Butter Wings
- Crisp skin from baking on a rack, no fryer required
- Garlic stays mild and sweet, never bitter or raw
- Sauce uses pantry staples and comes together in 5 minutes
- Works for game day, dinner, or meal prep portions
- Easy to scale up for a crowd without extra effort
Ingredients You’ll Need
- 2 lbs chicken wings, split into flats and drumettes
- 1 tbsp baking powder (not baking soda)
- 1 tsp fine salt
- 1/2 tsp black pepper
- 6 tbsp unsalted butter
- 6 cloves garlic, minced fine
- 1 tbsp fresh parsley, chopped
- 1/2 tsp paprika
- 1/4 tsp cayenne (optional)
- 1 tbsp lemon juice
Ingredient Substitutions
Unsalted butter: Replace with an equal amount of ghee if you need a lactose-light option. Ghee has a higher smoke point, so the sauce can be warmed a little hotter without browning the milk solids. Expect a slightly nuttier taste and a firmer set at room temperature. The garlic butter wings works well for weeknight cooking when time is limited.








Baking powder: Swap with 1 tsp cornstarch plus 1/2 tsp salt per pound of wings if you’re out. Cornstarch crisps the skin but won’t dry the surface the same way, so the crust is thinner and less brittle. You’ll want to pat the wings very dry first to make up the difference. Storing leftover garlic butter wings correctly keeps it tasting good for days.
Fresh parsley: Use 1 tsp dried parsley instead of the fresh amount. Dried herbs disperse more evenly in the butter but lose the fresh, grassy note at the end. Add it with the garlic so it has time to soften in the fat.
Lemon juice: Replace with 1 tbsp white wine vinegar for a sharper edge. Vinegar cuts the butter richness faster and leaves a cleaner finish on the palate. Use slightly less if you don’t want the sauce to taste acidic.
Step-by-Step Instructions
- Pat the wings completely dry with paper towels, then toss with baking powder, salt, and pepper in a large bowl until coated.
- Place wings on a wire rack set over a rimmed sheet pan and rest uncovered in the fridge for 30 minutes to dry the skin.
- Bake at 200°C / 400°F for 25–30 minutes, then flip and bake another 20–25 minutes until golden and crispy.
- Melt butter in a small pan over medium-low heat, add garlic and paprika, and cook 2 minutes until fragrant but not browned.
- Stir in lemon juice, parsley, and cayenne, then remove from heat and keep warm.
- Toss the hot wings in the garlic butter sauce in a large bowl until evenly coated, then serve immediately.
Pro Tips
Dry the wings thoroughly before the baking powder goes on, since surface moisture steams the skin instead of crisping it. A wire rack keeps the bottoms from sitting in rendered fat, which is the main reason oven wings turn soggy.
Warm the butter gently and pull it off heat the moment the garlic smells sweet, because burnt garlic turns the whole batch bitter fast. For more on controlled browning, see butter cooking techniques from Bon Appetit.
If you like a saucier wing, double the butter sauce and reserve half for dipping so the coated wings stay crisp. This also helps when serving a crowd that wants varying spice levels.
Let the wings sit 2 minutes after tossing so the butter firms slightly and doesn’t pool at the bottom of the bowl. You can pair them with garlic knots for a themed spread.
Common Mistakes to Avoid
Skipping the fridge rest leaves the skin too wet, so the wings bake pale and rubbery instead of crisp. Even 30 minutes on a rack makes a visible difference in the final texture.
Using baking soda instead of baking powder gives the wings a metallic taste and a dark, soapy finish. Check the label before you measure, since the cans look similar in the pantry.
Overcooking the garlic in the butter is the fastest way to ruin the sauce, because it goes from sweet to acrid in under a minute. Keep the heat at medium-low heat and watch the color.
Serving Suggestions
Plate the wings on a warm tray with celery and a side of blue cheese dip to balance the richness. A crisp butter bean pasta works as a filling side if you’re turning this into dinner.
For a seafood-themed table, garlic butter salmon sits well next to the wings without repeating flavors. Keep the wings the crispy centerpiece and let the salmon add a softer texture.
Storage and Reheating
Store cooled wings in an airtight container in the fridge for up to 3 days, separated from any extra sauce if possible. Reheat in a 190°C / 375°F oven for 10–12 minutes until the skin crisps and the meat reaches 74°C / 165°F internally.
You can freeze the baked, unsauced wings for freeze for up to 2 months in a sealed bag. Thaw overnight in the fridge, then toss with fresh garlic butter after reheating so the sauce tastes bright.
Don’t leave cooked wings out for more than 2 hours at room temperature, since the butter coating speeds up spoilage in warm kitchens. Yes, this garlic butter wings recipe freezes well for the baked base if you sauce after thawing.
Recipe Variations
Honey Garlic Version
Stir 1 tbsp honey into the butter with the lemon juice for a sweeter, stickier coat. The sugar browns faster, so drop the sauce heat to low and watch for caramelization. You get a glossy wing that pairs well with honey garlic noodles on the side.
Lemon Pepper Twist
Add 1 tsp cracked lemon pepper to the dry rub and skip the cayenne in the sauce. The citrus lifts the butter without extra acid, and the crust picks up more color. This version is lighter and works better with a lemon butter salmon pairing.
Spicy Cajun Style
Replace paprika with 1 tsp Cajun seasoning and raise cayenne to 1/2 tsp in the butter. The wings take on a deeper red tone and a sharper finish that holds up against creamy slaw. For a shrimp option, garlic butter shrimp uses the same sauce base.
Air Fryer Batch
Cook the dried, powdered wings at 190°C / 375°F for 18–22 minutes in an air fryer, shaking halfway, then toss with the sauce. The crust is tighter and slightly drier than oven-baked, so add an extra tbsp of butter. This is the fastest route when you only need a small protein batch for two.

Garlic Butter Wings
Description
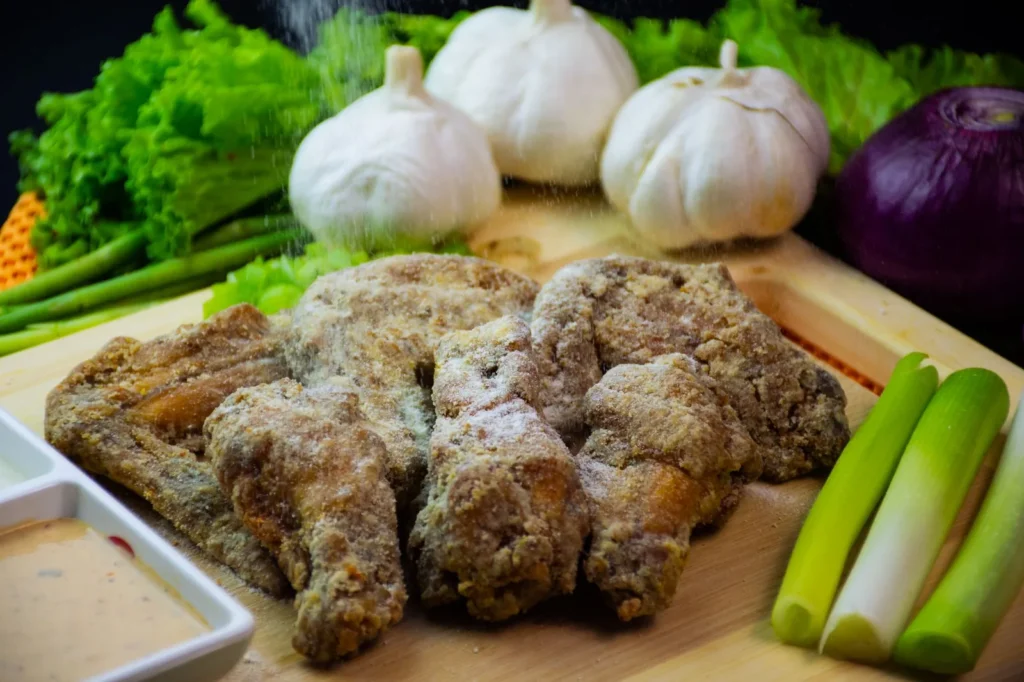
These garlic butter wings are baked on a rack for a light, brittle crust and tossed in a two-stage butter sauce that keeps the garlic sweet and mild. They are a weeknight-friendly, no-fryer batch that tastes like grilled but stays clean in the kitchen.
Ingredients
Instructions
-
Dry and coat wings
Pat the wings completely dry with paper towels so no surface moisture remains, then toss them with baking powder, salt, and pepper in a large bowl until evenly coated. Removing moisture now prevents the skin from steaming later and helps the powder dry the surface for crispness.
-
Rest on rack
Place the wings on a wire rack set over a rimmed sheet pan and rest uncovered in the fridge for 30 minutes to dry the skin further. This short cold rest makes the final crust visibly more brittle and less rubbery when baked.
-
Bake first side
Bake the wings at 200°C / 400°F for 25–30 minutes until the tops begin to turn golden and the skin starts to tighten. Keep them on the rack so the bottoms do not sit in rendered fat, which is what keeps oven wings from going soggy.
-
Flip and finish bake
Flip the wings and bake another 20–25 minutes until golden and crispy on both sides, with the skin light and brittle to the touch. The meat should reach an internal temperature of 74°C / 165°F for safe poultry doneness.
-
Melt butter and garlic
Melt butter in a small pan over medium-low heat, add garlic and paprika, and cook 2 minutes until fragrant but not browned. Pull the pan off heat the moment the garlic smells sweet, since burnt garlic turns the sauce bitter within a minute.
-
Finish sauce
Stir in lemon juice, parsley, and cayenne, then remove from heat and keep warm for tossing. The sauce is ready when it looks glossy and the parsley is dispersed throughout the warm butter.
-
Toss hot wings
Toss the hot wings in the garlic butter sauce in a large bowl until evenly coated on all sides. Serve immediately so the butter clings as it firms slightly and does not pool at the bottom of the bowl.
Nutrition Facts
Servings 4
- Amount Per Serving
- Calories 420kcal
- % Daily Value *
- Total Fat 32g50%
- Saturated Fat 15g75%
- Cholesterol 120mg40%
- Sodium 650mg28%
- Total Carbohydrate 3g1%
- Protein 28g57%
* Percent Daily Values are based on a 2,000 calorie diet. Your daily value may be higher or lower depending on your calorie needs.
Note
- Storage: Store cooled wings in an airtight container in the fridge for up to 3 days, separated from extra sauce if possible, and discard any left out more than 2 hours.
- Reheating: Reheat in a 190°C / 375°F oven for 10–12 minutes until the skin crisps and the meat reaches 74°C / 165°F internally.
- Pro tip: For a themed spread, you can pair them with butter bean pasta as a filling side.
- Make ahead: Let wings sit 2 minutes after tossing so the butter firms slightly and does not pool at the bowl bottom.
