

A good plate of fall of the bone ribs starts with patience and a low oven, not a rush of high heat. This recipe walks through a simple dry rub, a long gentle bake, and a broiled glaze so the meat turns soft enough to pull apart with a fork. You get a reliable weeknight-friendly method that doesn’t need a smoker or grill.
The approach here uses baby back ribs, a balanced spice rub, and a three-step cook that keeps the meat juicy. By the end you’ll know the exact internal temperature and visual cues that tell you the ribs are done. It’s a straightforward plan that works in almost any home kitchen. If you enjoyed this, our pork chops supreme is worth trying next. Making this fall of the bone ribs at home is surprisingly straightforward once you know the key steps.
Why You’ll Love These Fall Of The Bone Ribs
- Meat that separates from the bone after a low, even bake with no special equipment.
- A dry rub you can mix from pantry spices, so there’s no store-bought sauce required.
- A sticky glaze finished under the broiler for a lightly caramelized surface.
- Leftovers reheat well, making this practical for a second meal later in the week.
Ingredients You’ll Need
- 2 racks baby back ribs (about 4 pounds total), membrane removed from the back
- 2 tablespoons brown sugar, packed
- 1 tablespoon smoked paprika
- 2 teaspoons coarse salt
- 1 teaspoon black pepper
- 1 teaspoon garlic powder
- 1 teaspoon onion powder
- 1/2 teaspoon cayenne pepper
- 1 cup low-sodium chicken broth
- 3/4 cup barbecue sauce
- 2 tablespoons honey
Ingredient Substitutions
Smoked paprika: Replace with an equal amount of sweet paprika plus 1/2 teaspoon liquid smoke per rack. The color stays similar but the smoke note becomes lighter and less rounded. You’ll lose some of the pit-cooked depth, so add the liquid smoke sparingly to avoid a harsh taste. The fall of the bone ribs works well for weeknight cooking when time is limited.





Brown sugar: Use an equal amount of coconut sugar for a less sweet, slightly caramel-like rub. Coconut sugar is drier, so press it into the ribs firmly so it adheres. The crust will be a bit darker and a touch less sticky than with brown sugar. Storing leftover fall of the bone ribs correctly keeps it tasting good for days.
Barbecue sauce: Swap with a homemade tomato-base sauce using 1/2 cup ketchup, 2 tablespoons vinegar, and 1 tablespoon molasses. This cuts added sugars and lets you control salt. Expect a thinner coat that thickens mostly during the broil step rather than the bake. For the best results with this fall of the bone ribs, read through all the steps before starting.
Chicken broth: Use an equal volume of apple juice for a fruitier steam that lightly sweetens the meat. The ribs will brown a little faster near the end, so check the glaze earlier. This works well if you’re already serving the pork with green beans as a side.
Step-by-Step Instructions
- Heat the oven to 150°C / 300°F. Pat the ribs dry and remove the thin membrane on the back with a paper towel grip so the rub penetrates.
- Mix brown sugar, smoked paprika, salt, black pepper, garlic powder, onion powder, and cayenne in a small bowl. Coat both sides of each rack, pressing the rub in with your hands.
- Pour chicken broth into a rimmed baking sheet and lay the ribs bone-side down. Cover tightly with foil so steam stays trapped during the long bake.
- Bake for 2 hours 30 minutes at 150°C / 300°F, until the meat pulls back from the ends of the bones by about 1/2 inch and feels very tender when lifted.
- Whisk barbecue sauce with honey. Uncover the ribs, brush the top with the glaze, and broil on high heat for 4 minutes until the surface bubbles and browns at the edges.
- Rest the ribs for 10 minutes before cutting between the bones. The internal temperature should read at least 71°C / 160°F at the thickest point.
Pro Tips
Remove the back membrane fully; it shrinks under heat and turns the rack tough in spots. A bare grip with a paper towel gives you enough traction to peel it in one strip.
Use a rimmed sheet and seal the foil well so the broth steams the pork instead of drying out. That steam is what softens the connective tissue for the right texture.
Broil only after the long bake is done, since sauce burns fast under direct heat. Keep the rack six inches from the element and watch the edges closely.
For a deeper smoke flavor without a smoker, see low and slow cooking techniques that adapt to a standard oven. A light foil tent during broil prevents scorching if your sauce is thin.
For a tangier rub idea, the mustard ribs method adds a sharp note before the bake.
Common Mistakes to Avoid
Skipping the foil seal lets the broth evaporate and the ribs dry. Crimp the edges tightly so the pan holds a steady gentle steam.
Broiling too long hardens the glaze into a bitter shell. Pull the rack once the sauce bubbles and the tips darken, not when it looks deeply charred.
Cutting right out of the oven loses juices that should redistribute. A short rest keeps the slices moist when you separate them.
Serving Suggestions
Slice the rack into single bones and plate with a sharp caesar dressing salad to balance the sweet glaze. The crisp leaves cut through the richness of the pork.
Add a starch like fresh bread to soak up the pan juices. Warm the bread lightly so it holds up against the sauce.
For a drink pairing, a classic Manhattan matches the smoky rub with a bittersweet finish. Keep portions small since the ribs are filling.
Storage and Reheating
Cooled ribs keep in an airtight container in the fridge for up to 4 days. Don’t leave cooked pork at room temperature longer than 2 hours to stay food-safe.
To freeze, wrap the sliced ribs tightly and store for up to 3 months. Thaw overnight in the fridge before reheating so the meat warms evenly.
Reheat covered at 150°C / 300°F until the center reaches 74°C / 165°F. A quick broil restores the glaze without drying the interior.
Recipe Variations
Honey Mustard Version
Replace the barbecue sauce with 1/2 cup mustard and 2 tablespoons honey mixed together. Brush it on after the bake and broil for 3 minutes. The glaze turns sharp and light rather than sweet and thick.
Spicy Dry Rub
Double the cayenne and add 1 teaspoon ground chipotle to the rub before the bake. The pork gets a warmer heat that builds after the first bite. Serve with cooling pasta salad to soften the burn.
Cider Braise
Swap the chicken broth for apple cider and add 1 bay leaf to the pan. The steam carries a fruit note into the meat during the long cook. Remove the leaf before glazing so it doesn’t stick to the ribs.
Oven-To-Grill Finish
After the foil bake, move the racks to a medium grill for 5 minutes instead of broiling. You get a firmer bark and a cleaner smoke line. Watch for flare-ups from the dripping glaze.

Fall Of The Bone Ribs
Description
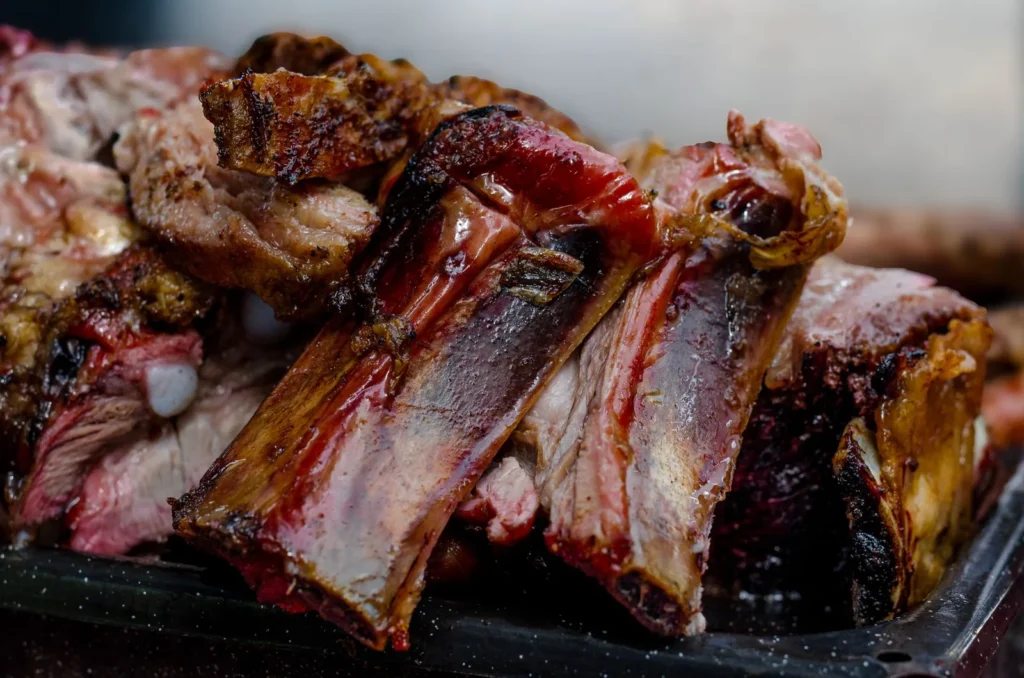
These fall of the bone ribs use a simple pantry dry rub, a long gentle steam-bake, and a quick broiled glaze for meat that pulls apart with a fork. No smoker or grill needed — just a standard oven and a little patience.
Ingredients
Instructions
-
Heat oven and prep ribs
Heat the oven to 150°C / 300°F. Pat the ribs dry with paper towels and remove the thin membrane on the back using a paper towel grip so the rub penetrates the meat. The rack should feel clean and slightly tacky once the silver skin is peeled off in one strip.
-
Mix and apply dry rub
Mix brown sugar, smoked paprika, salt, black pepper, garlic powder, onion powder, and cayenne in a small bowl until evenly combined. Coat both sides of each rack, pressing the rub in firmly with your hands so it adheres. The surface should look evenly speckled and lightly moist from the pressed spices.
-
Add broth and cover
Pour 1 cup chicken broth into a rimmed baking sheet and lay the ribs bone-side down so they sit above the liquid. Cover the pan tightly with foil, crimping the edges well so steam stays trapped during the long bake. The sealed pan should hold a steady gentle steam rather than let the broth evaporate.
-
Bake low and slow
Bake for 2 hours 30 minutes at 150°C / 300°F without opening the foil. The meat is done when it pulls back from the ends of the bones by about 1/2 inch and feels very tender when lifted with tongs. The internal temperature should read at least 71°C / 160°F at the thickest point.
-
Whisk glaze
Whisk 3/4 cup barbecue sauce with 2 tablespoons honey in a small bowl until smooth and pourable. Set the glaze aside while the ribs finish their bake. The mixture should look glossy and slightly thickened from the honey.
-
Broil glazed ribs
Uncover the ribs and brush the top with the glaze, then broil on high heat for 4 minutes about six inches from the element. Watch closely until the surface bubbles and browns at the edges without scorching. Pull the rack once the sauce bubbles and the tips darken, not when it looks deeply charred.
-
Rest before cutting
Rest the ribs for 10 minutes before cutting between the bones so the juices redistribute. The meat should feel firmer and less watery after the short rest. Slicing too early loses the moisture that keeps each bone moist.
-
Check final temperature
Verify the internal temperature reads at least 71°C / 160°F at the thickest point before serving if you have a thermometer handy. The visual cue of meat pulling back 1/2 inch from the bone ends confirms doneness alongside the temperature. Cut into single bones and plate while still warm.
Nutrition Facts
Servings 4
- Amount Per Serving
- Calories 520kcal
- % Daily Value *
- Total Fat 32g50%
- Saturated Fat 11g56%
- Cholesterol 130mg44%
- Sodium 980mg41%
- Total Carbohydrate 24g8%
- Dietary Fiber 1g4%
- Sugars 18g
- Protein 36g72%
* Percent Daily Values are based on a 2,000 calorie diet. Your daily value may be higher or lower depending on your calorie needs.
Note
- Storage: Keep cooled ribs in an airtight container in the fridge for up to 4 days; don't leave cooked pork at room temperature longer than 2 hours.
- Reheating: Reheat covered at 150°C / 300°F until the center reaches 74°C / 165°F, then broil briefly to restore the glaze without drying the interior.
- Pro tip: Remove the back membrane fully and seal the foil well so the broth steams the pork instead of drying out; see mustard ribs method for a tangier rub variation.
- Broil watch: Broil only after the long bake and keep the rack six inches from the element so the sauce browns instead of burning.
