

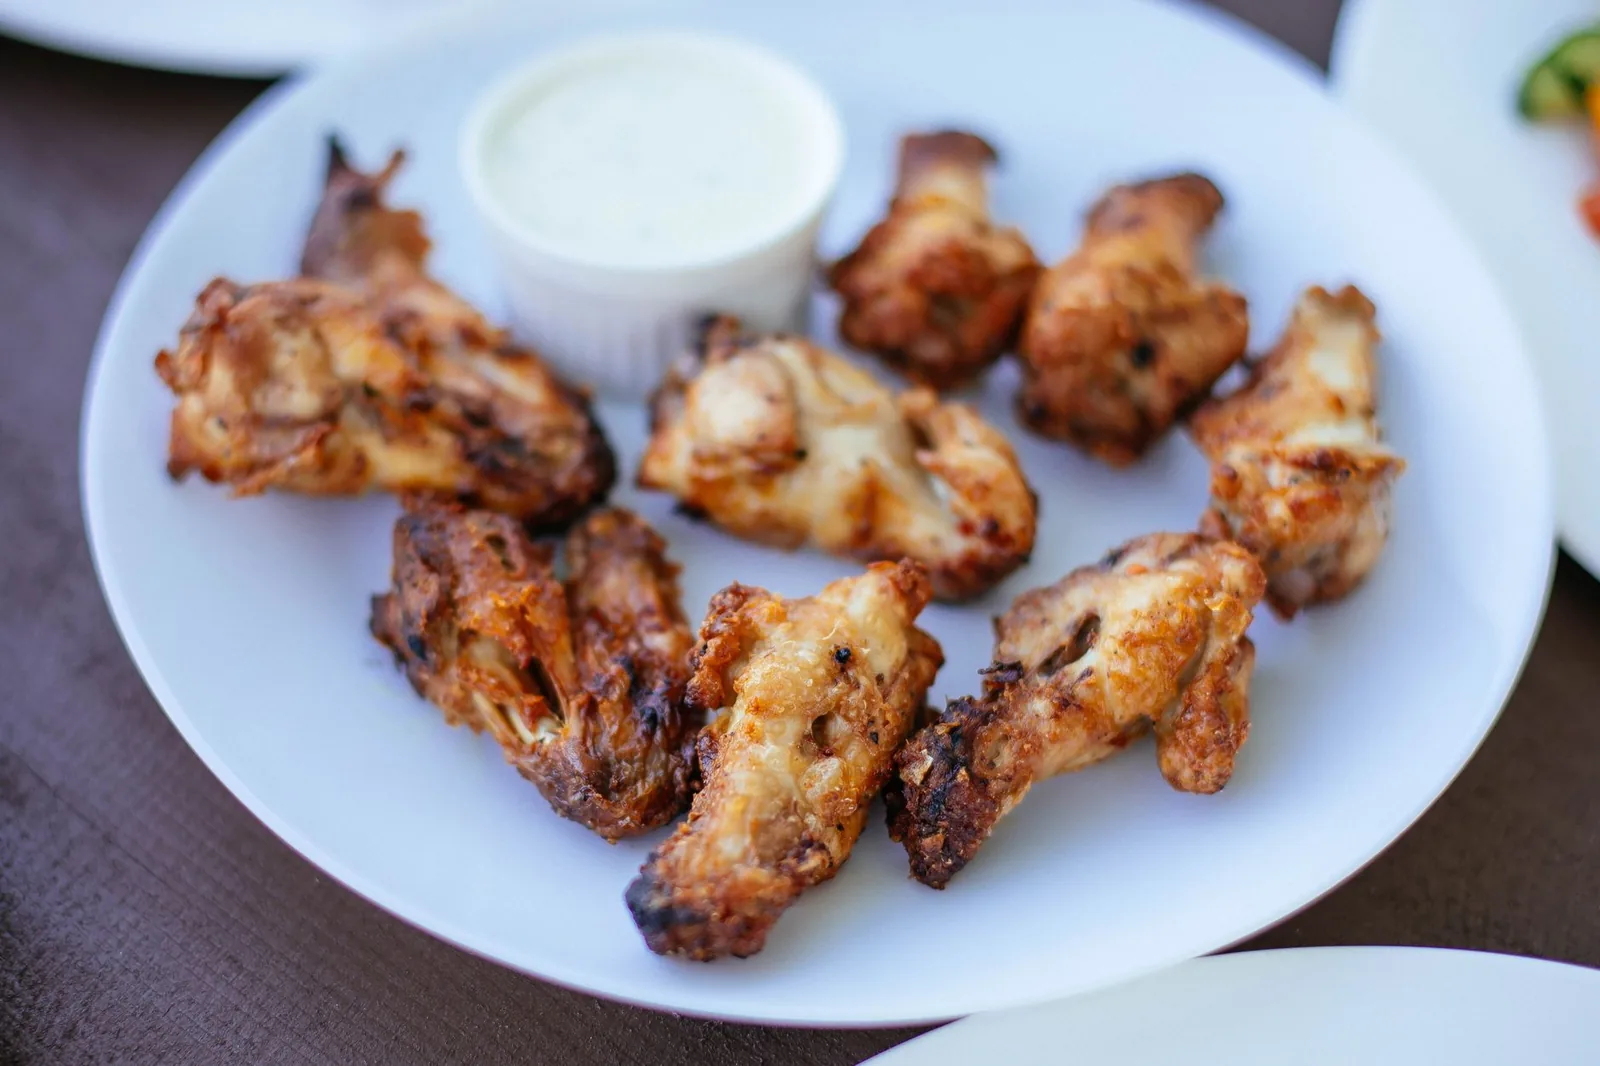
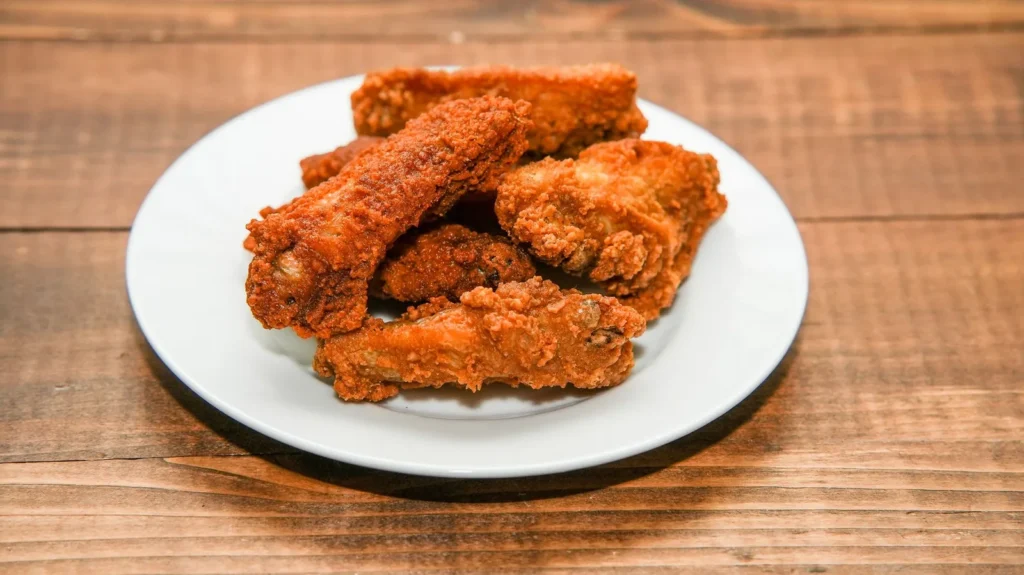
Crispy baked chicken wings are the answer when you want crackly skin and tender meat without a pot of hot oil. This oven method uses a dry surface, a baking powder coating, and a high heat blast to render fat and crisp the skin. You get a batch that holds up to sauce and doesn’t turn soggy on the tray.
The recipe keeps the ingredient list short so the texture does the talking. A wire rack keeps the wings off the rendered fat, which is the main reason baked wings often fail. With the right spacing and temperature, you’ll pull a tray of crisp baked chicken wings from the oven in under an hour. Making this crispy baked chicken wings at home is surprisingly straightforward once you know the key steps.
Why You’ll Love These Crispy Baked Chicken Wings
- Even browning from a wire rack instead of steaming in pan grease
- Salty, paprika-forward skin that stays crisp after saucing
- One tray and one bowl, with no deep fryer to clean
- A dry brine that firms the skin before it hits the oven
Ingredients You’ll Need
- 2 lb chicken wings, split into drumettes and flats, patted very dry
- 1 tbsp aluminum-free baking powder
- 1 tsp fine salt
- 1 tsp smoked paprika
- 1/2 tsp garlic powder
- 1/2 tsp onion powder
- 1/4 tsp black pepper
- 1 tbsp neutral oil
- 2 tbsp melted butter, for tossing after bake
- 3 tbsp buffalo sauce, for tossing after bake
Ingredient Substitutions
Smoked paprika: Replace with an equal amount of sweet paprika plus a pinch of cayenne if you want heat. Sweet paprika loses the wood-smoke note, so the wings read cleaner and slightly milder. The color stays red but the background flavor is flatter, which matters most if you’re serving them plain. The crispy baked chicken wings works well for weeknight cooking when time is limited.






Baking powder: Swap with an equal amount of cornstarch if you avoid aluminum-sensitive leaveners. Cornstarch crisps the skin through surface drying rather than pH shift, so the puff is less pronounced. Expect a thinner, tighter crackle and a slightly less airy edge on the drumettes. Storing leftover crispy baked chicken wings correctly keeps it tasting good for days.
Buffalo sauce: Use 2 tbsp melted butter mixed with 1 tbsp hot sauce as a from-scratch alternative. This gives you control over heat and salt without bottled thickeners. The coat will be glossier and thinner, so toss the wings right before serving to avoid pooling. For the best results with this crispy baked chicken wings, read through all the steps before starting.
Neutral oil: Replace with an equal weight of chicken goujons coating oil such as sunflower. The smoke point stays high enough for the oven temp, so browning is unchanged. Flavor stays neutral, which keeps the paprika visible on the skin.
Step-by-Step Instructions
- Pat the wings bone dry with paper towels, then place them on a plate and refrigerate uncovered for 30 minutes to dry the surface further.
- Heat the oven to 220°C / 425°F and set a wire rack inside a rimmed baking sheet so air moves under the wings.
- In a large bowl, mix baking powder, salt, smoked paprika, garlic powder, onion powder, and black pepper until evenly blended.
- Add the wings and 1 tbsp neutral oil, then toss until every piece is coated and looks faintly dusty rather than wet.
- Arrange wings on the rack with space between each piece, then bake 25–30 minutes until the skin is golden and crispy and the meat near the bone shows no pink.
- Whisk melted butter with buffalo sauce, then toss the hot wings in the mix until glossy and evenly red.
- Serve immediately on a warm plate with celery and a side of blue cheese if you like.
Pro Tips
Dry the wings longer than you think by leaving them uncovered in the fridge up to 8 hours for tighter skin. A wet surface steams before it browns, so the extra time pays off in crunch.
Use a wire rack even if your tray is nonstick, because contact points stay pale and rubbery without air flow underneath. The rack is the difference between baked and roasted texture.
Check doneness with a quick read of the thickest drumette, aiming for 74°C / 165°F internal temperature for poultry. Color alone can fool you when the skin is thin.
Read the dry brine technique from Bon Appetit if you want to scale the salt prep for larger batches. Their breakdown of surface moisture applies directly to wing crispness.
Common Mistakes to Avoid
Crowding the rack traps steam and gives you flabby skin, so leave a finger-width gap between wings. A second tray beats a packed one every time.
Skipping the baking powder leaves the skin soft because the pH lift is what breaks protein bonds for crispness. Cornstarch is the only real fallback, not flour.
Saucing before the bake makes the coating slide off and the skin soften, so always toss after the wings come out hot. Sauce is a finish, not a marinade here.
Serving Suggestions
Plate the wings with artichoke hearts for a warm, scoopable side that balances the heat. The mild bite of the hearts cools the palate between wings.
Add a crisp slaw or celery sticks to cut the richness, and keep blue cheese on the side rather than mixed in. The wings stay the focus while the sides do the refreshing.
Storage and Reheating
Store leftovers in an airtight container in the fridge for up to 3 days, and don’t leave cooked wings out longer than 2 hours. Separate any extra sauce so the skin doesn’t soften in storage.
Reheat on a rack at 190°C / 375°F for 10 minutes until the center hits 74°C / 165°F and the skin re-crisps. The microwave makes them chewy, so use the oven even for a small portion.
You can freeze baked unsauced wings for up to 2 months in a zip bag, then reheat from frozen at the same temperature for a few minutes longer. Sauce after reheating to keep the coat clean.
Recipe Variations
Lemon Pepper Version
Skip smoked paprika and toss the baked wings with 2 tsp lemon zest and 1 tsp cracked black pepper mixed into the butter. The result is bright and sharp with a drier, flaky crust. It pairs well with lemon butter salmon as a shared spread.
Garlic Parmesan Version
After baking, toss with 2 tbsp grated parmesan and 1 crushed roasted garlic clove in the butter. The cheese forms a savory film that crisps slightly as it cools. Serve with chicken milanese for a breaded contrast on the same table.
Low-Sodium Option
Cut salt to 1/4 tsp and use a salt-free paprika blend, then finish with a squeeze of lime for lift. The skin still crisps from the baking powder, just with less brine flavor. This works if you’re pairing with portobello mushrooms that carry their own seasoning.
Double-Bake Crunch
Bake at 200°C / 400°F for 20 minutes, rest 5, then raise to 230°C / 450°F for 8 minutes to drive a deeper crackle. The two-stage heat renders more fat from the flats. It’s a good method when you’re also making chicken katsu and want varied textures.

Crispy Baked Chicken Wings
Description
Crispy baked chicken wings use a baking powder coating and high heat on a wire rack to render fat and crisp the skin without a pot of oil. They stay crunchy under sauce and are ready from the oven in under an hour with one bowl and one tray.
Ingredients
Instructions
-
Dry wings in fridge
Pat the wings bone dry with paper towels, then place them on a plate and refrigerate uncovered for 30 minutes to dry the surface further. A drier surface prevents steaming and helps the skin crisp instead of turning rubbery in the oven.
-
Preheat and set rack
Heat the oven to 220°C / 425°F and set a wire rack inside a rimmed baking sheet so air moves under the wings. The rack keeps the wings off rendered fat, which is the main reason baked wings often fail and stay pale at contact points.
-
Mix dry seasoning
In a large bowl, mix baking powder, salt, smoked paprika, garlic powder, onion powder, and black pepper until evenly blended. This dry coating gives the skin its salty, paprika-forward crispness through a pH lift rather than a wet batter.
-
Coat wings with oil
Add the wings and 1 tbsp neutral oil to the bowl, then toss until every piece is coated and looks faintly dusty rather than wet. The thin oil layer helps the dry mix adhere and supports even browning on the skin.
-
Arrange and bake
Arrange wings on the rack with space between each piece, then bake at 220°C / 425°F for 25–30 minutes until the skin is golden and crispy and the meat near the bone shows no pink. Check the thickest drumette with a thermometer and pull at 74°C / 165°F internal, since thin skin can brown before poultry is safely cooked.
-
Whisk sauce
Whisk 2 tbsp melted butter with 3 tbsp buffalo sauce in a small bowl until combined and glossy. This finish coat is mixed only after baking so the skin stays crisp instead of softening during the oven time.
-
Toss hot wings
Toss the hot wings in the butter-buffalo mix until glossy and evenly red, working quickly so the sauce clings rather than pools. Serve immediately on a warm plate with celery and a side of blue cheese if you like.
-
Serve immediately
Plate the sauced wings while hot so the crackly skin stays firm and the buffalo coat reads fresh and red. Add celery or crisp slaw on the side to cut the richness and keep the wings the focus of the tray.
Nutrition Facts
Servings 4
- Amount Per Serving
- Calories 350kcal
- % Daily Value *
- Total Fat 25g39%
- Saturated Fat 9g45%
- Cholesterol 95mg32%
- Sodium 620mg26%
- Total Carbohydrate 3g1%
- Protein 24g48%
* Percent Daily Values are based on a 2,000 calorie diet. Your daily value may be higher or lower depending on your calorie needs.
Note
- Storage: Store leftovers in an airtight container in the fridge for up to 3 days, and don't leave cooked wings out longer than 2 hours; separate any extra sauce so the skin doesn't soften.
- Reheating: Reheat on a rack at 190°C / 375°F for 10 minutes until the center hits 74°C / 165°F and the skin re-crisps; avoid the microwave which makes them chewy.
- Pro tip: Dry the wings longer than you think by leaving them uncovered in the fridge up to 8 hours for tighter skin, and see chicken katsu for a varied crunch method on the same table.
- Doneness: Always use a thermometer on poultry rather than judging by color, aiming for 74°C / 165°F at the thickest point before saucing.
