

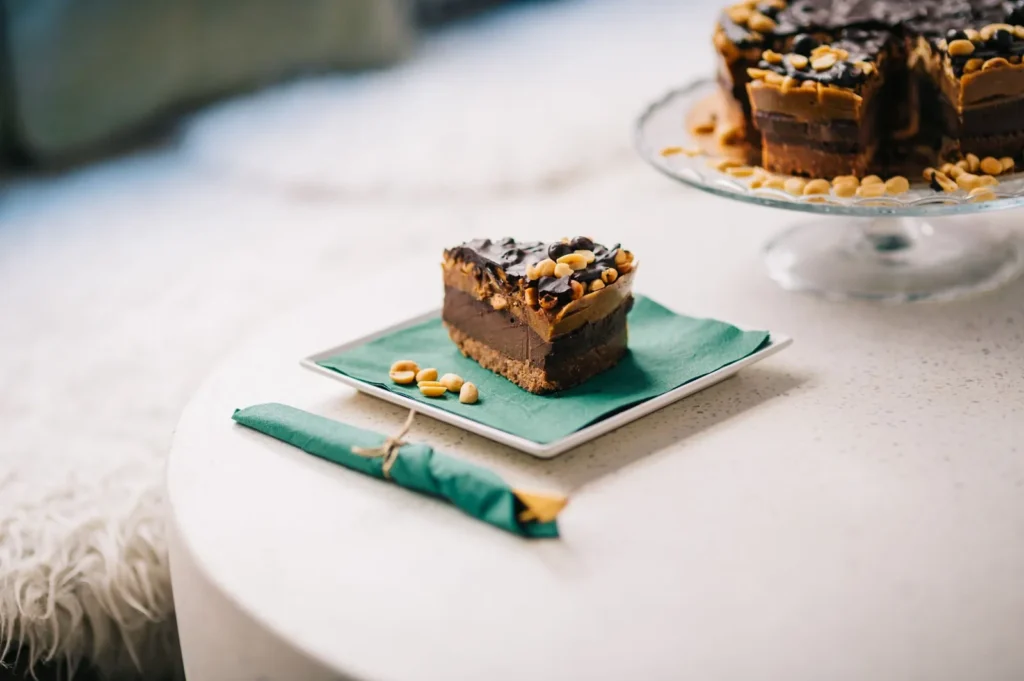
A chocolate peanut butter rice cakes recipe gives you a crisp, light base with a creamy nutty layer and a thin chocolate shell. This version uses plain rice cakes, natural peanut butter, and dark chocolate so the texture stays crunchy instead of soggy. You get a make-ahead snack that takes about ten minutes and needs no oven.
The balance matters here: too much liquid peanut butter softens the cake, and too little chocolate makes it feel dry. We keep the ratios tight so each bite has crunch, cream, and a clean snap of chocolate. It works as an after-school bite, a post-workout treat, or a quick dessert. If you enjoyed this, our garlic butter baked is worth trying next. Making this chocolate peanut butter rice cakes at home is surprisingly straightforward once you know the key steps.
Why You’ll Love These Chocolate Peanut Butter Rice Cakes
- Ready in 10 minutes with zero baking or stove time.
- Each cake stays crunchy because the peanut butter is applied in a thin layer.
- Dark chocolate sets firm at room temperature so they travel well.
- You control sweetness by choosing unsweetened peanut butter and 70% chocolate.
- Naturally gluten free if you use certified gluten-free rice cakes.
Ingredients You’ll Need
- 4 plain unsweetened rice cakes (about 9 cm each)
- 120 g natural peanut butter (no added sugar or oil)
- 100 g dark chocolate (70% cacao), chopped
- 1 tbsp coconut oil
- 1/4 tsp sea salt flakes
- 1 tsp honey (optional, for extra sweetness)
Ingredient Substitutions
Natural peanut butter: Replace with an equal weight of almond butter for a milder, slightly sweeter spread. Almond butter is looser than peanut butter, so chill the rice cakes for 5 minutes after spreading to keep the base from bending. The flavor turns less roasty and more floral, which pairs well with the dark chocolate. The chocolate peanut butter rice cakes works well for weeknight cooking when time is limited.




Dark chocolate: Use an equal amount of milk chocolate for a softer, sweeter shell that sets less hard. Milk chocolate contains more sugar and fat, so it stays tacky at warm room temperature and needs fridge time before stacking. Expect a lighter color and a less bitter finish on each bite. Storing leftover chocolate peanut butter rice cakes correctly keeps it tasting good for days.
Coconut oil: Swap with 1 tbsp of unsalted butter when melting the chocolate for a richer mouthfeel. Butter browns faster than coconut oil, so melt on low heat and stir constantly to avoid graininess. The shell will taste more like a confection coating than a clean chocolate snap. For the best results with this chocolate peanut butter rice cakes, read through all the steps before starting.
Plain rice cakes: Use certified gluten-free rice cakes if needed, or try cauliflower rice patties only if you bake them firm first. Soft cauliflower cakes will collapse under the peanut butter, so this swap changes the dish from crunchy to chewy. Keep the same thickness so the chocolate layer stays even.
Step-by-Step Instructions
- Place 4 rice cakes flat on a parchment-lined tray that fits your freezer. Spread 30 g peanut butter on each using the back of a spoon, keeping a 5 mm border so edges stay crisp.
- Melt 100 g dark chocolate with 1 tbsp coconut oil in a bowl over medium-low heat, stirring until glossy and smooth with no lumps.
- Spoon the chocolate over each cake, tilting the tray so it reaches the edges. Sprinkle sea salt flakes and drizzle honey if using.
- Freeze for 15 minutes until the chocolate is hard and makes a clear snap when tapped with a spoon.
- Peel off the parchment and serve, or store in a single layer in an airtight container.
Pro Tips
Chill the peanut butter jar for 10 minutes before spreading if your kitchen is warm, since firmer butter holds the ridge better. A thin layer prevents the rice cake from bending under weight.
Use a bench scraper to level the chocolate quickly; it gives a cleaner edge than a spoon and reduces mess on the tray. This matters most when you stack the finished cakes later.
For clean melts, read chocolate tempering guidance from Food Network before scaling the recipe up for a party. Proper temper keeps the shell from blooming white in the fridge.
Cut large rice cakes in half with a serrated knife for smaller portions that fit lunchboxes better. The chocolate layer helps seal the cut edge so it will not crumble as fast.
Common Mistakes to Avoid
Applying peanut butter too thick makes the base soggy within an hour because the moisture migrates into the rice. Keep the layer under 3 mm and freeze promptly after chocolate.
Melting chocolate on high heat scorches it and turns the shell grainy instead of smooth. Stay on medium-low heat and pull the bowl off early while residual warmth finishes the melt.
Stacking before the chocolate hardens smears the top and sticks the cakes together. Wait until you hear a real snap, then layer with parchment between each piece. For another easy option, check out our paccheri pasta butter.
Serving Suggestions
Pair a cake with a peanut butter smoothie bowl for a fuller breakfast that still feels light. The crunch contrasts the cold creamy bowl nicely.
Cut into quarters and plate with fresh banana slices for a dessert board. Add a few chocolate chip cookies on the side if you want a mixed texture spread.
Storage and Reheating
Keep finished cakes in an airtight container in the fridge for up to 5 days; the chocolate stays firm and the rice keeps its bite. Do not leave them out for more than 2 hours or the chocolate will soften.
They freeze well for up to 2 months in a single layer with parchment between pieces. Thaw at room temperature for 5 minutes; no reheating needed since this is a cold snack.
If the chocolate dulls, that is just sugar bloom from temperature swings, not spoilage. A quick 30 seconds in the fridge restores the snap without changing flavor.
Recipe Variations
White Chocolate Version
Swap the dark chocolate for 100 g white chocolate and add 1 tsp lemon zest to the peanut butter. The shell stays sweeter and softer, so fridge the cakes for 20 minutes longer before stacking. You get a brighter, less bitter finish that kids tend to prefer.
Espresso Crunch
Dissolve 1/2 tsp instant espresso in the coconut oil before mixing with chocolate for a mocha edge. Sprinkle 1 tsp crushed coffee beans on top for extra bite. The bitterness balances the peanut butter and makes the snack feel more adult.
Sea Salt Caramel
Spread 1 tsp date caramel under the peanut butter before the chocolate step for a layered chew. Use creamy sauce technique only if you adapt to a warm version; here keep it no-bake. The center turns sticky and sweet against the crisp cake.
Protein Boost
Stir 1 scoop unflavored protein powder into the peanut butter before spreading for a post-gym bite. Add 1 tsp water if the mix gets stiff. The layer firms up more in the freezer and adds staying power without changing the chocolate step.

Chocolate Peanut Butter Rice Cakes
Description
A crisp rice cake base topped with a thin layer of natural peanut butter and a firm dark chocolate shell with sea salt.
This ten-minute, no-oven snack stays crunchy and travels well, perfect for after-school or post-workout bites.
Ingredients
Instructions
-
Place rice cakes
Place the 4 rice cakes flat on a parchment-lined tray that fits your freezer. Make sure they lie in a single layer with space around each so the tray can slide in easily and the cakes will not touch during freezing.
-
Spread peanut butter
Spread 30 g peanut butter on each rice cake using the back of a spoon, keeping a 5 mm border so the edges stay crisp. The layer should be under 3 mm thick so the base does not bend or turn soggy within an hour from moisture migration.
-
Melt chocolate
Melt 100 g dark chocolate with 1 tbsp coconut oil in a bowl over medium-low heat, stirring until glossy and smooth with no lumps. Pull the bowl off the heat early and let residual warmth finish the melt to avoid scorching and a grainy shell.
-
Spoon chocolate
Spoon the melted chocolate over each cake, tilting the tray so it reaches the edges and covers the peanut butter evenly. Use a bench scraper to level the chocolate quickly for a cleaner edge that helps when stacking later.
-
Add toppings
Sprinkle sea salt flakes over the chocolate on each cake for a clean savory contrast. Drizzle the optional 1 tsp honey on top if you want extra sweetness, letting it fall in thin lines so it does not pool.
-
Freeze to set
Freeze the tray for 15 minutes until the chocolate is hard and makes a clear snap when tapped with a spoon. Wait until you hear a real snap before handling so the shell will not smear or stick.
-
Peel and serve
Peel the rice cakes off the parchment and serve right away for maximum crunch. If not serving immediately, keep them in a single layer in an airtight container to protect the chocolate.
Nutrition Facts
Servings 4
- Amount Per Serving
- Calories 220kcal
- % Daily Value *
- Total Fat 14g22%
- Saturated Fat 5g25%
- Sodium 150mg7%
- Total Carbohydrate 20g7%
- Dietary Fiber 2g8%
- Sugars 4g
- Protein 6g12%
* Percent Daily Values are based on a 2,000 calorie diet. Your daily value may be higher or lower depending on your calorie needs.
Note
- Storage: Keep finished cakes in an airtight container in the fridge for up to 5 days; do not leave them out for more than 2 hours or the chocolate will soften.
- Make ahead: Chill the peanut butter jar for 10 minutes before spreading if your kitchen is warm so the firmer butter holds the ridge better.
- Pro tip: For another easy option, see our paccheri pasta butter after making these.
- Freezing: Use parchment between pieces when freezing for up to 2 months to avoid the cakes sticking together.
