

An easy chocolate marshmallow pie is the no-bake dessert you make when you want something rich but don’t want to turn on the oven. This version uses a graham cracker crust, a firm chocolate filling, and a blanket of marshmallows that gets lightly toasted for a soft, sweet top. You get clean slices, a fudgy middle, and a texture contrast that reads as more work than it is.
The recipe is built for predictability. Each layer sets on its own, so there’s no tricky custard or tempering step where things can break. If you can melt chocolate and spread it, you can put this together before dinner and have it chilled by the time you eat. If you enjoyed this, our chocolate chip cookies is worth trying next. Making this easy chocolate marshmallow pie at home is surprisingly straightforward once you know the key steps.
Why You’ll Love These Easy Chocolate Marshmallow Pie
- No oven required, so the kitchen stays cool even in summer.
- Three components only: crust, filling, and topping — easy to remember.
- Filling firms up in the fridge, giving clean slices every time.
- Toasted marshmallow top adds a lightly caramelized flavor without extra sugar.
- Uses pantry staples, so a last-minute dessert is realistic.
Ingredients You’ll Need
- 1 1/2 cups graham cracker crumbs (about 10 full sheets, fine crumb)
- 6 tablespoons unsalted butter, melted
- 1/4 cup granulated sugar
- 2 cups semi-sweet chocolate chips
- 1 can (14 oz) sweetened condensed milk
- 1 teaspoon vanilla extract
- 3 cups mini marshmallows
- 1/4 teaspoon salt
Ingredient Substitutions
Graham cracker crumbs: Replace with an equal volume of finely crushed chocolate wafer cookies for a deeper cocoa base. Chocolate wafers hold fat differently, so add 1 tablespoon less melted butter to keep the crust from getting greasy. The crust will taste more like a cookie shell and slightly less sweet overall. The easy chocolate marshmallow pie works well for weeknight cooking when time is limited.








Semi-sweet chocolate chips: Use an equal weight of bittersweet chocolate (60–70% cacao) for a less sweet, more intense filling. Bittersweet sets firmer at fridge temperature, so slices hold shape better but the mouthfeel is a touch drier. Cut the salt to a pinch if the chocolate is already high in cocoa solids. Storing leftover easy chocolate marshmallow pie correctly keeps it tasting good for days.
Sweetened condensed milk: Swap with an equal amount of evaporated milk plus 3/4 cup sugar, cooked down until thickened. This homemade version needs medium-low heat and constant stirring for 10 minutes to reach the right body. Skip this if you want a true no-cook filling, since the reduction step adds time and a hot pan. For the best results with this easy chocolate marshmallow pie, read through all the steps before starting.
Mini marshmallows: Replace with 2 cups large marshmallows cut into quarters for a chunkier topping. Large pieces toast slower and brown unevenly, so keep them 6 inches from the broiler and watch closely. The cut edges caramelize faster than the smooth mini version. For another easy option, check out our caprese flatbread low.
Step-by-Step Instructions
- Stir graham crumbs, melted butter, and granulated sugar in a bowl until the mix clumps when pressed. Press it evenly into a 9-inch pie dish using the bottom of a measuring cup. Chill the crust in the fridge for 15 minutes so it firms before filling.
- Combine chocolate chips, sweetened condensed milk, salt, and vanilla in a heatproof bowl. Set it over a pot of simmering water on low heat, stirring every minute until the chips melt into a glossy, thick sauce with no streaks.
- Pour the warm filling into the chilled crust and tilt the dish so it reaches the edges. Tap the dish twice on the counter to release bubbles. Refrigerate uncovered for 2 hours until the top looks matte and the center no longer wobbles when nudged.
- Heat the broiler to high and arrange mini marshmallows in a single layer across the cold filling. Broil 6 inches from the element for 1–2 minutes until the tops turn golden and the centers puff. Cool 10 minutes before slicing so the layer settles.
Pro Tips
Press the crust firmly and evenly or the filling will seep under loose spots and make soggy bottom slices. A flat measuring cup gives more even pressure than your fingers.
Let the chocolate filling cool for 5 minutes before pouring so it doesn’t soften the chilled crust. Warm-but-not-hot is the right range for a clean set.
Broil with the oven door cracked and watch the whole time — marshmallows go from golden to burnt in under 30 seconds. Pull the pie the moment the tops brown.
For clean slices, use a knife warmed under hot water and wiped between cuts. This prevents the marshmallow layer from dragging across the chocolate. See broiling basics for safe topping methods.
Common Mistakes to Avoid
Skipping the crust chill step leads to a crumbly base that falls apart when sliced. The fridge time lets the butter re-solidify and lock the crumbs together.
Pouring filling into a warm crust makes the butter melt and pool, giving a greasy layer at the bottom. Always chill first and let the filling drop below scalding.
Over-broiling the marshmallows burns the sugar and turns the top bitter. Stay within 2 minutes and move the dish if one side browns faster. You might also like our privacy policy.
Serving Suggestions
Cut the pie into eight wedges and plate with a small scoop of vanilla ice cream to balance the chocolate. The cold cream softens the toasted top within a minute.
For a party spread, pair it with chocolate chip cookies so guests get two textures of cocoa. Keep both chilled until serve time.
A drizzle of warm caramel over each slice adds a salty note that cuts the sweetness. Use about a teaspoon per wedge so the layers stay visible.
Storage and Reheating
Cover the pie with foil and refrigerate for up to 4 days. The marshmallow top stays soft but the chocolate remains firm at fridge temperature.
Freeze individual slices wrapped in plastic for freeze for up to 2 months. Thaw in the fridge for 3 hours before eating; the topping will be slightly chewier than fresh.
Do not leave the finished pie out for more than 2 hours total. Condensed milk and marshmallow both support bacterial growth once warmed past room temp. Pair this with our dole whip smoothie for more ideas.
Recipe Variations
Peanut Butter Version
Stir 1/3 cup peanut butter into the melted chocolate filling before pouring. The fat changes the set slightly, so add 20 minutes to the chill time. You get a firmer, nutty slice that pairs well with a fresh herb contrast on a cheese board.
Mint Chocolate Swap
Replace the vanilla with 1/2 teaspoon peppermint extract and top with 1/4 cup crushed peppermint candies after broiling. The candies stay crunchy if added post-toast. This version reads as a holiday wine night dessert.
Cookie Crust Change
Use 1 1/2 cups crushed oreo cookies instead of graham crumbs and drop the granulated sugar. The filling becomes darker and the base more chocolate-forward. Chill the same 15 minutes before filling.
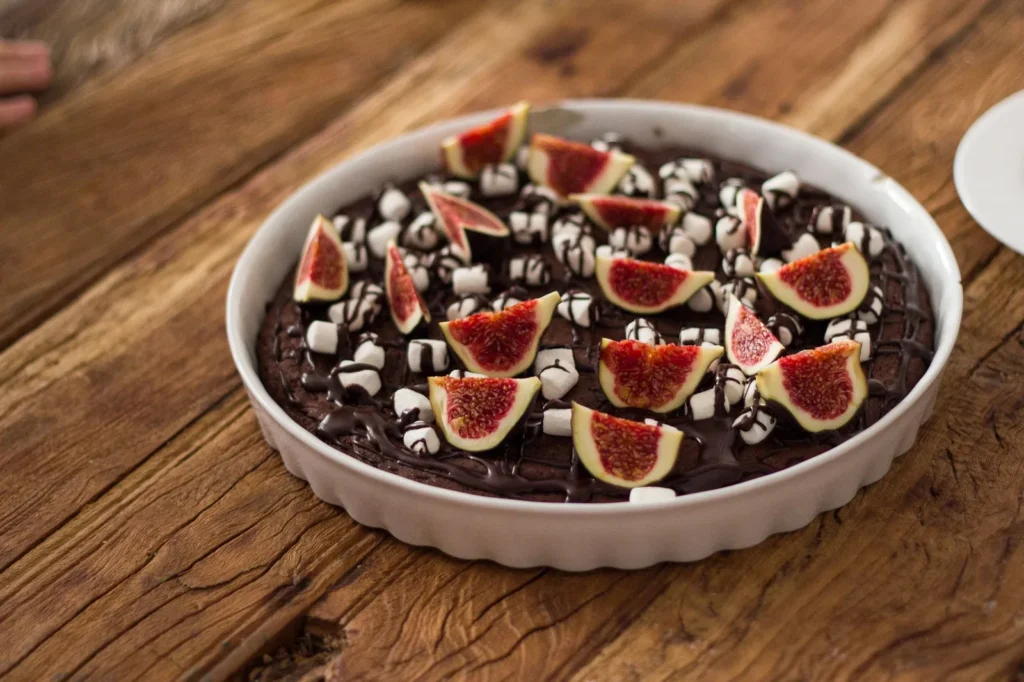

Easy Chocolate Marshmallow Pie
Description
This easy no-bake chocolate marshmallow pie layers a graham cracker crust, a firm fudgy chocolate filling, and a lightly toasted marshmallow top for a cool-kitchen dessert that slices cleanly every time.
Ingredients
Instructions
-
Mix and press crust
Stir the 1 1/2 cups graham cracker crumbs, 6 tablespoons melted unsalted butter, and 1/4 cup granulated sugar in a bowl until the mixture clumps when pressed together. Press it evenly into a 9-inch pie dish using the bottom of a measuring cup so the base is firm and level.
-
Chill the crust
Place the crust in the fridge for 15 minutes so the butter re-solidifies and locks the crumbs together. The crust should feel firm and cool to the touch before you add any filling.
-
Melt chocolate filling
Combine the 2 cups semi-sweet chocolate chips, 14 oz sweetened condensed milk, 1/4 teaspoon salt, and 1 teaspoon vanilla in a heatproof bowl set over a pot of simmering water on low heat. Stir every minute until the chips melt into a glossy, thick sauce with no streaks, about 5-8 minutes.
-
Pour and settle filling
Pour the warm filling into the chilled crust and tilt the dish so it reaches all the edges evenly. Tap the dish twice on the counter to release bubbles; the surface should look smooth and level.
-
Refrigerate to set
Refrigerate the pie uncovered for 2 hours until the top looks matte and the center no longer wobbles when nudged. The filling should feel firm like fudge when gently pressed with a fingertip.
-
Arrange marshmallows
Heat the broiler to high and arrange the 3 cups mini marshmallows in a single layer across the cold filling. The marshmallows should cover the surface with no large gaps so the top toasts evenly.
-
Broil the topping
Broil the pie 6 inches from the element for 1-2 minutes until the marshmallow tops turn golden and the centers puff. Watch the whole time because marshmallows go from golden to burnt in under 30 seconds; pull it the moment the tops brown.
-
Cool before slicing
Let the pie cool for 10 minutes so the toasted layer settles and is easier to cut. The marshmallow top should be soft but no longer tacky before you slice into eight wedges.
Nutrition Facts
Servings 8
- Amount Per Serving
- Calories 420kcal
- % Daily Value *
- Total Fat 18g28%
- Saturated Fat 11g56%
- Cholesterol 28mg10%
- Sodium 190mg8%
- Total Carbohydrate 62g21%
- Dietary Fiber 2g8%
- Sugars 48g
- Protein 6g12%
* Percent Daily Values are based on a 2,000 calorie diet. Your daily value may be higher or lower depending on your calorie needs.
Note
- Storage: Cover the pie with foil and refrigerate for up to 4 days; do not leave it out more than 2 hours total. For another easy treat try our mini chocolate gateau.
- Crust tip: Press the crust firmly and evenly with a flat measuring cup or the filling will seep under loose spots and make soggy bottom slices.
- Broiling: Keep the oven door cracked and watch constantly; marshmallows burn fast once they start toasting.
- Clean slices: Use a knife warmed under hot water and wiped between cuts so the marshmallow layer does not drag across the chocolate.
