

A homemade all butter pie crust gives you a tender, flaky base with a rich dairy flavor that shortening just can’t match. This recipe uses cold butter cut into flour so the layers separate as they bake. You’ll get a crust that holds wet fillings without turning soggy.
The method below is built for repeatable results, not luck. We use weight-based measurements and a rest period so the gluten relaxes and the butter stays in distinct pieces. That’s what creates the shatter when you cut a slice. If you enjoyed this, our garlic butter baked is worth trying next. Making this homemade all butter pie crust at home is surprisingly straightforward once you know the key steps.
Why You’ll Love These Homemade All Butter Pie Crust
- Short ingredient list: flour, butter, salt, water — nothing artificial.
- Cold butter creates visible flaky layers instead of a flat cracker.
- Works for sweet and savory pies without changing the base ratio.
- Freezes raw or baked for up to two months.
Ingredients You’ll Need
- 250 g all-purpose flour (about 2 cups), spooned and leveled
- 226 g unsalted butter (2 sticks), cut into 1/2-inch cubes and kept cold
- 5 g fine sea salt (1 teaspoon)
- 60 ml ice water (4 tablespoons), added slowly
- 15 ml apple cider vinegar (1 tablespoon), helps relax the dough
The flour should be a standard protein around 10 to 11 percent. Too high and the crust turns chewy; too low and it crumbles at the edges. The homemade all butter pie crust works well for weeknight cooking when time is limited.




Ingredient Substitutions
Unsalted butter: Replace with an equal weight of salted butter, then drop the added salt to 2 g. Salted butter varies in sodium so the crust may taste slightly saltier and brown a touch faster. Watch the edges after 25–30 minutes so they don’t over-darken. Storing leftover homemade all butter pie crust correctly keeps it tasting good for days.
All-purpose flour: Swap with an equal weight of pastry flour for a more delicate, melt-in-mouth crumb. Pastry flour has lower protein so the dough is easier to roll but less sturdy under heavy fruit fillings. You may need 1 tablespoon less water to keep it from getting sticky. For the best results with this homemade all butter pie crust, read through all the steps before starting.
Apple cider vinegar: Use an equal amount of lemon juice to get the same acidity that slows gluten formation. Lemon adds a faint citrus note that pairs well with apple or berry pies. The dough rest time stays the same at 1 hour.
Ice water: Replace with cold whole milk for a slightly richer, more golden crust. Milk sugars encourage browning so lower the oven by 10°C if the top darkens too soon. The crust will taste more like a shortbread edge.
Step-by-Step Instructions
- Place 250 g flour and 5 g salt in a bowl. Add 226 g cold butter cubes and press each piece flat with a bench scraper until you have flat shards with some pea-size bits.
- Mix 60 ml ice water with 15 ml vinegar. Sprinkle 2 tablespoons over the flour and stir with a fork just until clumps form; add the rest only if the dough won’t come together.
- Turn the dough onto a counter and press into a 1-inch thick disk. Wrap in film and rest in the fridge for 1 hour so the butter firms and gluten relaxes.
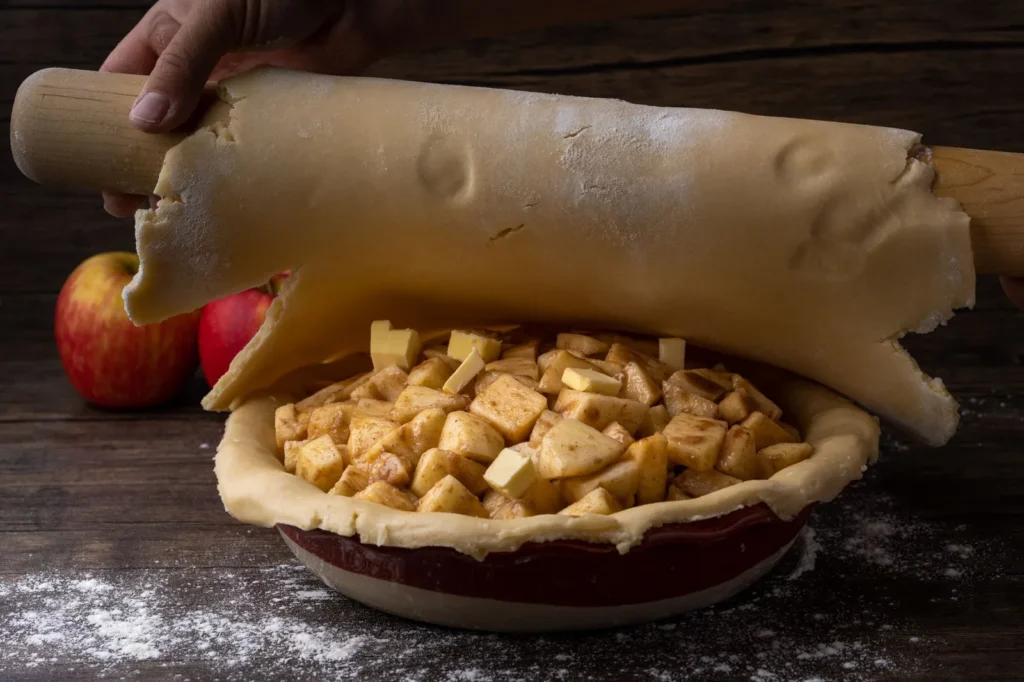
- Roll the disk on a floured surface to a 12-inch circle about 3 mm thick. Fold in thirds like a letter, roll again, then chill 15 minutes for easier transfer.
- Set the crust in a 9-inch pie dish, trim the overhang to 2 cm, and crimp the edge with your fingers. Prick the base if baking blind at 180°C / 350°F.
- For a filled pie, bake at 180°C / 350°F until the edge is golden and crisp and the filling bubbles at the center, about 45–55 minutes depending on the filling.
Pro Tips
Keep your butter below 10°C until the moment you cut it in; warm butter smears into the flour and you lose the layer separation. A marble board helps if your kitchen runs warm.
Rest the rolled crust in the dish inside the fridge for 20 minutes before baking to stop shrinkage on the sides. This step is skipped by most beginners and shows as pulled-away edges.
Read the lamination technique if you want to understand why cold fat matters in doughs like this one.
Use a metal pie dish rather than glass if you want a browner bottom; metal transfers heat faster to the base than ceramic does.
Common Mistakes to Avoid
Adding all the water at once makes a sticky mass that needs extra flour, which tightens the crumb. Sprinkle slowly and stop when the dough just holds a squeeze.
Skipping the chill after rolling lets the butter soften so it leaks out during bake instead of steaming into layers. Always give it the 15 minutes cold rest.
Stretching the dough to fit the dish thins the wall and causes cracks while baking. Lift and lay it loose, then press gently into the corners without pulling.
Serving Suggestions
Fill the cooled shell with vanilla custard and top with basil pesto for a savory tart, or use it under a classic apple filling. A dusting of sugar on the crimped edge adds crunch.
For a seafood pie, pair the baked crust with lemon butter salmon flaked into a light cream sauce. The crisp base balances the soft topping.
Storage and Reheating
Wrap a baked or raw crust tight and freeze for up to 2 months; thaw overnight in the fridge before rolling or filling. A baked shell keeps in an airtight container at room temperature for up to 3 days.
To crisp a stored baked shell, heat at 180°C / 350°F for 8 minutes until the surface feels dry. Don’t microwave it or the crust turns soft and greasy.
Recipe Variations
Whole Wheat Version
Replace 100 g of the flour with whole wheat flour and add 1 extra tablespoon of ice water. The crust gets a nutty taste and a denser bite that suits pear or walnut fillings.
Herbed Crust
Mix 2 g dried thyme and 1 g cracked pepper into the flour before cutting the butter. The savory note matches salsa verde chicken or tomato tarts.
Sweetened Crust
Add 20 g fine sugar to the dry mix for dessert pies; the edge browns a little faster so check at 40 minutes. Use it under peanut butter cream fillings.
Rye Blend
Swap 50 g flour for rye flour to get a deep malty flavor that pairs with butter beans in a rustic galette. Roll with extra care since rye is less elastic.

Homemade All Butter Pie Crust
Description
A homemade all butter pie crust gives you a tender, flaky base with a rich dairy flavor that shortening can't match. Cold butter cut into flour creates distinct layers that separate as they bake for a crisp, shatter-when-cut slice.
Ingredients
Instructions
-
Mix flour and salt
Place 250 g flour and 5 g salt in a medium mixing bowl and stir briefly to combine. This dry base ensures the salt is evenly distributed before the fat goes in.
-
Cut in cold butter
Add 226 g cold butter cubes to the bowl and press each piece flat with a bench scraper until you have flat shards with some pea-size bits remaining. Keep the butter below 10°C so it stays in distinct pieces and does not smear into the flour, which is what creates visible flaky layers later.
-
Prepare water vinegar
Mix 60 ml ice water with 15 ml vinegar in a small cup and set aside. The acidity helps relax the dough without toughening the gluten as it rests.
-
Add liquid slowly
Sprinkle 2 tablespoons of the liquid over the flour and stir with a fork just until clumps form; add the rest only if the dough won't come together when squeezed. Stop adding liquid as soon as the dough holds a gentle squeeze to avoid a sticky mass that needs extra flour.
-
Form and rest disk
Turn the dough onto a counter and press into a 1-inch thick disk, then wrap in film and rest in the fridge for 1 hour. This rest lets the butter firm and the gluten relax so the rolled crust keeps its shape and shatters when baked.
-
Roll and fold
Roll the disk on a floured surface to a 12-inch circle about 3 mm thick, then fold in thirds like a letter and roll again. Chill the folded dough 15 minutes in the fridge so the butter stays cold and the sheet is easier to transfer without tearing.
-
Fit pie dish
Set the crust in a 9-inch pie dish, trim the overhang to 2 cm, and crimp the edge with your fingers without stretching the wall. Lift and lay it loose, then press gently into the corners so it doesn't thin and crack while baking.
-
Bake the crust
Prick the base if baking blind at 180°C / 350°F; for a filled pie, bake at the same temperature until the edge is golden and crisp and the filling bubbles at the center, about 45–55 minutes depending on the filling. Use a metal pie dish if you want a browner bottom since it transfers heat faster to the base than ceramic.
Nutrition Facts
Servings 8
- Amount Per Serving
- Calories 350kcal
- % Daily Value *
- Total Fat 24g37%
- Saturated Fat 15g75%
- Cholesterol 65mg22%
- Sodium 250mg11%
- Total Carbohydrate 29g10%
- Dietary Fiber 1g4%
- Protein 4g8%
* Percent Daily Values are based on a 2,000 calorie diet. Your daily value may be higher or lower depending on your calorie needs.
Note
- Storage: Wrap a baked or raw crust tight and freeze for up to 2 months; a baked shell keeps in an airtight container at room temperature for up to 3 days.
- Reheating: To crisp a stored baked shell, heat at 180°C / 350°F for 8 minutes until the surface feels dry; don't microwave or it turns soft and greasy.
- Pro tip: Rest the rolled crust in the dish inside the fridge for 20 minutes before baking to stop shrinkage, and see our garlic butter shrimp for a savory filling idea.
- Make ahead: The 1-hour fridge rest after forming the disk is required, plus a 15-minute chill after folding, so plan accordingly.
