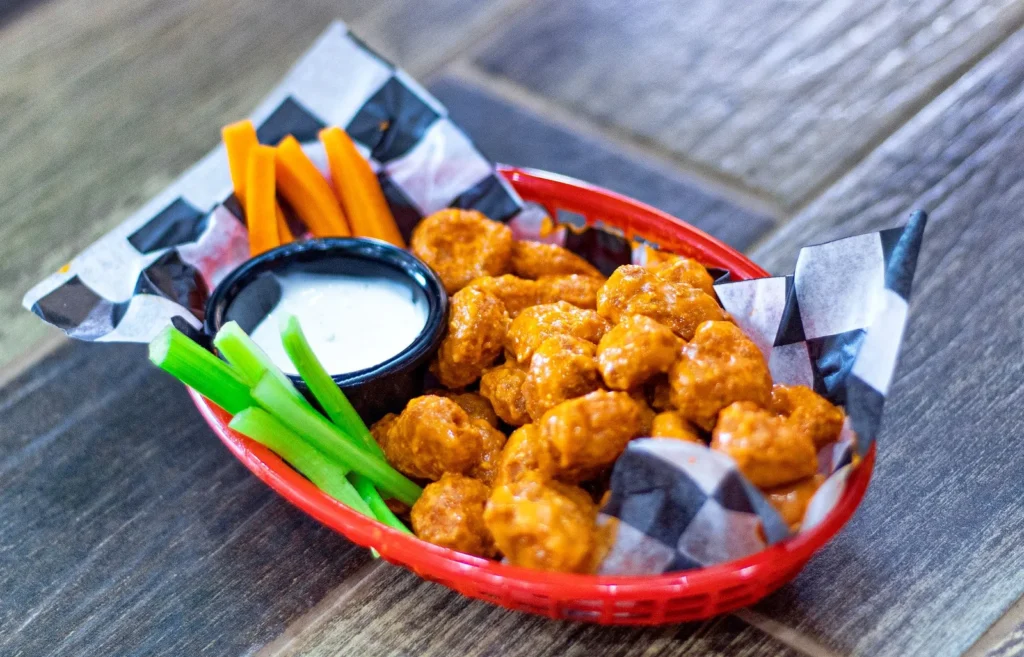
An air fryer buffalo cauliflower recipe turns a humble head of cauliflower into crisp, tangy, spicy bites without the mess of deep frying. The hot circulating air crisps the coated florets while the buffalo sauce clings to every ridge for real heat and vinegar bite. You get a snack or side that holds its crunch longer than oven-baked versions and uses about a tablespoon of oil total.
This version keeps the batter light so the florets don’t turn soggy, and it builds the sauce from pantry staples you likely already own. The result is a dependable weeknight cook that scales easily for game days or lazy lunches. If you want a lighter base for a bowl, our cauliflower rice pairs well alongside. Making this air fryer buffalo cauliflower at home is surprisingly straightforward once you know the key steps.
Why You’ll Love These Air Fryer Buffalo Cauliflower
- Crisp coating from a thin flour batter that air fries to a dry, snap-able shell
- Real buffalo tang using melted butter and hot sauce, not a bottled glaze
- Ready in about 15 minutes of active cook time with no oil splatter
- Flexible heat level you control by the brand and amount of hot sauce
- Works as a snack, side, or vegetarian game-day replacement for wings
Ingredients You’ll Need
- 1 medium head cauliflower (about 800 g), cut into 2-inch florets
- 1/2 cup all-purpose flour
- 1/2 cup water
- 1/2 tsp garlic powder
- 1/4 tsp salt
- 1 tbsp olive oil for the basket
- 3 tbsp unsalted butter
- 1/3 cup Frank’s RedHot or similar cayenne pepper sauce
- 1/4 tsp smoked paprika
Ingredient Substitutions
All-purpose flour: Replace with an equal weight of rice flour for a gluten-free coating that crisps slightly sharper. Rice flour holds less water, so the batter will be thinner and you may need 1 tbsp less water to keep it clinging. Expect a lighter color and a fainter wheat note, with the same cook time at 190°C / 375°F. The air fryer buffalo cauliflower works well for weeknight cooking when time is limited.
Unsalted butter: Use an equal amount of olive oil to make the sauce dairy-free and a touch fruitier. Oil won’t solidify when cooled, so the glaze stays slick rather than setting into a glossy shell. The flavor loses the rounded dairy sweetness but gains a greener edge that suits a vegan plate. Storing leftover air fryer buffalo cauliflower correctly keeps it tasting good for days.
Frank’s RedHot: Swap for a equal volume of Cholula or Tabasco if that’s what’s open in the pantry. These are thinner and sharper, so cut the quantity to 1/4 cup and add 1 tsp of white vinegar to keep the buffalo balance. The heat reads hotter per drop, so taste before tossing all florets. For the best results with this air fryer buffalo cauliflower, read through all the steps before starting.
Olive oil for basket: Replace with avocado oil spray to cut added fat and improve nonstick release. Spray coats the metal more evenly than a poured tablespoon, reducing bald spots where batter sticks. You’ll use roughly 8 short pumps instead of measuring a spoon. If you enjoyed this, our peach bellini grapefruit is worth trying next.
Step-by-Step Instructions
- Cut the cauliflower into even 2-inch florets so they cook at the same rate, then pat them dry with a towel to help the batter stick.
- Whisk flour, water, garlic powder, and salt in a bowl until smooth and the consistency of thin pancake batter, then drop in florets and stir to coat.
- Brush the air fryer basket with olive oil and arrange florets in a single layer with space between them; never crowd the pan or they steam.
- Air fry at 190°C / 375°F for 12 minutes, shaking the basket at minute 6, until the coating looks golden and crispy.
- Melt butter in a small pan over medium-low heat, stir in hot sauce and smoked paprika, and cook 2 minutes until glossy and unified.
- Toss the hot florets with the buffalo sauce in a bowl until evenly filmed, then return to the basket for 3 minutes to re-crisp the edges.
Pro Tips
Dry the raw florets well before battering; surface water thins the coating and leads to pale, soft spots instead of a shell. A quick spin in a salad spinner works if you batch prep.
Shake the basket halfway through the first fry so all sides meet the hot air; static florets brown on top and stay pale underneath. Treat it like rotating a tray in a oven.
For sauce technique and safe butter handling, see the guidance from butter sauce on timing melts without separation. Pull the pan the moment the foam settles.
Re-crisp sauced florets briefly rather than serving them straight from the bowl; that 3 minutes second pass rebuilds the snap that the liquid sauce softens. Skip it only if you prefer a softer bite.
Common Mistakes to Avoid
Overcrowding the basket traps steam and yields chewy florets; cook in two batches if needed so air moves freely around each piece. A tight layer defeats the air fryer’s speed.
Pouring sauce on cold florets keeps the coating from re-setting, leaving a soggy result; always toss with sauce right after the first fry while pieces are hot. Heat is what locks the glaze.
Using a thick batter instead of a thin one adds a bready layer that stays doughy inside; aim for a batter that drips but doesn’t run like water. Too thick is the usual home error. For another easy option, check out our more.
Serving Suggestions
Plate the florets with celery sticks and a small cup of blue cheese dip to cut the heat the way wings are served. The cool dairy balances the cayenne sharpness.
For a full meal, set them on our lime cauliflower rice with a squeeze of lemon for a low-starch bowl. The bright herbs lift the heavy sauce.
They also work as a side dish next to grilled corn or a simple green salad when you want crunch without meat. Keep portions around six florets per person.
Storage and Reheating
Refrigerate leftovers in an airtight container for up to 3 days and keep them away from the fridge door where temps swing. Sauced florets soften but stay safe that long.
Reheat in the air fryer at 180°C / 350°F for 5 minutes until the edges turn golden and crispy again; skip the microwave which makes them limp. Eat within the window for best texture.
This dish does not freeze well because the sauce separates on thaw, so make only what you’ll eat in a few days. Cooked cauliflower also weeps water when frozen. You might also like our espagnole sauce step.
Recipe Variations
Extra Hot Version
Add 1/4 tsp cayenne to the sauce with the paprika and use a hotter vinegar sauce like Tabasco Scorpion in place of half the RedHot. The bite turns from warm to fierce, so serve with extra cooling dip. Keep the butter ratio to avoid a thin, burning glaze.
Cheesy Version
Sprinkle 2 tbsp grated parmesan over the florets after the final 3 minutes crisp and close the basket for 1 minute to melt it. The cheese adds a salty umami layer that tempers the tang. Use a fine grate so it doesn’t clump.
BBQ Buffalo Version
Replace 2 tbsp of the hot sauce with a smoky barbecue sauce for a sweeter, darker glaze that still carries heat. The sugar browns faster, so drop the re-crisp time to 2 minutes and watch for burn. This suits kids who find straight buffalo too sharp.
Low Oil Version
Skip the butter and use 1 tbsp olive oil plus 1 tbsp water in the sauce, then spray the basket instead of brushing. The coating crisps nearly as well with about 60% less fat. Expect a less glossy finish and a lighter mouthfeel.