
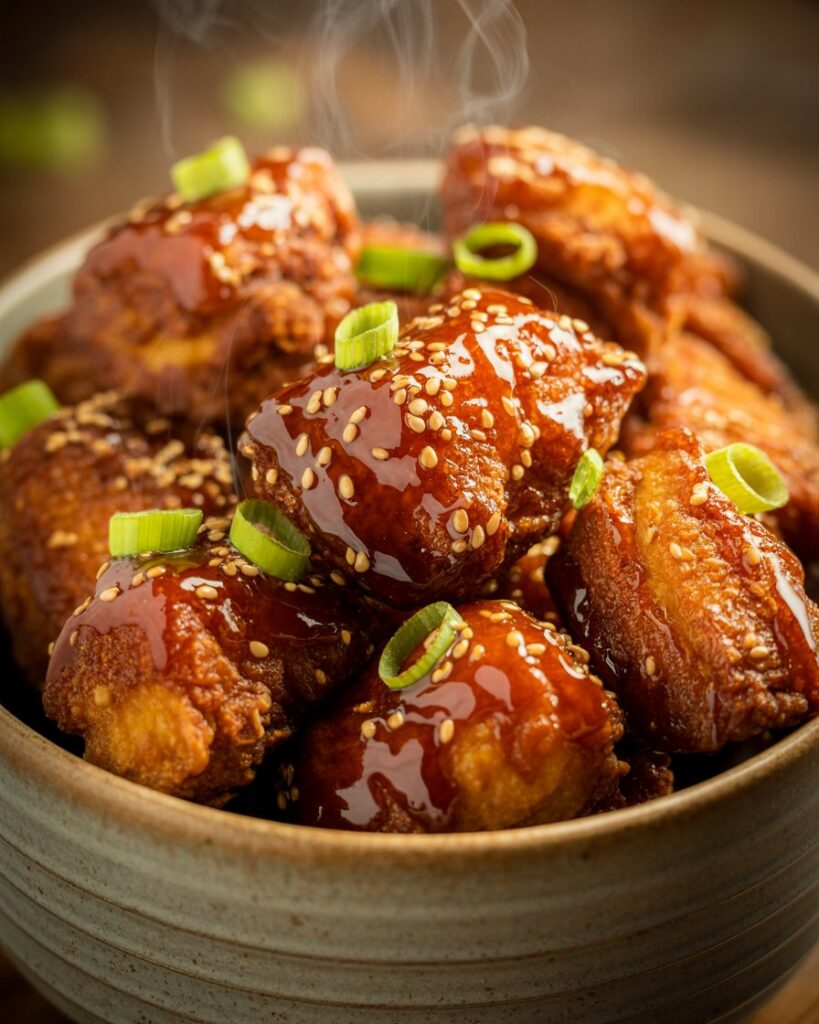
Introducing a quick and tasty dinner: 30-Minute Honey Butter Chicken. Juicy chicken bites are cooked to golden-brown perfection and tossed in a rich, buttery honey glaze. Ready in just half an hour, it’s the easy weeknight meal everyone will ask you to make again!
Why You’ll Love This 30-Minute Honey Butter Chicken
This one-pan Honey Butter Chicken is the ultimate weeknight meal. In just 30 minutes, you’ll get crispy, bite-sized chicken coated in a sticky-sweet honey butter sauce. No lengthy prep or heavy frying required—just simple ingredients coming together for flavor-packed results.
- Quick and Easy: Ready in half an hour with minimal prep.
- Crispy, Not Oily: A light cornstarch coating makes the chicken perfectly crunchy without heavy frying.
- Kid-Friendly: The sweet glaze wins over picky eaters, while adults love the savory balance.
What Makes This Recipe Special
This dish is all about the perfectly balanced glaze and crispy chicken. Honey caramelizes with butter into a rich, sticky sauce, and a splash of apple cider vinegar cuts through the sweetness. A light coating of cornstarch gives the chicken a crunchy crust without deep frying, so each bite is tender inside and golden-brown and crunchy on the outside.


Ingredients You’ll Need
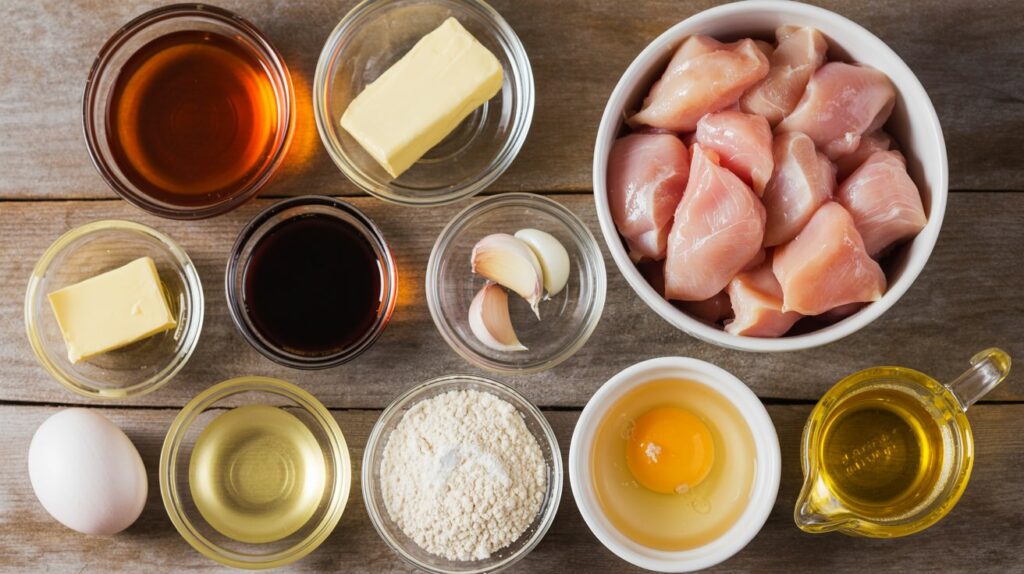
Gather these simple ingredients before you start:
1. Boneless chicken (thighs or breast), cubed (1 lb / about 450g)
Chicken thighs stay juicier, cut into even pieces for quick and uniform cooking
2. Large egg (1)
Beaten egg helps cornstarch stick properly to the chicken
3. Garlic salt (or garlic powder + salt) (1/4 tsp)
Season evenly, or use 1/2 tsp garlic powder + 1/2 tsp salt as substitute
4. Cornstarch (1 cup)
Gives crispy coating, potato starch or tapioca starch can also work
5. Vegetable (neutral) oil (1/3 cup)
Use canola, peanut, or any high-heat oil for frying
6. Honey (1/2 cup)
Use mild, runny honey for smooth sauce mixing
7. Unsalted butter (1/3 cup / about 75g)
Cut into cubes for faster melting, helps control salt level
8. Garlic, minced (2 cloves)
Fresh garlic gives stronger and better flavor
9. Soy sauce (2 tbsp)
Low-sodium or tamari works for a gluten-free option
10. Apple cider vinegar (3 tbsp)
Adds balance and tang, white vinegar can be used instead
11. Optional garnish
Toasted sesame seeds and sliced green onions for crunch and color
Pro-Tips for Success
- Double Fry for Crunch: If time allows, fry the chicken in two batches. Remove once lightly golden, let cool, then fry again briefly until extra crispy.
- Maintain Heat: Cook chicken in a hot pan and in batches to keep the oil temperature high. This prevents soggy chicken and ensures an even golden crust.
- Fresh Ingredients: Use fresh garlic and good-quality honey. A clove of garlic in the sauce and pure honey make a big flavor difference.
- Season in Layers: Season the chicken and sauce separately. For example, wait to taste for salt until after adding soy sauce to avoid over-salting.
- Quick Glaze: Let the honey butter sauce bubble and thicken slightly before adding the chicken back, so it clings beautifully to each piece.
Common Mistakes to Avoid
- Overcrowding the Pan: Cooking too many pieces at once will steam the chicken instead of crisping it. Work in batches for best results.
- Heat Too High or Low: Medium-high heat is key. Too hot and the butter in the sauce can burn; too cool and the chicken won’t crisp up.
- Uneven Coating: Make sure each piece is evenly coated with egg and cornstarch. Missed spots won’t get that golden, crunchy crust.
- Over-Salting Early: The soy sauce adds salt to the dish. Taste the sauce before adding extra salt to avoid it becoming too salty.
Flavor Variations
- Keto-Friendly: Swap the honey for a sugar-free syrup or monk fruit sweetener. Use coconut aminos instead of soy sauce to keep it low-carb.
- Paleo Version: Replace cornstarch with arrowroot or tapioca starch for coating. Use coconut sugar in the sauce and coconut aminos for a grain-free twist.
- Vegan “Chicken”: Use cubed tofu or cauliflower florets instead of chicken and a vegan butter alternative. Coat and cook the same way for a plant-based version.
- Spicy Honey Butter: Stir a pinch of red pepper flakes or a spoonful of gochujang into the sauce for a sweet-and-spicy kick.
What to Serve With 30-Minute Honey Butter Chicken
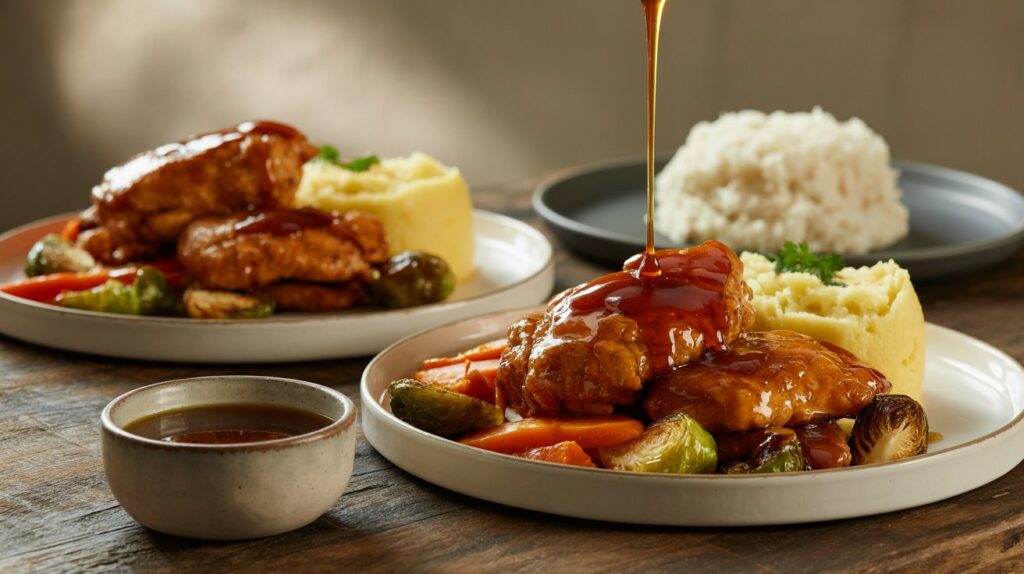
- Steamed Rice: The classic choice for soaking up all that delicious sauce. Jasmine or basmati rice works well.
- Mashed Potatoes: Creamy mashed potatoes (try adding a little mustard) complement the sweet glaze perfectly.
- Vegetables: Steamed or roasted green beans, broccoli, or snap peas add color and a healthy crunch.
- Fresh Salad or Slaw: A cucumber salad or crunchy coleslaw provides a cool, crisp contrast to the warm, sticky chicken.
Storage and Reheating
Storage: Store leftover chicken in an airtight container in the fridge for up to 3–4 days. The sauce will continue to seep into the chicken, keeping it moist.
Reheating: Reheat gently in the microwave or in a skillet over low heat, adding a splash of water or chicken broth if the sauce has thickened. This will revive the sauce and prevent the chicken from drying out.
Frequently Asked Questions
Can I use chicken wings or bone-in chicken pieces?
Yes, you can! The method works with wings or bone-in pieces too. Just be sure to adjust the cooking time: larger or bone-in pieces need longer to cook through. The crispy coating and honey butter glaze are delicious on any cut of chicken.
Can I bake or air-fry the chicken instead of frying?
Absolutely. For an air fryer, lightly oil and air-fry at about 175°C (350°F) for 15–20 minutes, shaking halfway through. For oven-baking, spread coated chicken on a greased tray and bake at 200°C (400°F) for 20 minutes or until crispy. Then toss with the warm honey butter sauce as directed.
How do I thicken the honey butter sauce if it’s too runny?
If the sauce is too thin, simmer it a little longer to reduce and concentrate. You can also stir in a teaspoon of cornstarch dissolved in water and cook until it reaches your desired thickness. Remember that the sauce will continue to set as it cools, so don’t over-thicken it on the stove.
How do I store and reheat leftovers?
Store any leftovers in an airtight container in the refrigerator for up to 3–4 days. Reheat gently in the microwave or in a skillet on low heat, adding a splash of water or broth if the sauce has thickened. This will prevent the chicken from drying out.
VIEW FULL RECIPE
If you liked this recipe, you may also enjoy…
- Best Honey Garlic Chicken Noodles (In Under 30 Minutes!) Recipe
- How to Make Marry Me Chicken Pasta (Step-by-Step USA Guide)
- Healthy Crispy Chicken Milanese Recipe (Low-Carb & Delicious)
Ultimate Baked Caesar Chicken Easy Step By Step Guide
Description
This sticky, sweet honey butter chicken is crispy on the outside and tender inside. Ready in just 30 minutes, it’s the easy weeknight dinner the whole family will love.
Ingredients
Instructions
-
Step 1 (0-5 min): Prep the Chicken
Cut the chicken into bite-sized pieces. Place chicken in a bowl or large zip-top bag. Sprinkle with garlic salt, crack the egg over top, and mix or massage to coat. Add the cornstarch, seal the bag, and shake well until the chicken is fully coated.
-
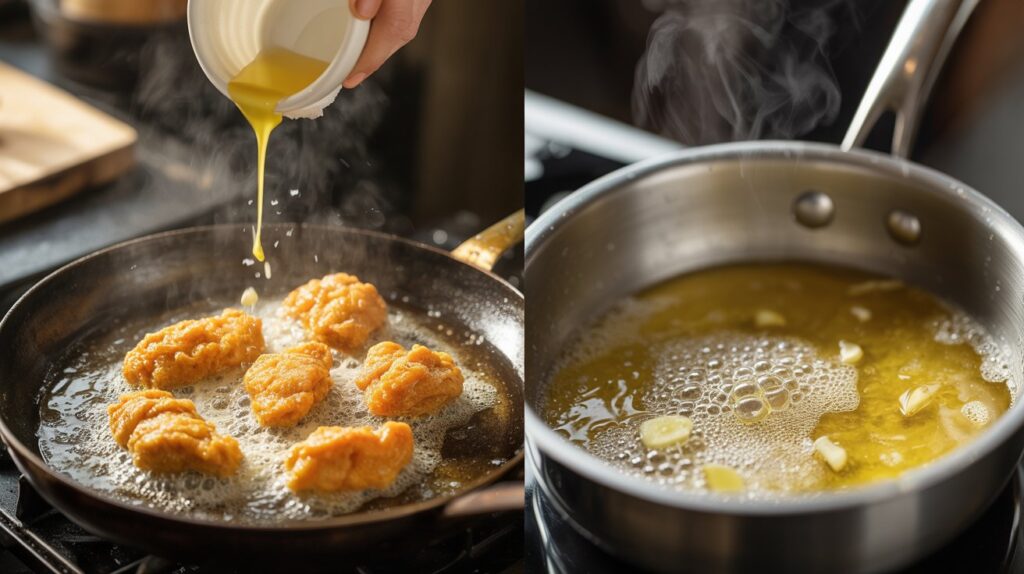
Step 2 (5-12 min): Cook the Chicken
Heat the oil in a large skillet over medium-high heat. Add the coated chicken and cook for 7-8 minutes, stirring occasionally, until the chicken is golden brown and cooked through. Transfer the chicken to a plate and set aside.
-
Step 3 (12-17 min): Make the Honey Butter Sauce
In the same skillet, melt the butter over medium heat. Add the honey, minced garlic, soy sauce, and apple cider vinegar. Stir and let the sauce bubble for 1-2 minutes until it thickens slightly.
-
Step 4 (17-20 min): Coat Chicken and Serve
Return the cooked chicken to the skillet and toss to coat in the sauce. Cook for another minute until everything is glazed. Garnish with sesame seeds and sliced green onions if desired, and serve immediately (try it over rice or with veggies!).
Nutrition Facts
Servings 4
- Amount Per Serving
- Calories 470kcal
- % Daily Value *
- Total Fat 19g30%
- Saturated Fat 9g45%
- Cholesterol 135mg45%
- Sodium 989mg42%
- Total Carbohydrate 51g17%
- Dietary Fiber 1g4%
- Sugars 20g
- Protein 24g48%
* Percent Daily Values are based on a 2,000 calorie diet. Your daily value may be higher or lower depending on your calorie needs.
Note
- Double Fry: For extra crunch, fry chicken in two stages – fry until golden, let cool, then refry.
- Use Fresh Garlic: Freshly minced garlic really boosts the sauce flavor, much more than powdered.
- Let Sauce Set: Allow chicken to rest for a minute after tossing in sauce – this helps the glaze thicken and stick to each piece.