

A good butternut squash waffles recipe turns roasted winter squash into a tender, golden breakfast with a mild sweetness and a crisp edge. The batter uses cooked squash puree, which adds moisture and a soft crumb without making the waffle heavy. You get a make-ahead friendly morning meal that works with both sweet and savory toppings.
The method below is built for a standard Belgian waffle iron and uses pantry staples plus one roasted squash. Because the squash is already soft, the batter comes together in one bowl and rests while the iron heats. If you like a reliable weekday option, this butternut squash waffles recipe is worth keeping on rotation. If you enjoyed this, our baked butternut squash is worth trying next.
Why You’ll Love These Butternut Squash Waffles
- Real roasted squash gives a naturally sweet, earthy base instead of empty carbs.
- The batter rests in 10 minutes, so the waffles cook evenly with a crisp outside.
- They freeze cleanly and reheat in a toaster for fast breakfasts.
- You can shift them sweet or savory with one topping change.
- One batch uses one small squash, cutting waste from a large vegetable.

Ingredients You’ll Need
- 1 cup butternut squash puree (from about 1 small roasted squash, skinned and mashed)
- 2 large eggs
- 1 1/2 cups whole milk
- 1/3 cup melted unsalted butter
- 2 cups all-purpose flour
- 2 tbsp brown sugar
- 2 tsp baking powder
- 1/2 tsp baking soda
- 1/2 tsp salt
- 1 tsp ground cinnamon
- 1/4 tsp ground nutmeg
Ingredient Substitutions
Whole milk: Replace with an equal volume of unsweetened almond milk for a dairy-light version. Almond milk lowers the fat, so the crumb is slightly less rich and the edge crisps a bit slower. Add 1 tablespoon of melted butter to the liquid if you want more browning. Making this butternut squash waffles at home is surprisingly straightforward once you know the key steps.



All-purpose flour: Swap with an equal weight of white whole wheat flour for more fiber. This flour drinks more liquid, so rest the batter 5 minutes longer and add 1 to 2 tablespoons of milk if it looks thick. Expect a denser bite and a tan crust. The butternut squash waffles works well for weeknight cooking when time is limited.
Brown sugar: Use an equal amount of maple syrup instead for a cleaner sweetness. Liquid sugar softens the crumb, so cut the milk by 2 tablespoons to keep the batter scoopable. The waffles will brown faster, so lower the iron by one setting. Storing leftover butternut squash waffles correctly keeps it tasting good for days.
Unsalted butter: Replace the melted butter with the same amount of neutral oil for a vegan-friendly fat. Oil makes the waffle more tender but less buttery in smell. You may lose some surface crisp, so cook 30 seconds longer per side. For another easy option, check out our hamachi collar.
Step-by-Step Instructions
- Roast the squash at 200°C / 400°F for 35 minutes until a knife slides through with no resistance, then mash to a smooth cup.
- Whisk the eggs, milk, and melted butter in a large bowl until blended, about 1 minute.
- Stir in the squash puree and brown sugar until the mix is uniform orange.
- Add flour, baking powder, baking soda, salt, cinnamon, and nutmeg; mix until just combined with a few small lumps.
- Rest the batter at room temperature for 10 minutes so the gluten relaxes and the leaveners activate.
- Heat a Belgian waffle iron to medium and ladle in enough batter to cover the grid without spilling.
- Cook 4 to 5 minutes until the steam stops and the waffle releases with a golden and crispy surface.
- Move finished waffles to a wire rack while you cook the rest to keep them from going soft.
Pro Tips
Dry the squash puree with a paper towel if it looks watery; excess liquid thins the batter and slows crisping. For a deeper flavor, roast the squash with the cut side down so the sugars caramelize on the pan.
Preheat the iron fully and lightly brush it with oil before the first pour to prevent sticking. A waffle iron guide can help you read your model’s doneness cues if you are new to it.
Keep cooked waffles on a rack, not a plate, so trapped steam does not undo the crisp. If you stack them, slide parchment between layers only after they cool.
Portion the batter with a measuring cup so each waffle cooks the same time. Uneven fills lead to one half raw and one half dry.
Common Mistakes to Avoid
Overmixing the batter after the flour goes in builds gluten and gives a chewy, bread-like waffle. Stop at just combined and accept small lumps.
Pouring batter into a cold iron makes it spread and stick, producing a ragged edge. Wait until the indicator light shows ready or a drop sizzles.
Skipping the rest time leaves the baking soda uneven, so some waffles rise and others stay flat. Set a timer for 10 minutes before heating the iron.
Serving Suggestions
Top warm waffles with fried eggs and a pinch of salt for a savory plate that pairs well with stewed butternut squash on the side. The mild squash base takes both runny yolk and hot sauce without clashing.
For sweet service, use maple butter and toasted pecans, or spoon fruit dip over sliced apples on top. A dusting of cinnamon sugar right after cooking sticks to the ridges.
Storage and Reheating
Cooled waffles keep in an airtight container in the fridge for up to 3 days. Reheat in a toaster on medium until steam stops and the center is hot, about 2 minutes.
For longer hold, freeze them in a single layer then bag for freeze for up to 2 months. Toast from frozen; do not microwave or they turn rubbery. Yes, this freezes well for up to 2 months.
Recipe Variations
Cheesy Herb Version
Add 1/2 cup grated sharp cheddar and 1 tablespoon chopped sage to the dry mix. The cheese crisps on the grid and gives a salty note that suits eggs. Expect a firmer bite and faster browning, so drop the cook time by 30 seconds.
Spiced Maple Version
Increase cinnamon to 2 teaspoons and stir 2 tablespoons maple syrup into the liquid. The waffles read more like dessert and pair with cookie crumbs as a topping. Watch the iron since syrup browns the surface quickly.
Gluten-Free Version
Use a 1-to-1 gluten-free flour blend in place of all-purpose and add 1/4 teaspoon xanthan if your blend lacks it. The crumb stays tender but a little more fragile, so handle with a spatula. Rest the batter 15 minutes so the blend hydrates.
Savory Grain Version
Replace 1/2 cup flour with fine cornmeal for a gritty, toast-like edge. This shifts the waffle toward a squash side dish feel and holds up under chili. Cook 1 minute longer to set the cornmeal.
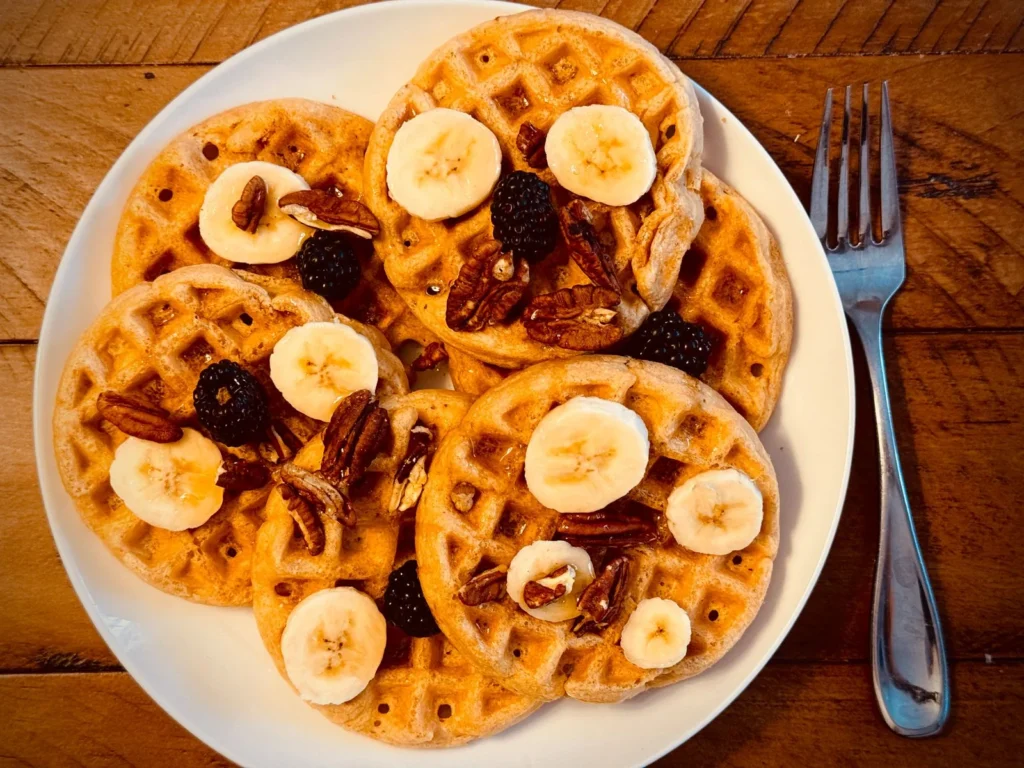

Butternut Squash Waffles
Description
These butternut squash waffles turn roasted winter squash into a tender, golden breakfast with mild sweetness and a crisp edge. The one-bowl batter rests while the iron heats and works with both sweet and savory toppings.
Ingredients
Instructions
-
Roast and mash squash
Roast the squash at 200°C / 400°F for 35 minutes until a knife slides through with no resistance, showing it is fully tender. Then skin the squash and mash it to a smooth cup of puree for the batter.
-
Whisk wet base
Whisk the 2 large eggs, 1 1/2 cups whole milk, and 1/3 cup melted unsalted butter in a large bowl until blended, about 1 minute. This creates a uniform liquid base with no streaks of egg white remaining.
-
Add squash and sugar
Stir in the 1 cup butternut squash puree and 2 tbsp brown sugar until the mix is a uniform orange color. Make sure no lumps of squash remain so the sweetness distributes evenly.
-
Combine dry ingredients
Add 2 cups all-purpose flour, 2 tsp baking powder, 1/2 tsp baking soda, 1/2 tsp salt, 1 tsp ground cinnamon, and 1/4 tsp ground nutmeg; mix until just combined with a few small lumps. Stop mixing as soon as the flour disappears to avoid a chewy waffle.
-
Rest the batter
Rest the batter at room temperature for 10 minutes so the gluten relaxes and the leaveners activate. The surface should look slightly bubbly when the time is up.
-
Heat waffle iron
Heat a Belgian waffle iron to medium and wait until the indicator shows ready or a drop of water sizzles on the grid. Lightly brush with oil before the first pour to prevent sticking.
-
Cook the waffles
Ladle in enough batter to cover the grid without spilling and cook for 4 to 5 minutes until the steam stops and the waffle releases with a golden and crispy surface. The edges should feel firm and sound crisp when lifted from the iron.
-
Cool on rack
Move finished waffles to a wire rack while you cook the rest to keep them from going soft. Leave them in a single layer so trapped steam does not undo the crisp edge.
Nutrition Facts
Servings 4
- Amount Per Serving
- Calories 320kcal
- % Daily Value *
- Total Fat 13g20%
- Saturated Fat 7g35%
- Cholesterol 110mg37%
- Sodium 520mg22%
- Total Carbohydrate 42g15%
- Dietary Fiber 3g12%
- Sugars 8g
- Protein 9g18%
* Percent Daily Values are based on a 2,000 calorie diet. Your daily value may be higher or lower depending on your calorie needs.
Note
- Storage: Cooled waffles keep in an airtight container in the fridge for up to 3 days; reheat in a toaster on medium about 2 minutes until hot.
- Make ahead: Roast the squash in advance and try our squash gnocchi for another prep-friendly meal.
- Pro tip: Dry the squash puree with a paper towel if watery so the batter stays thick and crisps faster.
- Rest: Set a timer for 10 minutes before heating the iron so the leaveners activate evenly.
