

A loaded nachos recipe for parties is the kind of dish that disappears faster than you can set it down. It builds on a base of sturdy tortilla chips, layers them with seasoned meat, melted cheese, and fresh toppings, then bakes into one shareable pan. You get crunch, salt, fat, and acid in every bite, which is exactly why it works as a centerpiece snack.
The method below keeps the chips from going soggy and spaces the toppings so nobody gets a bare corner. It scales up or down without changing the timing much, which makes it practical when guest counts shift. If you want a lighter base, our healthy nachos use the same layering logic with swapped ingredients. Making this loaded nachos recipe for parties at home is surprisingly straightforward once you know the key steps.
Why You’ll Love These Loaded Nachos Recipe For Parties
- Chips stay crisp because the meat is drained and the cheese goes on in two layers.
- One sheet pan feeds eight to ten people as a snack without separate plating.
- Toppings are added after baking so greens and creams keep their texture.
- You can build it ahead and bake right before guests arrive.
Ingredients You’ll Need
- 14 oz tortilla chips (restaurant-style, thick)
- 1 lb ground beef (80/20)
- 1 tbsp olive oil
- 1 packet taco seasoning (1 oz)
- 3/4 cup water
- 3 cups shredded cheddar cheese
- 1 cup shredded Monterey Jack cheese
- 1 cup black beans, drained and rinsed
- 1 cup pico de gallo
- 1/2 cup sour cream
- 1/4 cup sliced jalapeños
- 1/4 cup chopped fresh cilantro
Ingredient Substitutions
Ground beef: Replace with 1 lb of ground turkey for a leaner pan. Turkey releases less fat, so the chips stay drier, but it browns less and tastes milder, so add 1/2 tsp smoked paprika with the seasoning. Expect a slightly softer crumble and a lighter color than beef. The loaded nachos recipe for parties works well for weeknight cooking when time is limited.








Cheddar cheese: Swap with an equal weight of Colby Jack for a creamier melt and milder taste. Colby Jack browns faster, so check the pan at 5 minutes to avoid burnt edges. The flavor is less sharp but the pull is longer and smoother. Storing leftover loaded nachos recipe for parties correctly keeps it tasting good for days.
Black beans: Use 1 cup of pinto beans, drained, for a softer bite and earthier note. Pintos break down more under heat, so stir them in gently to keep some whole pieces. The color shifts from black specks to a tan-beige spread. For the best results with this loaded nachos recipe for parties, read through all the steps before starting.
Sour cream: Replace with 1/2 cup of Greek yogurt for tang and lower fat. Yogurt is thinner, so dollop it rather than drizzle to keep chips crisp. The acidity is brighter and the mouthfeel is a touch gummier. If you enjoyed this, our recipe keys is worth trying next.
Step-by-Step Instructions
- Heat medium-high heat in a 12-inch skillet with olive oil, then add ground beef and break it into small crumbles. Cook 6 to 8 minutes until no pink remains and the meat looks golden and crispy at the edges, then drain the fat.
- Return the pan to medium-low heat, stir in taco seasoning and water, and simmer 3 minutes until the liquid thickens to a glossy coat on the meat. Remove from heat.
- Spread tortilla chips across a 13×18-inch sheet pan in an even layer with no large gaps. Scatter half the cheddar and Monterey Jack over the chips, then spoon the meat and black beans across, then top with the remaining cheese.
- Bake at 180°C / 350°F for 12 to 14 minutes until the cheese is fully melted and the chip edges turn light brown. Pull the pan when you see bubbles across the surface.
- Spoon pico de gallo and jalapeños over the hot pan, then add dollops of sour cream and a scatter of cilantro. Serve immediately while the cheese is still stretchy.
Pro Tips
Use thick restaurant-style chips because thin ones snap under the weight of meat and cheese. A double layer of cheese traps moisture away from the chip surface so the base stays audible when bitten.
Bake on the lower oven rack so the pan bottom crisps while the top melts. The sheet pan technique from pros keeps heat even across a crowded pan.
Warm the black beans before adding them so they do not cool the cheese on contact. Cold beans create steam that softens nearby chips within minutes.
Reserve a handful of cheese for a final scatter after baking if you want a fresher melt look. This also hides any dry spots from uneven chip placement.
Common Mistakes to Avoid
Skipping the fat drain after browning meat leaves grease that soaks the chips into paste. Always tip the crumbles into a colander and shake once before seasoning.
Overloading one section with toppings means the middle bakes while the corners stay bare. Spread meat in small clusters so each chip gets contact with cheese.
Adding sour cream before baking makes it split and turn oily under heat. Keep dairy toppings for the post-bake step so they stay cool and thick. For another easy option, check out our fettuccine alfredo you.
Serving Suggestions
Set the pan on a heat-safe board with small bowls of extra gravy on the side for guests who want a dipping option. Lime wedges squeezed over the top cut the fat and brighten the beef.
Pair with a simple cucumber salad to add crunch and cool contrast on the plate. A pitcher of iced tea or light beer keeps the salt balanced without heavy sides.
Storage and Reheating
Leftovers keep in an airtight container in the fridge for up to 3 days, though the chips soften by day two. Reheat in a 180°C / 350°F oven for 8 minutes until the cheese re-melts and the meat reaches 74°C / 165°F inside.
Freezing is not advised because the chips turn to mush on thaw. If you must, freeze the baked pan unbaked-topped for up to 1 month and add creams after reheating.
Recipe Variations
Chicken Version
Replace ground beef with 1 lb of shredded rotisserie chicken tossed in the taco seasoning and water mix. The result is lighter and strings apart on the chip, with a shorter bake of 10 minutes since the meat is pre-cooked.
Vegetarian Build
Drop the meat and add 1 cup of corn plus 1 cup of pinto beans for bulk and sweetness. You get a meat-free pan that holds shape well and reads as a Mexican style side without losing the cheese pull.
Spicy Heat
Add 1 tsp chili powder to the beef and swap jalapeños for 1/4 cup of sliced serrano. The heat sits at the back of the throat and pairs with extra sour cream to cool each bite.
Breakfast Nachos
After baking, top with 4 soft-scrambled eggs and 1/4 cup of crumbled bacon instead of pico. The eggs add a soft layer that changes the dish from snack to brunch without new equipment.
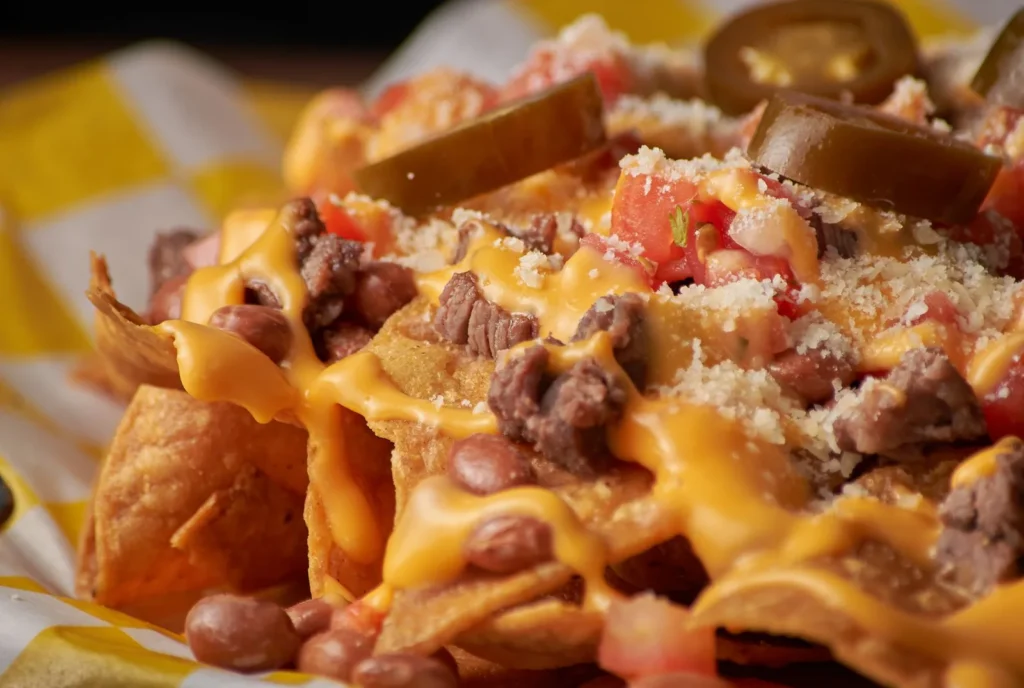

loaded nachos recipe for parties
Description
A loaded nachos recipe for parties built on sturdy tortilla chips with seasoned meat, melted cheese, and fresh post-bake toppings. One sheet pan feeds a crowd and stays crisp because the meat is drained and cheese is layered to protect the chips.
Ingredients
Instructions
-
Brown the ground beef
Heat a 12-inch skillet over medium-high heat with 1 tablespoon olive oil, then add 1 lb ground beef and break it into small crumbles with a spoon. Cook for 6 to 8 minutes until no pink remains, the meat looks golden, and the edges are crispy; the internal temperature should reach 71°C/160°F for safe ground beef. Then drain the fat by tipping the crumbles into a colander and shaking once before moving on.
-
Season the meat
Return the pan to medium-low heat and stir in 1 packet taco seasoning and 3/4 cup water with the drained beef. Simmer for 3 minutes until the liquid thickens to a glossy coat on the meat and the mixture is sticky rather than watery. Remove from heat and set aside while you prepare the chips.
-
Layer the chips and cheese
Spread 14 oz tortilla chips across a 13x18-inch sheet pan in an even layer with no large gaps so every chip has support. Scatter half the cheddar and Monterey Jack (1.5 cups cheddar and 0.5 cup Jack) over the chips, then spoon the meat and 1 cup black beans across, then top with the remaining cheese. This double layer traps moisture away from the chip surface so the base stays crisp.
-
Bake the nachos
Bake at 180°C / 350°F on the lower oven rack for 12 to 14 minutes until the cheese is fully melted and the chip edges turn light brown. Pull the pan when you see bubbles across the cheese surface and the corners show no pale, un-melted spots. The pan bottom should crisp while the top melts evenly.
-
Add fresh toppings
Spoon 1 cup pico de gallo and 1/4 cup sliced jalapeños over the hot pan right after baking so they warm without cooking through. Add dollops of 1/2 cup sour cream and a scatter of 1/4 cup chopped cilantro for cool contrast and fresh flavor. Serve immediately while the cheese is still stretchy and the chips audible when bitten.
Nutrition Facts
Servings 10
- Amount Per Serving
- Calories 520kcal
- % Daily Value *
- Total Fat 32g50%
- Saturated Fat 15g75%
- Cholesterol 75mg25%
- Sodium 820mg35%
- Total Carbohydrate 38g13%
- Dietary Fiber 5g20%
- Sugars 3g
- Protein 24g48%
* Percent Daily Values are based on a 2,000 calorie diet. Your daily value may be higher or lower depending on your calorie needs.
Note
- Storage: Leftovers keep in an airtight container in the fridge for up to 3 days, though chips soften by day two; reheat in a 180°C/350°F oven for 8 minutes until cheese re-melts and meat hits 74°C/165°F.
- Make ahead: Build the layered pan before baking and hold cold; for a lighter base our healthy nachos use the same logic with swapped ingredients.
- Pro tip: Warm the black beans before adding so they do not cool the cheese and create steam that softens nearby chips.
- Doneness: Never judge ground beef by color alone; confirm 71°C/160°F and crispy edges before draining.
