

A good cheeseburger quesadilla recipe solves the weeknight dinner problem with pantry staples and one skillet. You get the seasoned beef and melted cheese of a burger inside a tortilla that crisps instead of falling apart. This version keeps the filling dry enough that the shell stays snap-able, not soggy.
The method below builds the beef with a flat sear, drains the fat, then layers cheese as the glue. You end up with a handheld pocket that eats like a burger but cooks in about 20 minutes. It scales easily and uses one pan, so cleanup stays short. If you enjoyed this, our beef birria low is worth trying next. Making this cheeseburger quesadilla at home is surprisingly straightforward once you know the key steps.
Why You’ll Love These Cheeseburger Quesadilla
- One skillet means less washing and faster cook time than a grill burger.
- Dry-seasoned beef keeps the tortilla crisp instead of steam-softened.
- Pickles and mustard bring the burger tang without extra sauce.
- Kids can help layer cheese and flip with a spatula safely.
- Freezes flat for ground beef meal prep.
Ingredients You’ll Need
- 1 lb ground beef (80/20) — fat renders flavor but drain after searing.
- 1 small onion, diced — builds a sweet base in the beef.
- 1 tbsp Worcestershire sauce — adds umami depth to the meat.
- 1 tsp salt — seasons the beef evenly before cheese.
- 1/2 tsp black pepper — balances the richness.
- 4 large flour tortillas (10 inch) — holds filling without tearing.
- 2 cups shredded cheddar cheese — melts smooth and binds edges.
- 1/2 cup dill pickle chips — gives the signature burger tang.
- 2 tbsp yellow mustard — spread thin for sharp bite.
- 1 tbsp butter — for crisping the outside.
Ingredient Substitutions
Ground beef: Replace the 1 lb 80/20 with 1 lb ground turkey for a leaner pocket. Turkey releases less fat, so add 1 tbsp olive oil when searing to avoid sticking and dry spots. Expect a milder flavor and a slightly softer bite, and season a touch more since poultry needs salt to read. The cheeseburger quesadilla works well for weeknight cooking when time is limited.








Cheddar cheese: Swap the 2 cups shredded cheddar for 2 cups shredded Monterey Jack if you want a creamier melt. Jack stretches more and browns less, giving a quieter cheese pull and a paler interior. The quesadilla will hold together but taste milder, so add a pinch of salt to the beef. Storing leftover cheeseburger quesadilla correctly keeps it tasting good for days.
Flour tortillas: Use 4 corn tortillas (6 inch) for a firmer, gluten-free shell if certified. Corn crisps faster and cracks at folds, so warm them first and use less filling per piece. Cook over medium-low heat to avoid burning before the cheese sets. For the best results with this cheeseburger quesadilla, read through all the steps before starting.
Dill pickle chips: Trade the 1/2 cup chips for 1/2 cup bread-and-butter pickles for a sweeter profile. The sugar softens the tang and pairs well with sharp cheddar, but adds moisture, so pat slices dry. You may need 1 minute less sear time to keep the shell from steaming. For another easy option, check out our recipe cuisines.
Step-by-Step Instructions
- Heat a 12-inch skillet over medium-high heat and add the ground beef with diced onion. Break the meat into small crumbles and cook until no pink remains and edges brown, about 6 to 8 minutes.
- Stir in Worcestershire, salt, and pepper, then tilt the pan and spoon out excess fat. The beef should look dry and slightly tacky, not shiny with grease.
- Lay one tortilla flat and spread 1/2 tbsp mustard across half, then add 1/4 of the beef, 1/2 cup cheese, and a few pickle chips. Fold the bare half over to close.
- Melt 1/2 tbsp butter in the same skillet over medium-low heat and place the folded quesadilla in. Cook until the bottom is golden and crispy, about 3 minutes.
- Flip with a wide spatula and cook the second side until cheese melts and the shell sounds hollow when tapped, about 2 to 3 minutes. Repeat with remaining tortillas and filling.
Pro Tips
Build the beef a day ahead and chill it so weeknight assembly takes 5 minutes. Cold filling also keeps the tortilla from warming too fast before the cheese melts.
Use a cast iron skillet if you have one — it holds even heat and crisps the shell without hot spots. A warped pan causes pale, soft patches.
Shred your own cheese from a block instead of buying bags. Pre-shredded mixes coat cheese in starch that slows melting and dulls the pull.
Press the quesadilla gently with the spatula during the first side to seat the fillings. This prevents air gaps that make the pocket split when flipped.
Common Mistakes to Avoid
Overfilling is the main reason shells tear. Keep each half to about 1/2 cup beef and 1/2 cup cheese so the fold seals under light pressure.
Cooking on high heat burns the tortilla before the inside warms. Stay at medium-low heat once buttered and watch for even browning.
Skipping the fat drain leaves grease that steams the shell soft. Always spoon out the rendered fat after the beef browns. You might also like our register.
Serving Suggestions
Cut each pocket into three wedges and plate with ketchup and extra mustard for dipping. A side of stewed potatoes rounds the plate with a soft contrast to the crisp shell.
For a lighter spread, add a vegetable stew alongside instead of fries. The acidic tomatoes cut through the cheese nicely.
Storage and Reheating
Cooled quesadillas keep in an airtight container in the fridge for up to 3 days. Separate layers with parchment so the shells don’t stick.
To reheat, place on a dry skillet over medium-low heat until the center reaches 165°F and the shell crisps again, about 4 minutes per side. Avoid the microwave, which softens the tortilla.
You can freeze cooked pieces flat for up to 2 months. Reheat from frozen in a covered skillet with a splash of water to steam the inside while the outside crisps.
Recipe Variations
Bacon Version
Add 4 cooked bacon strips, crumbled, to the beef layer before the cheese. The salt and smoke deepen the burger note and the pieces stay chewy after crisping. Expect a richer pocket that needs no extra salt.
Spicy Version
Mix 1 tsp chili powder into the beef with the Worcestershire for a warm heat. Swap dill pickles for pickled jalapeños to add bright bite and a little moisture. The shell crisps the same but the inside reads hotter and sharper.
Low-Carb Option
Use 4 low-carb tortillas and reduce onion to 1/4 cup to cut starch. The shell browns faster, so watch the first side closely and lower heat by a notch. The filling stays the same and the pocket holds well.
Double Cheese
Layer 1/4 cup cheddar and 1/4 cup shredded Swiss per half for a creamier melt. Swiss adds nutty notes and a longer cheese pull, though it browns quicker. Keep the beef dry so the extra dairy doesn’t steam the shell.

Cheeseburger Quesadilla
Description
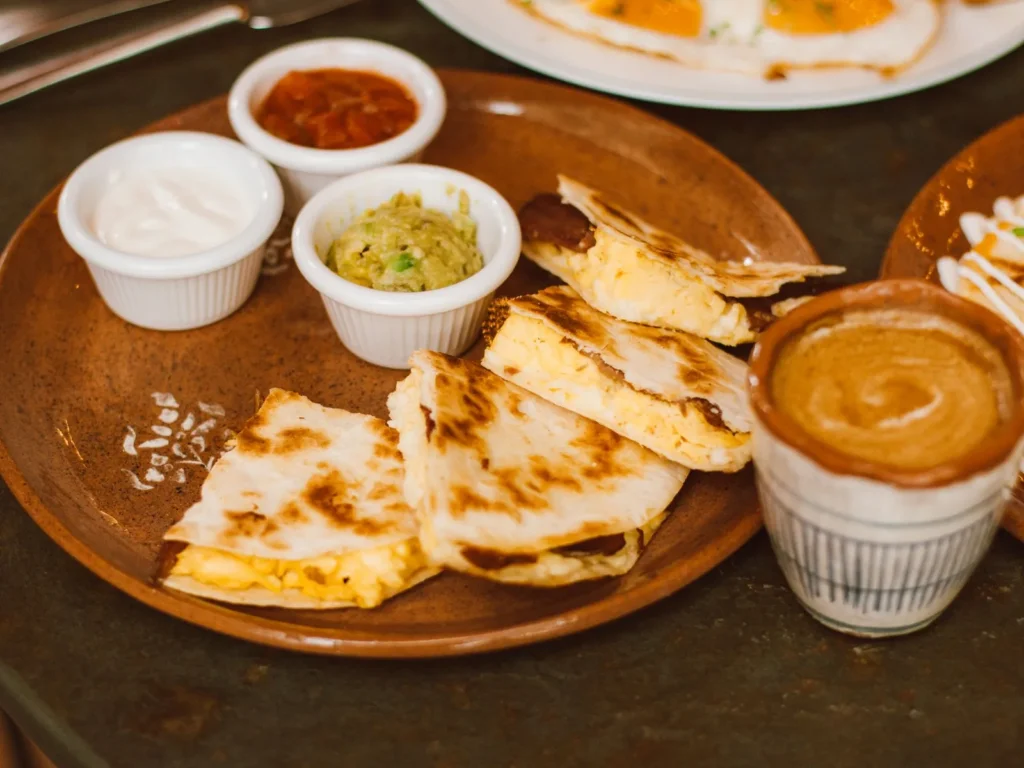
A cheeseburger quesadilla packs seasoned seared beef, melted cheddar, pickles, and mustard inside a tortilla that crisps instead of sogging. It cooks in one skillet in about 20 minutes, making weeknight dinner fast and cleanup short.
Ingredients
Instructions
-
Sear beef and onion
Heat a 12-inch skillet over medium-high heat and add the 1 lb ground beef with 1 small diced onion. Break the meat into small crumbles and cook until no pink remains and edges brown, about 6 to 8 minutes; the beef should reach a safe internal temperature of 71°C (160°F) for ground meat.
-
Season and drain fat
Stir in 1 tbsp Worcestershire sauce, 1 tsp salt, and 1/2 tsp black pepper, then tilt the pan and spoon out excess fat. The beef should look dry and slightly tacky, not shiny with grease, so the tortilla stays crisp rather than steamed soft.
-
Assemble first quesadilla
Lay one 10-inch flour tortilla flat and spread 1/2 tbsp yellow mustard across half, then add 1/4 of the beef, 1/2 cup shredded cheddar, and a few dill pickle chips. Fold the bare half over to close the pocket and keep the fill level low so the seam seals under light pressure.
-
Crisp first side
Melt 1/2 tbsp butter in the same skillet over medium-low heat and place the folded quesadilla in. Cook until the bottom is golden and crispy, about 3 minutes, watching for even browning without burning the shell.
-
Flip and finish first
Flip with a wide spatula and cook the second side until cheese melts and the shell sounds hollow when tapped, about 2 to 3 minutes. The inside should be hot and the cheese fully melted before removing from the pan.
-
Repeat remaining batches
Repeat the assembly and cooking steps with the remaining 3 tortillas and filling, using the last 1/2 tbsp butter as needed for crisping. Keep the heat at medium-low so each shell browns evenly while the cheese sets.
Nutrition Facts
Servings 4
- Amount Per Serving
- Calories 520kcal
- % Daily Value *
- Total Fat 32g50%
- Saturated Fat 15g75%
- Cholesterol 95mg32%
- Sodium 780mg33%
- Total Carbohydrate 30g10%
- Dietary Fiber 2g8%
- Sugars 3g
- Protein 28g57%
* Percent Daily Values are based on a 2,000 calorie diet. Your daily value may be higher or lower depending on your calorie needs.
Note
- Storage: Cooled quesadillas keep in an airtight container in the fridge for up to 3 days; separate layers with parchment so shells don't stick, and reheat in a dry skillet until the center hits 71°C (160°F).
- Make ahead: Build the beef a day ahead and chill it so weeknight assembly takes 5 minutes; for more easy options browse our recipe tags.
- Pro tip: Shred your own cheese from a block instead of buying bags, since pre-shredded mixes coat cheese in starch that slows melting and dulls the pull.
- Pan choice: Use a cast iron skillet if you have one — it holds even heat and crisps the shell without hot spots that cause pale, soft patches.
