

A lemon pepper chicken breast is a simple skillet dinner built on boneless chicken, cracked black pepper, and fresh lemon. The acid lightly tenderizes the meat while the pepper adds heat and depth without heavy sauce. You get a weeknight protein that pairs with almost any side and cleans up in one pan.
The method here uses a quick brine and a hard sear so the outside picks up color while the center stays moist. We keep the ingredient list short so the lemon and pepper stay the stars. If you like bright, savory mains, this belongs in your regular rotation. If you enjoyed this, our lemon chicken is worth trying next. Making this lemon pepper chicken breast at home is surprisingly straightforward once you know the key steps.
Why You’ll Love These Lemon Pepper Chicken Breast
- Ready in about 25 minutes from fridge to plate
- Uses common pantry spices and one lemon
- Stays juicy from a short saltwater brine
- Works with rice, salads, or roasted vegetables
- Naturally gluten free and low carb as written
Ingredients You’ll Need
- 4 boneless skinless chicken breasts (about 680 g / 1.5 lb), pounded to even thickness
- 1 tablespoon fine sea salt, for the brine
- 4 cups cold water, for the brine
- 2 tablespoons olive oil, for searing
- 2 tablespoons unsalted butter
- 1 tablespoon cracked black pepper, coarse grind
- 1 lemon, zested and juiced (about 3 tablespoons juice)
- 3 cloves garlic, minced
- 1 teaspoon honey
- 2 tablespoons chopped fresh parsley
Ingredient Substitutions
Olive oil: Replace with an equal amount of avocado oil if you need a higher smoke point. Avocado oil stays stable at medium-high heat without turning bitter, so the sear stays clean. The flavor is more neutral, letting the lemon read sharper. The lemon pepper chicken breast works well for weeknight cooking when time is limited.





Unsalted butter: Use 2 tablespoons of ghee for a lactose-free version with the same browning power. Ghee browns the garlic without scorching as fast as dairy butter. Expect a slightly nuttier finish and the same glossy pan sauce. Storing leftover lemon pepper chicken breast correctly keeps it tasting good for days.
Honey: Swap with an equal amount of maple syrup for a deeper, earthier sweetness. Maple loosens the sauce a touch faster because of its water content. The lemon still cuts through, but the color turns a shade darker. For the best results with this lemon pepper chicken breast, read through all the steps before starting.
Fresh parsley: Replace with 2 tablespoons of chopped fresh thyme for a more woodsy note. Thyme holds up better if you make the dish ahead and reheat it. Skip the parsley if you only have dried, but cut the amount to 2 teaspoons. For another easy option, check out our no bake lemon.
Step-by-Step Instructions
- Dissolve 1 tablespoon fine sea salt in 4 cups cold water, add the chicken, and brine for 15 minutes. Pat the breasts completely dry with paper towels so the surface sears instead of steaming.
- Heat 2 tablespoons olive oil in a 12-inch stainless or cast-iron skillet over medium-high heat until it shimmers. Lay the breasts down with space between them and press flat for even contact.
- Sear 4 minutes without moving until the underside is golden and crispy. Flip and cook the second side 4 minutes until the same color forms.
- Add 2 tablespoons unsalted butter, 3 cloves minced garlic, and 1 tablespoon cracked black pepper to the pan. Tilt the skillet and spoon the foaming butter over the chicken for 1 minute.
- Stir in the zest and juice of 1 lemon plus 1 teaspoon honey. Simmer 1 minute until the liquid thickens to a light glaze that coats a spoon.
- Check the center with a thermometer reading 74°C / 165°F, then rest the chicken 5 minutes off heat. Slice or serve whole with 2 tablespoons chopped parsley on top.
Pro Tips
Pound the breasts to a uniform half-inch thickness so the thin end doesn’t dry out before the thick end cooks through. A flat meat mallet or a rolling pin works fine for this.
Dry the meat thoroughly after brining or the oil temperature drops and you lose the crust. pan sauce technique works best when the surface is bare.
Use coarse cracked pepper rather than fine powder so you get little bursts of heat instead of a flat spicy dust. Grind it fresh if you can.
Rest the chicken before slicing so the juices redistribute instead of pooling on the cutting board. 5 minutes is enough for breasts this size.
Zest the lemon before juicing; once it’s cut open the peel is harder to grip and you lose the oily, fragrant top layer.
Common Mistakes to Avoid
Skipping the brine leads to tighter muscle fibers and a drier bite because salt relaxes the protein structure. Even 15 minutes makes a measurable difference in moisture.
Crowding the pan drops the heat and causes steaming, leaving pale chicken. never crowd the pan — cook in two batches if your skillet is under 12 inches.
Adding lemon juice too early curdles the butter and sharpens the acid before the garlic softens. Wait until after the sear, as the steps list.
Cutting into the breast immediately after cooking spills the juices onto the plate. A short rest fixes this every time.
Serving Suggestions
Slice the chicken over a lemon arugula pasta for a cohesive citrus theme. The peppery greens stand up to the sear.
Pair with steamed green beans or roasted potatoes if you want a plain side that soaks up the pan glaze. A wedge of the same lemon on the plate lets people brighten it further.
For meal prep, lay whole breasts on chicken quesadillas later in the week. The flavor holds after a day in the fridge.
Storage and Reheating
Keep leftovers in an airtight container in the fridge for up to 3 days. Cool the chicken to room temperature within 2 hours of cooking before sealing it.
Reheat in a 180°C / 350°F oven for 10 minutes or until the center hits 74°C / 165°F again. The microwave works but softens the crust, so use a skillet if texture matters.
This dish freezes for up to 2 months in a sealed bag with the glaze. Thaw overnight in the fridge, then reheat from the chilled state to keep the meat from overcooking.
Recipe Variations
Oven Roasted Version
After searing, move the breasts to a sheet pan and finish at 200°C / 400°F for 12 minutes. You get a drier surface and hands-off cooking when feeding a crowd.
Spicy Lemon Pepper
Add 1 teaspoon crushed red pepper with the black pepper in step four. The heat builds behind the citrus and pairs well with cool shrimp pasta on the side.
Grilled Option
Skip the skillet and grill over medium-high heat for 5 minutes per side with the same glaze brushed on at the end. The smoke adds a layer the pan can’t match.
Creamy Lemon Pepper
Stir 3 tablespoons of cream into the pan sauce after the lemon juice and simmer 2 minutes. The result is richer and clings more heavily to the meat, closer to a creamy lemon chicken.

Lemon Pepper Chicken Breast
Description
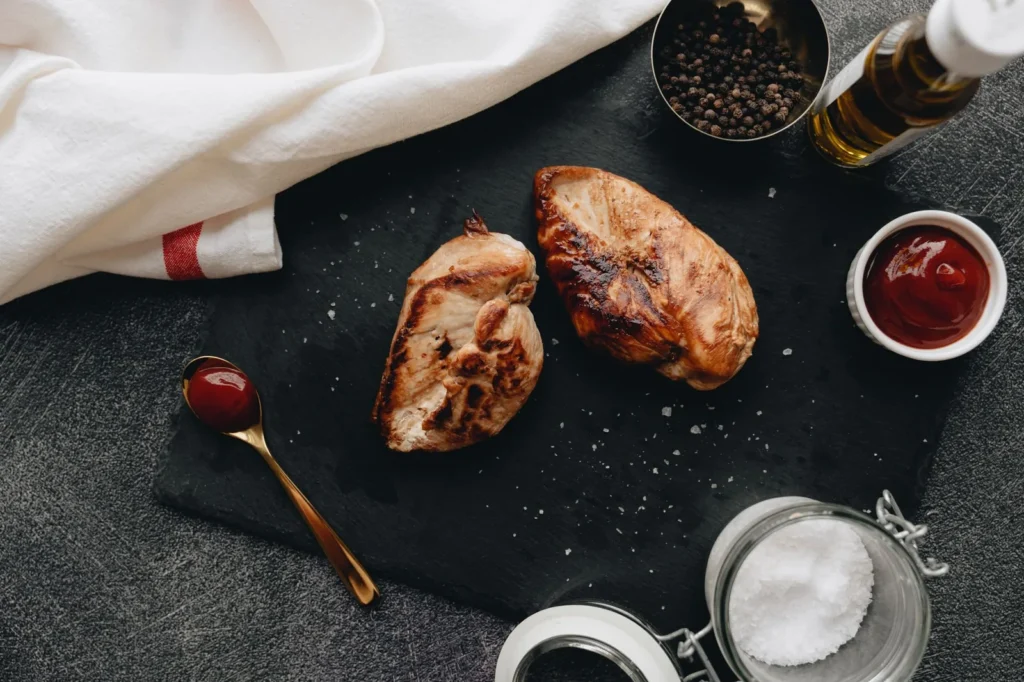
A lemon pepper chicken breast is a simple skillet dinner built on boneless chicken, cracked black pepper, and fresh lemon. The quick brine and hard sear keep the center moist while the outside picks up color, making a weeknight protein that pairs with almost any side.
Ingredients
Instructions
-
Make the brine
Dissolve 1 tablespoon fine sea salt in 4 cups cold water in a large bowl. Add the 4 boneless skinless chicken breasts and brine for 15 minutes so the salt relaxes the protein and the meat stays juicy.
-
Dry the chicken
Remove the breasts from the brine and pat them completely dry with paper towels. Dry meat is essential so the surface sears instead of steaming and you keep a crisp crust.
-
Heat the skillet
Heat 2 tablespoons olive oil in a 12-inch stainless or cast-iron skillet over medium-high heat until it shimmers. The oil should look wavy and coat the pan evenly before the chicken goes in.
-
Sear first side
Lay the breasts down with space between them and press flat for even contact. Sear for 4 minutes without moving until the underside is golden and crispy with a deep brown crust.
-
Sear second side
Flip the chicken and cook the second side for 4 minutes until the same golden color forms. The meat should feel firm at the edges and release easily from the pan when ready to turn.
-
Add butter and pepper
Add 2 tablespoons unsalted butter, 3 cloves minced garlic, and 1 tablespoon cracked black pepper to the pan. Tilt the skillet and spoon the foaming butter over the chicken for 1 minute until the garlic smells toasty and the butter is lightly browned.
-
Make lemon glaze
Stir in the zest and juice of 1 lemon plus 1 teaspoon honey. Simmer for 1 minute until the liquid thickens to a light glaze that coats a spoon and looks glossy.
-
Check and rest
Check the center with a thermometer reading 74°C / 165°F, the safe minimum for poultry, then rest the chicken 5 minutes off heat. After resting the juices should stay in the meat when sliced rather than pooling on the board; serve whole or sliced with 2 tablespoons chopped parsley on top.
Nutrition Facts
Servings 4
- Amount Per Serving
- Calories 350kcal
- % Daily Value *
- Total Fat 18g28%
- Saturated Fat 6g30%
- Cholesterol 110mg37%
- Sodium 900mg38%
- Total Carbohydrate 4g2%
- Dietary Fiber 1g4%
- Sugars 2g
- Protein 42g84%
* Percent Daily Values are based on a 2,000 calorie diet. Your daily value may be higher or lower depending on your calorie needs.
Note
- Storage: Keep leftovers in an airtight container in the fridge for up to 3 days; cool to room temperature within 2 hours of cooking before sealing.
- Reheating: Reheat in a 180°C / 350°F oven for 10 minutes or until the center hits 74°C / 165°F again; a skillet keeps the crust better than the microwave.
- Meal prep: Lay whole breasts on chicken quesadillas later in the week, as the flavor holds after a day in the fridge.
- Pro tip: Zest the lemon before juicing so you capture the oily, fragrant top layer while the peel is easy to grip.
