

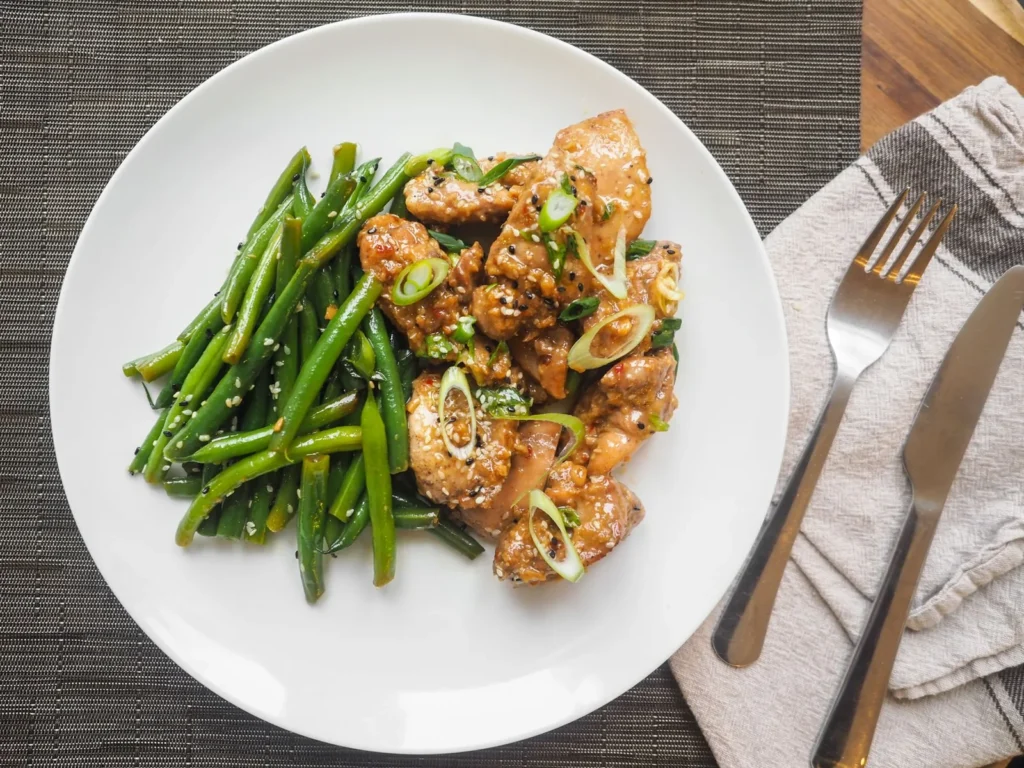
A healthy sesame chicken recipe gives you the sticky, nutty takeout flavor you crave without the deep-fryer and heavy corn syrup glaze. This version uses a light cornstarch coat, a quick pan sear, and a balanced sesame-soy sauce that clings to every piece. You get a weeknight dinner that hits the table in about 30 minutes and stores well for lunch the next day.
The method matters more than the ingredient list. By searing the chicken in a thin layer rather than drowning it in oil, you keep the crust crisp while the sauce reduces to a glossy finish. The result is a savory-sweet dish with real sesame character, not a sugar bomb pretending to be dinner. If you enjoyed this, our avocado smoothie is worth trying next. Making this healthy sesame chicken at home is surprisingly straightforward once you know the key steps.
Why You’ll Love These Healthy Sesame Chicken
- Pan-seared instead of deep-fried, so you use about 2 tablespoons of oil total.
- The sauce balances low-sodium soy, rice vinegar, and toasted sesame for a clean savory edge.
- Cooked chicken and sauce keep separately for up to 3 days, making meal prep simple.
- You control the sweetness with a measured tablespoon of honey rather than a cup of syrup.
- Works over rice, noodles, or a bed of cabbage for a lower-carb plate.
Ingredients You’ll Need
- 1.5 lb boneless skinless chicken breast, cut into 1-inch cubes
- 3 tbsp cornstarch
- 2 tbsp avocado oil (divided)
- 3 cloves garlic, minced
- 1 tbsp fresh ginger, grated
- 3 tbsp low-sodium soy sauce
- 1 tbsp toasted sesame oil
- 1 tbsp rice vinegar
- 1 tbsp honey
- 1 tbsp sesame seeds, plus more for garnish
- 1/4 cup water
- 2 scallions, sliced thin
Ingredient Substitutions
Chicken breast: Replace with an equal weight of boneless skinless chicken thigh for a juicier bite. Thigh meat carries more fat, so it stays tender under high heat and won’t dry out if you sear a minute longer. Expect a slightly richer flavor and a less clean slice than breast. The healthy sesame chicken works well for weeknight cooking when time is limited.





Cornstarch: Swap with an equal amount of potato starch for a thinner, cracklier crust that browns a shade lighter. Potato starch loses its grip if mixed too early, so coat the chicken right before it hits the pan. The sauce will thicken similarly once it reduces.
Honey: Use an equal amount of maple syrup if you avoid honey. Maple adds a deeper earthy note and darkens the glaze slightly, so pull the pan off heat when the sauce looks glossy rather than waiting for amber color. The sweetness level stays close to the original.
Low-sodium soy sauce: Replace with an equal amount of coconut aminos for a soy-free version. Coconut aminos taste milder and sweeter, so add 1 teaspoon more rice vinegar to keep the sauce from reading flat. The color will be lighter brown with a softer salt profile. For another easy option, check out our chicken milanese.
Step-by-Step Instructions
- Toss the chicken cubes with cornstarch in a bowl until each piece is evenly dusted and no dry powder remains at the bottom.
- Heat 1 tablespoon avocado oil in a 12-inch nonstick skillet over medium-high heat until it shimmers but does not smoke.
- Add half the chicken in a single layer and sear 3 to 4 minutes per side until golden and crispy; transfer to a plate and repeat with the second batch and remaining oil.
- Lower the heat to medium-low heat and add garlic and ginger, stirring 30 seconds until fragrant but not browned.
- Whisk soy sauce, sesame oil, rice vinegar, honey, sesame seeds, and water in a small bowl, then pour into the skillet.
- Simmer the sauce 2 to 3 minutes until it thickens to a syrup that coats the back of a spoon.
- Return all chicken to the skillet and toss 1 minute until every piece is glazed and hot through.
- Top with scallions and extra sesame seeds, then serve immediately.
Pro Tips
Cut the chicken into uniform 1-inch cubes so all pieces finish at the same time instead of some drying while others stay raw at the center.
Sear in two batches even if your pan looks big; never crowd the pan or the steam will soften the crust before it browns.
Toast your sesame seeds in a dry pan for 1 minute before using them if you want a deeper nutty note in the finished glaze.
For a glossy sauce that doesn’t break, pull the skillet off heat the moment it coats a spoon, since residual warmth keeps it tightening. Learn proper pan sauce technique from pan sauce guide on Simply Recipes.
Common Mistakes to Avoid
Adding all the chicken at once drops the pan temperature and yields pale, steamed meat instead of a seared crust; cook in batches to keep the surface dry.
Pouring the sauce in before the garlic loses its raw edge leads to harsh flavor; give it only 30 seconds over gentle heat first.
Walking away during the final reduction lets the honey scorch; stay at the stove for the 2 to 3 minutes it takes to thicken. You might also like our cherry almond oatmeal.
Serving Suggestions
Spoon the healthy sesame chicken over steamed jasmine rice or try chicken noodles for a slurpable twist on the same flavors. A side of quick cucumber salad cuts the richness with cold crunch.
For a lower-carb plate, lay the glazed pieces on shredded cabbage and finish with a squeeze of lime. If you like a crisp chicken base, our crispy chicken pairs well with the leftover sauce.
Storage and Reheating
Keep cooked chicken and sauce in an airtight container in the fridge for up to 3 days; separate them if you plan to reheat more than once. Reheat in a skillet over medium-low heat until the chicken reaches 165°F at the center.
The dish freezes for up to 2 months in a sealed container, though the crust softens on thaw. Never leave cooked chicken at room temperature longer than 2 hours before chilling. Pair this with our crab meat weight for more ideas.
Recipe Variations
Spicy Version
Stir 1 teaspoon crushed red pepper into the sauce with the garlic for a warm bite that builds after the first chew. Add a dash of chili oil at the end if you want the heat to read immediately. The sesame sweetness balances the spice so it stays dinner-friendly rather than raw-hot.
Tofu Swap
Replace the chicken with 1.5 lb pressed firm tofu cut in cubes and dusted with cornstarch the same way. Sear 4 minutes per side since tofu releases more water than meat. You get a plant-based plate with the same glossy coat and a milder base flavor.
Orange Twist
Add 2 tablespoons fresh orange juice and 1 teaspoon zest to the sauce for a bright citrus layer under the sesame. Cut the honey to 2 teaspoons so the orange stays sharp instead of candy-like. The glaze turns lighter and smells like breakfast citrus with a savory finish.
Broccoli Add-In
Steam 2 cups broccoli florets 4 minutes and fold them in with the chicken at the final toss. The florets catch the sauce in their crowns and add a fibrous bite. This turns the healthy sesame chicken into a one-pan protein-plus-veg meal with no extra side required.

Healthy Sesame Chicken
Description
A healthy sesame chicken that delivers sticky, nutty takeout flavor using a light cornstarch coat and quick pan sear instead of deep-frying.
A balanced sesame-soy sauce with honey clings to every piece for a savory-sweet weeknight dinner ready in about 30 minutes.
Ingredients
Instructions
-
Dust chicken with cornstarch
Toss the chicken cubes with cornstarch in a bowl until each piece is evenly dusted and no dry powder remains at the bottom.
Use a large mixing bowl so the 1.5 lb of cubed breast moves freely and the starch coats all surfaces for a crisp sear later.
-
Heat oil and sear first batch
Heat 1 tablespoon avocado oil in a 12-inch nonstick skillet over medium-high heat until it shimmers but does not smoke.
Add half the chicken in a single layer and sear 3 to 4 minutes per side until the pieces are golden and crispy with a dry, browned crust, then transfer to a plate.
-
Sear second batch
Repeat the searing with the second batch of chicken and the remaining 1 tablespoon avocado oil in the same 12-inch skillet over medium-high heat.
Cook 3 to 4 minutes per side until golden and crispy, then transfer to the plate so all chicken is seared before saucing.
-
Cook garlic and ginger
Lower the heat to medium-low and add the minced garlic and grated ginger to the skillet, stirring for 30 seconds until fragrant but not browned.
Keep the heat gentle so the aromatics release their scent without scorching or turning bitter before the sauce goes in.
-
Mix and simmer sauce
Whisk soy sauce, sesame oil, rice vinegar, honey, sesame seeds, and water in a small bowl, then pour the mixture into the skillet.
Simmer the sauce over medium-low heat for 2 to 3 minutes until it thickens to a syrup that coats the back of a spoon with a glossy film.
-
Glaze chicken in sauce
Return all seared chicken to the skillet and toss for 1 minute until every piece is glazed and hot through.
The chicken should reach an internal temperature of 74°C (165°F) at the center; the glossy sauce will cling to the crisp crust without sliding off.
-
Garnish and serve
Top the glazed chicken with sliced scallions and extra sesame seeds, then serve immediately while the crust is still crisp.
Plate over rice, noodles, or cabbage so the sticky sesame glaze lands on a base that catches the flavor.
Nutrition Facts
Servings 4
- Amount Per Serving
- Calories 350kcal
- % Daily Value *
- Total Fat 12g19%
- Saturated Fat 2g10%
- Cholesterol 75mg25%
- Sodium 480mg20%
- Total Carbohydrate 14g5%
- Dietary Fiber 1g4%
- Sugars 6g
- Protein 38g76%
* Percent Daily Values are based on a 2,000 calorie diet. Your daily value may be higher or lower depending on your calorie needs.
Note
- Storage: Keep cooked chicken and sauce in an airtight container in the fridge for up to 3 days; separate them if you plan to reheat more than once, and chill within 2 hours of cooking.
- Reheating: Reheat in a skillet over medium-low heat until the chicken reaches 74°C (165°F) at the center; do not reheat the same portion more than once.
- Pro tip: Toast your sesame seeds in a dry pan for 1 minute before using them if you want a deeper nutty note in the finished glaze, and try our cauliflower rice as a low-carb base.
- Batch sear: Never crowd the 12-inch pan; sear in two batches so the surface stays dry and browns instead of steaming.
