

A reliable weeknight dinner starts with honey garlic chicken thighs seared until the skin turns crisp, then braised in a pan sauce that thickens into a glossy, sticky coat. Bone-in, skin-on thighs stay juicy under high heat while the honey caramelizes against the garlic and soy. This method gives you a restaurant-style glaze without a long ingredient list or special equipment.
The recipe below uses a single 12-inch skillet and finishes in about 35 minutes of active cooking. You’ll get a balanced sweet-savory profile where the garlic stays mellow and the honey browns without burning. It pairs well with plain rice, roasted vegetables, or a sharp cucumber side. If you enjoyed this, our honey garlic chicken is worth trying next. Making this honey garlic chicken thighs at home is surprisingly straightforward once you know the key steps.
Why You’ll Love These Honey Garlic Chicken Thighs
- Bone-in thighs stay moist while the skin crisps in one pan.
- The glaze uses pantry staples and needs no cornstarch slurry.
- Each batch makes enough for four with minimal cleanup.
- Leftovers reheat without drying out the meat.
Ingredients You’ll Need
- 8 bone-in, skin-on chicken thighs (about 2.5 lbs / 1.1 kg)
- 2 tbsp neutral oil (such as canola or sunflower)
- 6 garlic cloves, minced (about 2 tbsp)
- 1/3 cup honey (liquid, not creamed)
- 3 tbsp low-sodium soy sauce
- 1 tbsp rice vinegar
- 1/2 cup chicken broth
- 1/2 tsp black pepper
- 2 tbsp unsalted butter
- 1 tbsp fresh parsley, chopped (garnish)
Ingredient Substitutions
Neutral oil: Replace with an equal amount of avocado oil or refined coconut oil if you need a higher smoke point. Both brown the skin at the same rate but avocado oil leaves less aroma. Coconut oil adds a faint sweetness that reads clearly against the garlic, so cut the honey by 1 tbsp if you use it. The honey garlic chicken thighs works well for weeknight cooking when time is limited.






Soy sauce: Use tamari in a 1:1 swap for a gluten-free version with nearly identical salt and color. Tamari is slightly less sharp, so add a pinch of salt if your broth is unsalted. The glaze will look a touch darker but sets the same way. Storing leftover honey garlic chicken thighs correctly keeps it tasting good for days.
Honey: Swap in maple syrup at a 1:1 ratio for a less floral, deeper sweetness. Maple reduces faster than honey, so watch the pan during the last 3 minutes and pull it off medium-low heat sooner. The finish is a bit less sticky but still coats the thighs. For the best results with this honey garlic chicken thighs, read through all the steps before starting.
Chicken broth: Replace with water plus 1/4 tsp salt if you have no broth on hand. The sauce loses some body and a layer of savory depth, so add 1 tsp tomato paste with the garlic to recover some roundness. Expect a lighter-colored glaze. For another easy option, check out our prawn pil pil.
Step-by-Step Instructions
- Pat the chicken thighs dry with paper towels and season the skin with black pepper only. Dry skin sears instead of steaming, which is the difference between crisp and rubbery.
- Warm 2 tbsp neutral oil in a 12-inch skillet over medium-high heat until it shimmers. Place thighs skin-side down with space between them and cook 8 minutes without moving until the skin is golden and crispy.
- Flip thighs, lower to medium heat, and cook 6 minutes on the bone side until the underside releases easily. Transfer to a plate, leaving the fat in the pan.
- Add minced garlic to the pan drippings and stir on medium-low heat for 45 seconds until fragrant but not browned. Burnt garlic turns the whole sauce bitter.
- Pour in honey, soy sauce, rice vinegar, and chicken broth. Stir and return thighs skin-side up to the liquid, then simmer 12 minutes until the internal temperature hits 165°F at the thickest part.
- Move thighs to a serving plate. Add butter to the pan and stir on medium-low heat 2 minutes until the sauce thickens to a syrupy coat that clings to a spoon.
- Spoon the glaze over the thighs and scatter parsley. Serve immediately while the skin still has snap from the initial sear.
Pro Tips
Start the sear with the pan fully heated so the skin releases on its own instead of sticking. If you tug early, the layer tears and the thigh steams instead of crisping.
Use a meat thermometer rather than guessing by color; thighs at 165°F stay tender while overcooked breast-style temps make them stringy. For background on safe poultry handling, see poultry cooking guidance.
Reduce the sauce off the heat source if it thickens too fast, since honey scorches in seconds once the water cooks off. A quick pan-off pause resets the temperature.
Rest the seared thighs on a wire rack instead of a plate if you stage them before the glaze step, so the skin stays dry. A plate traps steam and softens the crisp layer you just built.
Common Mistakes to Avoid
Crowding the skillet drops the temperature and boils the skin instead of browning it. Cook in two batches if your pan is under 12 inches so each piece contacts hot metal.
Adding honey before the garlic softens risks a sugary film that burns while the meat stays raw. Build the aromatic base first, then introduce the sweetener.
Skipping the final butter mount leaves a thin, watery sauce that slides off the thighs. The fat binds the reduced liquid into a coat that holds on the skin.
Serving Suggestions
Spoon the thighs over steamed jasmine rice to catch the extra glaze, or pair with mashed potatoes for a heavier plate. A side of brussels sprouts echoes the sweet edge without repeating the protein.
For a lighter spread, slice the meat off the bone and lay it over grilled chicken style salad greens with the warm sauce as dressing. The contrast of cold leaves and sticky heat works well.
Storage and Reheating
Refrigerate cooled thighs in an airtight container for up to 3 days and keep the glaze in the same box so the meat reheats moist. Discard anything left at room temperature beyond 2 hours.
Reheat in a 350°F oven for 12 minutes until the center reaches 165°F again, then crisp the skin under the broiler for 90 seconds. Freezing works for up to 2 months in a sealed bag with the sauce.
Recipe Variations
Spicy Version
Add 1 tsp crushed red pepper with the garlic and finish with 1 tbsp sriracha stirred into the butter mount. The heat cuts the honey’s sweetness and gives the glaze a red tint while keeping the same timing.
Noodle Toss
After removing the thighs, add 8 oz cooked lo mein to the sauce and coat for 1 minute, then plate the noodles under the meat. For a faster route, our chicken noodles follow the same flavor base with pasta built in.
Sheet Pan Method
Roast thighs at 425°F for 25 minutes, brush with the reduced glaze, then broil 3 minutes. This trades stovetop control for hands-off time and yields a drier, more caramelized skin than the skillet version.
Lemon Brightened
Add 2 tbsp lemon juice with the broth and garnish with zest instead of parsley. The acid lifts the sauce so it reads less heavy, and the citrus pairs with the garlic without changing the cook steps.
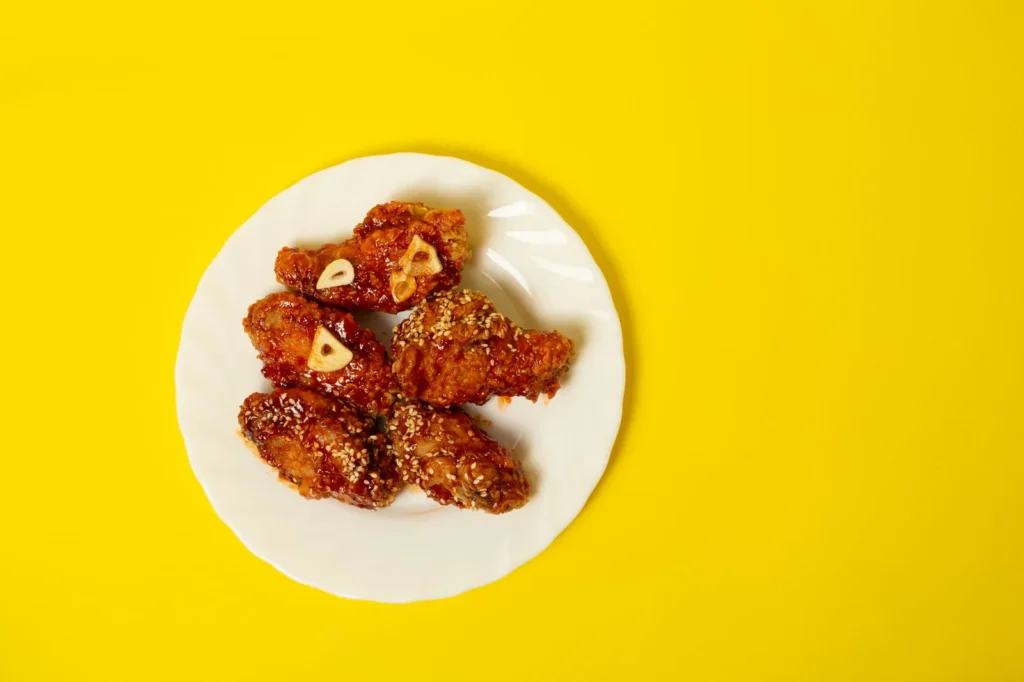

Honey Garlic Chicken Thighs
Description
Honey garlic chicken thighs are seared until the skin is crisp, then braised in a glossy pan sauce of honey, garlic, and soy that caramelizes into a sticky coat. This single-skillet weeknight meal stays juicy with pantry staples and finishes in about 35 minutes.
Ingredients
Instructions
-
Dry and season thighs
Pat the 8 bone-in, skin-on chicken thighs completely dry with paper towels so the skin sears instead of steaming. Season the skin only with the 1/2 tsp black pepper, leaving the meat side unseasoned for now. Dry skin is the difference between crisp and rubbery, so take a full minute on this step.
-
Sear skin-side down
Warm 2 tbsp neutral oil in a 12-inch skillet over medium-high heat until the oil shimmers and looks fluid. Place thighs skin-side down with space between them and cook 8 minutes without moving until the skin is golden and crispy and releases on its own from the pan.
-
Cook bone side
Flip thighs with tongs, lower the heat to medium, and cook 6 minutes on the bone side until the underside releases easily and the meat near the bone is opaque. Transfer the thighs to a plate, leaving the rendered fat in the pan for the sauce base.
-
Soften garlic
Add the 6 minced garlic cloves to the pan drippings and stir on medium-low heat for 45 seconds until fragrant but not browned. Burnt garlic turns the whole sauce bitter, so pull the pan off heat if the aroma spikes too fast.
-
Build braising liquid
Pour in 1/3 cup honey, 3 tbsp low-sodium soy sauce, 1 tbsp rice vinegar, and 1/2 cup chicken broth and stir to combine with the garlic. Return the thighs skin-side up to the liquid so the crisp skin stays above the sauce.
-
Simmer to safe temp
Simmer the thighs in the liquid for 12 minutes until the internal temperature hits 165°F (74°C) at the thickest part, checked with a meat thermometer. The meat should feel firm yet springy and the juices run clear when pierced near the bone.
-
Thicken glaze
Move the thighs to a serving plate and add 2 tbsp unsalted butter to the pan, stirring on medium-low heat for 2 minutes. The sauce thickens to a syrupy coat that clings to a spoon and looks glossy without scorching.
-
Glaze and garnish
Spoon the warm glaze over the thighs and scatter 1 tbsp fresh parsley on top as garnish. Serve immediately while the skin still has snap from the initial sear and the sauce is sticky on the meat.
Nutrition Facts
Servings 4
- Amount Per Serving
- Calories 420kcal
- % Daily Value *
- Total Fat 26g40%
- Saturated Fat 8g40%
- Cholesterol 125mg42%
- Sodium 620mg26%
- Total Carbohydrate 22g8%
- Sugars 19g
- Protein 28g57%
* Percent Daily Values are based on a 2,000 calorie diet. Your daily value may be higher or lower depending on your calorie needs.
Note
- Storage: Refrigerate cooled thighs in an airtight container with the glaze for up to 3 days; discard anything left at room temperature beyond 2 hours.
- Reheating: Reheat in a 350°F oven for 12 minutes until the center reaches 165°F, then broil 90 seconds to crisp the skin; do not reheat the same portion more than once.
- Pro tip: Rest seared thighs on a wire rack instead of a plate before the glaze step so the skin stays dry and crisp.
- Variation: For a hands-off version, our grilled thighs use a similar cut with different heat control.
