

Stuffed spaghetti squash recipes give you a low-starch way to enjoy a filling dinner that still feels like comfort food. The squash roasts until the strands pull apart like thin pasta, then gets loaded with a savory mix and baked again to melt everything together. This post walks through three reliable fills, the prep steps that actually matter, and how to store leftovers without them turning soggy.
What makes these worth making is the structure: the squash shell holds the filling, so you skip the extra baking dish and get built-in portion control. We cover a classic ground beef and cheese version, a taco-style option, and a vegetarian pesto fill. Each one uses the same roasting base, so once you learn the squash prep, the variations come together fast. If you enjoyed this, our california spaghetti salad is worth trying next. Making this stuffed spaghetti squash at home is surprisingly straightforward once you know the key steps.
Why You’ll Love These Stuffed Spaghetti Squash
- One squash yields four sturdy boats, so a single ingredient feeds four people without side dishes.
- The strands hold sauce better than regular pasta because they stay slightly firm at the core.
- You control the fat level by choosing the filling, from lean turkey to full-fat chorizo.
- Leftovers reheat in the shell, which keeps the texture from going mushy.
- The same roasting method works for butternut squash if you want a different shape.
Ingredients You’ll Need
- 2 medium spaghetti squash (about 2.5 lb each), halved and seeded
- 2 tbsp olive oil, divided
- 1 lb ground beef (85% lean)
- 1 small yellow onion, diced
- 3 cloves garlic, minced
- 1 cup canned crushed tomatoes
- 1 tsp salt, divided
- 1/2 tsp black pepper
- 1.5 cups shredded mozzarella
- 1/4 cup grated parmesan
- 1 tbsp Italian seasoning
- 2 tbsp fresh basil, chopped
Ingredient Substitutions
Ground beef: Replace with 1 lb ground turkey (93% lean) for a lower-fat fill. Turkey releases less rendered fat, so add 1 tbsp olive oil when browning to keep the mix from drying. Expect a lighter color and a milder taste; bump the salt by 1/4 tsp to compensate. The stuffed spaghetti squash works well for weeknight cooking when time is limited.





Crushed tomatoes: Use 1 cup tomato passata for a smoother sauce with no pulp. Passata cooks down faster, so reduce the simmer time by 3 minutes to avoid a pasty texture. The fill will look glossier and stick more to the strands. Storing leftover stuffed spaghetti squash correctly keeps it tasting good for days.
Mozzarella: Swap for 1.5 cups shredded fontina if you want a nuttier melt. Fontina browns quicker, so check the final bake at 20 minutes instead of 25. The pull will be shorter but the flavor deeper. For the best results with this stuffed spaghetti squash, read through all the steps before starting.
Italian seasoning: Replace the 1 tbsp blend with 1 tsp dried oregano plus 1 tsp dried thyme. This gives a more pronounced herbal note and less overall dustiness. Crush the herbs between your fingers before adding to release oils. For another easy option, check out our spaghetti arrabbiata.
Step-by-Step Instructions
- Heat the oven to 180°C / 350°F. Brush the cut squash faces with 1 tbsp olive oil and place cut-side down on a sheet pan. Roast 35 minutes until a knife slides into the skin with no resistance.
- Let the squash cool 10 minutes until safe to handle. Scoop the strands into a bowl, leaving a 1/2-inch wall so the shell stays rigid. Reserve the shells.
- Warm the remaining 1 tbsp olive oil in a 12-inch skillet over medium heat. Add onion and cook 4 minutes until translucent, then add garlic and stir 30 seconds until fragrant.
- Add ground beef, 1/2 tsp salt, and pepper. Brown 7 minutes, breaking it up, until no pink remains and the bits are golden at the edges.
- Stir in crushed tomatoes and Italian seasoning. Simmer 5 minutes until the sauce thickens and coats the spoon. Fold in the squash strands and basil.
- Divide the mix among the four shells. Top with mozzarella and parmesan. Bake 25–30 minutes until the cheese is golden and bubbling.
Pro Tips
Roast the squash cut-side down so steam stays trapped and the strands cook from the inside without drying on the surface. This step is what keeps the boats from collapsing later.
Score the squash flesh with a fork before scooping to loosen long strands instead of tearing them into short bits. You get a pasta-like pull that holds the sauce.
Season the beef separately from the squash so the meat gets a direct sear and the strands stay lightly dressed. Layering flavor this way avoids a flat总体 taste.
Check doneness by pressing the cheese with a spatula; it should spring back and show light brown spots. For more on safe baking temps, see oven basics from The Kitchn.
Common Mistakes to Avoid
Over-scooping the shell leaves it too thin and it splits when filled. Keep a 1/2-inch border of flesh attached to the rind for structure.
Skipping the pre-roast and trying to bake raw squash with filling adds 25 minutes and yields watery results. Always roast the shells first.
Using pre-shredded cheese with starch coatings prevents a clean melt. Grate your own mozzarella for a smooth, stretchy top.
Serving Suggestions
Plate each boat on a warm dinner plate with a side of spaghetti salad for a cold crunch contrast. The vinegar in the salad cuts the cheese richness.
A simple green salad with lemon dressing sits well beside the rich fill. Keep the portions small since the squash itself is a full vegetable serving.
Storage and Reheating
Cooled boats keep in an airtight container up to 3 days in the fridge. Reheat in a 180°C / 350°F oven 15 minutes until the center hits 74°C / 165°F for meat safety.
You can freeze unbaked filled shells up to 2 months. Thaw overnight in the fridge before baking to avoid a cold center.
Do not leave cooked squash at room temperature beyond 2 hours or bacteria grows fast in the moist flesh.
Recipe Variations
Taco Style
Replace the Italian seasoning with 1 tbsp taco seasoning and swap crushed tomatoes for 1 cup black beans. Top with cheddar and a spoon of poblano chili mix. The fill turns smoky and holds a firmer bite.
Pesto Vegetarian
Skip the beef and mix the strands with 1/3 cup basil pesto and 1 cup ricotta. Bake as directed with mozzarella on top. You get a creamy, herb-forward boat with no meat step.
Chorizo Swap
Use 1/2 lb chorizo plus 1/2 lb beef for a spicier, oilier fill. Drain 1 tbsp fat after browning to keep the shell from soaking. The color goes deep red and the taste is sharper.
Shrimp Fill
Add 1/2 lb peeled shrimp in the last 3 minutes of simmering instead of beef. The seafood cooks fast and stays tender. Pair with garlic prawns on the side if you like more seafood.

stuffed spaghetti squash recipes
Description
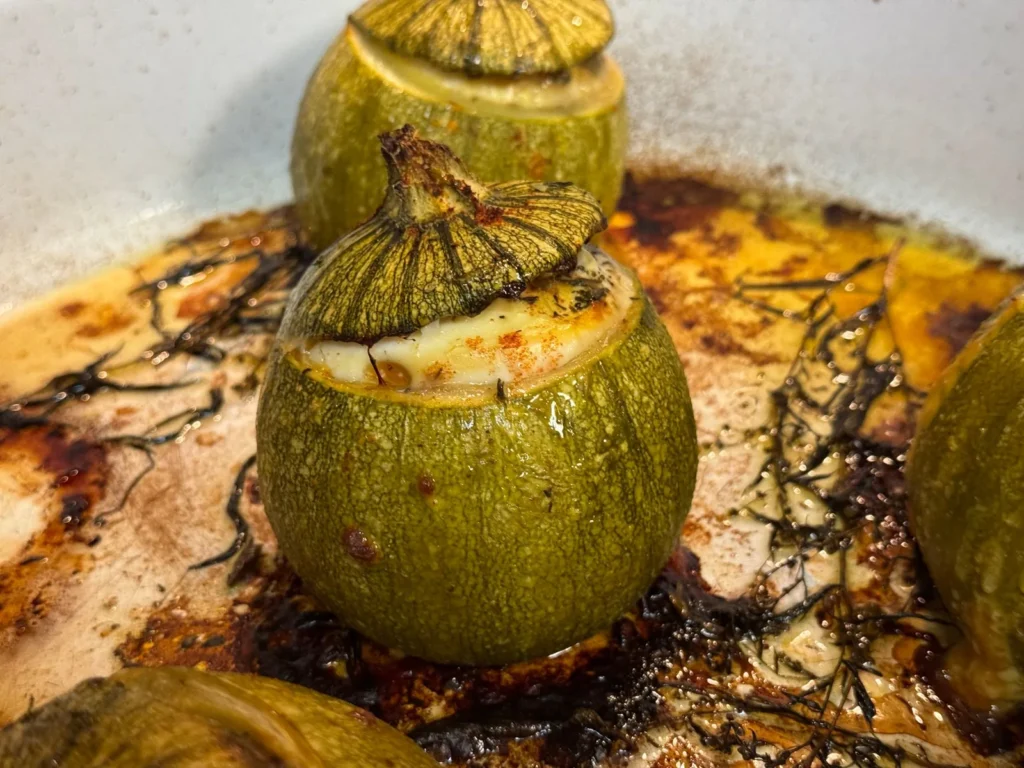
Roasted spaghetti squash shells are filled with a savory ground beef and tomato mixture, then topped with melted cheese for a filling dinner.
Each squash yields four sturdy boats, giving you built-in portion control and a comforting meal without the extra starch.
Ingredients
Instructions
-
Heat and roast squash
Heat the oven to 180°C / 350°F. Brush the cut squash faces with 1 tbsp olive oil and place cut-side down on a sheet pan.
Roast 35 minutes until a knife slides into the skin with no resistance, showing the flesh is fully tender.
-
Cool squash shells
Let the squash cool 10 minutes until safe to handle with bare hands.
This short rest prevents burns and makes scooping the strands cleaner without tearing the shell.
-
Scoop squash strands
Scoop the strands into a bowl, leaving a 1/2-inch wall so the shell stays rigid.
Reserve the shells for filling later; the border of flesh keeps the boats from splitting when loaded.
-
Cook onion and garlic
Warm the remaining 1 tbsp olive oil in a 12-inch skillet over medium heat. Add onion and cook 4 minutes until translucent and softened at the edges.
Then add garlic and stir 30 seconds until fragrant, taking care not to let it brown.
-
Brown the ground beef
Add ground beef, 1/2 tsp salt, and pepper to the skillet. Brown 7 minutes, breaking it up, until no pink remains and the bits are golden at the edges.
For food safety, the ground beef should reach an internal temperature of 71°C / 160°F and show no pink when cut open.
-
Simmer tomato sauce
Stir in crushed tomatoes and Italian seasoning. Simmer 5 minutes until the sauce thickens and coats the spoon with a glossy layer.
The reduced liquid prevents a watery fill and helps the strands hold the sauce.
-
Combine and fill shells
Fold in the squash strands and basil until evenly mixed. Divide the mix among the four reserved shells, mounding it slightly.
Top each with mozzarella and parmesan for an even cheesy cover.
-
Bake filled boats
Bake at 180°C / 350°F for 25–30 minutes until the cheese is golden and bubbling with light brown spots.
Press the cheese with a spatula; it should spring back and show crisp edges, confirming the fill is heated through.
Nutrition Facts
Servings 4
- Amount Per Serving
- Calories 420kcal
- % Daily Value *
- Total Fat 24g37%
- Saturated Fat 10g50%
- Cholesterol 75mg25%
- Sodium 620mg26%
- Total Carbohydrate 22g8%
- Dietary Fiber 4g16%
- Sugars 7g
- Protein 28g57%
* Percent Daily Values are based on a 2,000 calorie diet. Your daily value may be higher or lower depending on your calorie needs.
Note
- Storage: Cooled boats keep in an airtight container up to 3 days in the fridge; refrigerate within 2 hours of cooking to prevent bacterial growth.
- Reheating: Reheat in a 180°C / 350°F oven 15 minutes until the center hits 74°C / 165°F for meat safety; do not reheat the same portion more than once.
- Pro tip: Roast the squash cut-side down so steam stays trapped and the strands cook from inside without drying; see spaghetti arrabbiata for another easy pasta option.
- Shell care: Keep a 1/2-inch border of flesh when scooping so the boats stay rigid and do not split when filled.
