

A thanksgiving chicken recipe gives you all the comfort of a holiday roast without the size and timing stress of a full turkey. You get crisp skin, juicy thigh meat, and a pan full of roasted vegetables in about two hours. This version uses a sage-citrus butter rub and a moderate oven temperature so the breast stays tender while the legs finish through.
The method below is built for a standard 4 to 5 pound bird, which feeds four to six people with leftovers. You won’t need special equipment beyond a rimmed sheet pan and a reliable thermometer. It’s a practical centerpiece when you want the Thanksgiving feel on a smaller scale. If you enjoyed this, our chicken milanese is worth trying next. Making this thanksgiving chicken at home is surprisingly straightforward once you know the key steps.
Why You’ll Love These Thanksgiving Chicken
- Smaller bird means a 90-minute roast instead of a four-hour turkey wait.
- Sage-citrus butter under the skin drives flavor into the meat, not just on top.
- One pan catches the drippings so you get built-in side vegetables.
- Leftover meat shreds well for sandwiches and quesadillas the next day.
Ingredients You’ll Need
- 1 whole chicken, 4 to 5 lb, giblets removed
- 5 tbsp unsalted butter, softened
- 2 tbsp fresh sage, finely chopped
- 1 tbsp fresh thyme leaves
- 1 tbsp orange zest
- 1 tbsp kosher salt
- 1 tsp black pepper
- 1 lb carrots, cut into 2-inch chunks
- 1 lb Yukon gold potatoes, halved
- 1 medium onion, cut into wedges
- 3 garlic cloves, smashed
- 2 tbsp olive oil
Ingredient Substitutions
Unsalted butter: Replace with an equal amount of duck fat for a deeper, savory crust. Duck fat renders at a similar temperature so the rub stays workable, but the flavor reads richer and the skin browns a shade darker. You lose the dairy sweetness, so add a pinch more orange zest to keep the bright note. The thanksgiving chicken works well for weeknight cooking when time is limited.





Fresh sage: Use 2 tsp dried rubbed sage if fresh isn’t available. Dried herbs concentrate faster under heat, so cut the amount to avoid a dusty, bitter edge. Expect a slightly less perfumed aroma but the same woodsy base. Storing leftover thanksgiving chicken correctly keeps it tasting good for days.
Yukon gold potatoes: Swap for an equal weight of cubed butternut squash. Squash softens quicker than potatoes, so place it on the pan after the first 25 minutes of roast time. The flesh turns sweet and caramelized at the edges where it meets the chicken drippings. For the best results with this thanksgiving chicken, read through all the steps before starting.
Olive oil: Substitute with 2 tbsp melted bacon fat for a smoky finish on the vegetables. Bacon fat solidifies when cold, so the leftovers will firm up in the fridge more than with oil. The carrots pick up a pinkish tint from the smoke compounds.
Step-by-Step Instructions
- Heat the oven to 200°C / 400°F and set a rack to the lower third. Pat the chicken dry with paper towels so the skin can crisp instead of steam.
- Mash softened butter with sage, thyme, orange zest, salt, and pepper. Loosen the breast skin with your fingers and push two-thirds of the mixture underneath, then rub the rest on the outside.
- Toss carrots, potatoes, onion, and garlic with olive oil and a pinch of salt. Spread them on a rimmed sheet pan and place the chicken breast-up on top of the vegetables.
- Roast at 200°C / 400°F for 25 minutes, then drop the heat to 175°C / 350°F and continue for 45 to 55 minutes. The thigh should read 74°C / 165°F and the skin look golden and crisp.
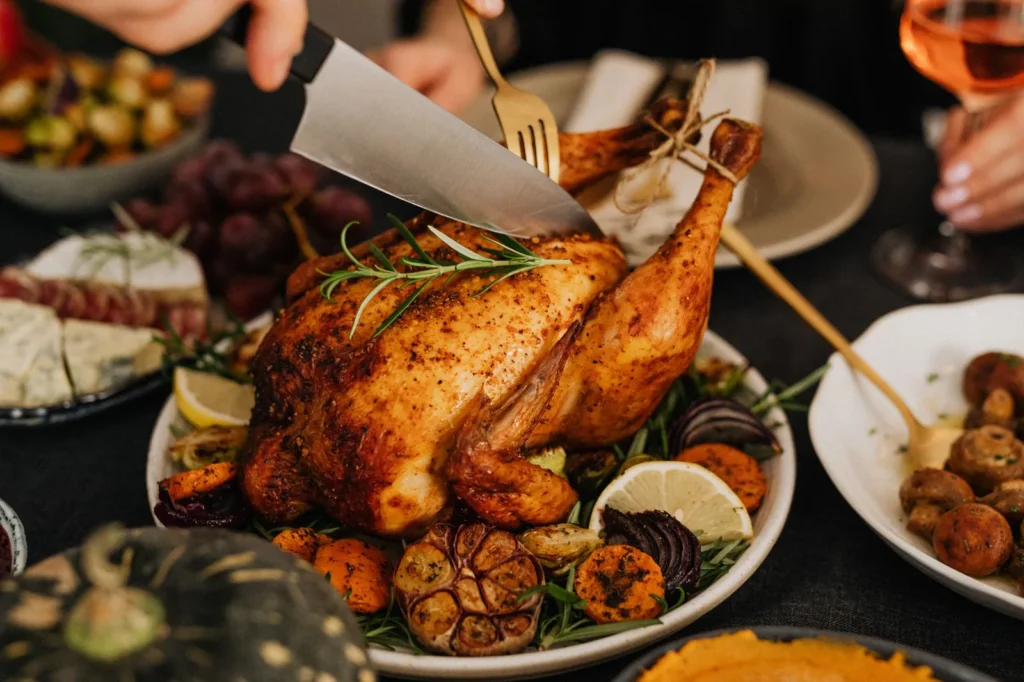
- Rest the bird on a board for 15 minutes before carving so the juices redistribute. The vegetables should be tender when pierced with a fork and lightly browned at the corners.
Pro Tips
Dry the cavity and outer skin the night before and leave the bird uncovered in the fridge for firmer, crisper skin. A cold, dry surface renders fat faster than a wet one straight from the package.
Use a leave-in probe thermometer so you aren’t opening the oven and dropping the heat during the long roast. Stable ambient temperature keeps the breast from tightening before the thighs finish.
Spatchcock the bird if you want it flat and faster; the same weight cooks in about 50 minutes at 200°C / 400°F. See the spatchcock technique for the cut layout before you start.
Save the pan drippings and whisk in a tablespoon of flour off heat for a quick gravy. The vegetable starch already in the pan gives it body without a separate roux step.
Common Mistakes to Avoid
Skipping the rest period after roasting lets the juices run out onto the board when you carve, leaving dry meat. Always wait the full 15 minutes before slicing.
Roasting straight from the fridge shocks the muscle fibers and slows even cooking, so the outside browns while the center lags. Pull the bird out 30 minutes before it goes in the oven.
Crowding the vegetables under the chicken steams them instead of roasting, giving pale, soft chunks. Use a pan large enough that the pieces sit in a single layer around the bird, not piled beneath it.
Serving Suggestions
Carve the bird at the table and spoon the pan vegetables alongside with a little of the warm dripping juice. A sharp broccoli side cuts the richness with a clean, bitter green.
If you want a starch upgrade from the pan potatoes, a celery pasta adds a soft, savory note that matches the sage. Warm the pasta in the drained drippings pan for a minute to pick up the roast flavor.
Storage and Reheating
Strip the meat and store it in an airtight container with the vegetables for up to 4 days in the fridge. Keep the carcass separate if you plan to simmer stock within 2 days.
Reheat portions in a 175°C / 350°F oven until the chicken reaches 74°C / 165°F at the center, about 12 minutes covered with foil. Microwaving works but softens the skin, so crisp it under the broiler for 2 minutes after.
The cooked bird freezes for up to 3 months in sealed bags with the air pressed out. Thaw overnight in the fridge before reheating so the texture stays even.
Recipe Variations
Apple Cider Version
Replace the orange zest with 2 tbsp reduced apple cider in the butter rub. Brush the bird with cider every 20 minutes during the last half of the roast for a lacquered, sweet-tart skin. The vegetables take on a darker, candy-like edge from the sugars.
Smoked Paprika Version
Add 1 tbsp smoked paprika to the herb butter and use thigh meat cut into pieces if you prefer dark meat. The smoke note reads like a backyard pit without an actual smoker. Roast the same way but check the smaller pieces five minutes earlier.
Lemon Herb Version
Swap orange zest for lemon zest and add 1 tbsp rosemary to the butter. Lemon brightens the fat and keeps the breast from tasting heavy. Serve with a creamy lemon spoon sauce on the side for guests who want more acid.
Stuffed Bread Version
Place 4 cups cubed day-old sourdough tossed with the raw vegetables inside the cavity instead of under the bird. The bread soaks drippings and comes out as a savory stuffing while the outside vegetables still roast. Pull it after the thigh hits temperature and check the center cube is 74°C / 165°F.

Thanksgiving Chicken
Description
A thanksgiving chicken gives you all the comfort of a holiday roast without the size and timing stress of a full turkey. With a sage-citrus butter rub and one pan of roasted vegetables, you get crisp skin, juicy meat, and built-in sides in about two hours.
Ingredients
Instructions
-
Heat oven and rack
Heat the oven to 200°C / 400°F and set a rack to the lower third so the chicken has room to roast evenly. This positioning helps the breast stay tender while the legs finish through without burning the top.
-
Dry the chicken
Pat the chicken dry with paper towels so the skin can crisp instead of steam during roasting. A dry surface is essential for rendering fat and achieving golden, crisp skin rather than pale, soft skin.
-
Make herb butter
Mash softened butter with sage, thyme, orange zest, salt, and pepper in a small bowl until evenly combined. The mixture should look like a fragrant green-flecked paste that spreads easily under the skin.
-
Rub butter under skin
Loosen the breast skin with your fingers and push two-thirds of the mixture underneath, then rub the rest on the outside of the bird. This drives flavor into the meat, not just on top, and helps the surface brown.
-
Toss vegetables
Toss carrots, potatoes, onion, and garlic with olive oil and a pinch of salt in a bowl until coated. The vegetables should glisten and sit in a single layer later so they roast instead of steam.
-
Arrange pan and chicken
Spread the vegetables on a rimmed sheet pan and place the chicken breast-up on top of them. Use a pan large enough that the pieces sit around the bird, not piled beneath, so they brown at the corners.
-
Roast at high heat
Roast at 200°C / 400°F for 25 minutes to start crisping the skin and browning the vegetables. After this time the top should show light golden color and the kitchen will smell of sage and citrus.
-
Lower heat to finish
Drop the heat to 175°C / 350°F and continue for 45 to 55 minutes until the thigh reads 74°C / 165°F and the skin looks golden and crisp. The vegetables should be tender when pierced with a fork and lightly browned at the corners.
-
Rest before carving
Rest the bird on a board for 15 minutes before carving so the juices redistribute and don't run out onto the board. The meat should feel firm yet springy and the thigh temp will hold at a safe 74°C / 165°F or above.
Nutrition Facts
Servings 5
- Amount Per Serving
- Calories 520kcal
- % Daily Value *
- Total Fat 32g50%
- Saturated Fat 13g65%
- Cholesterol 135mg45%
- Sodium 780mg33%
- Total Carbohydrate 24g8%
- Dietary Fiber 4g16%
- Sugars 5g
- Protein 38g76%
* Percent Daily Values are based on a 2,000 calorie diet. Your daily value may be higher or lower depending on your calorie needs.
Note
- Storage: Strip the meat and store it in an airtight container with the vegetables for up to 4 days in the fridge; keep the carcass separate if simmering stock within 2 days.
- Reheating: Reheat portions in a 175°C / 350°F oven until the chicken reaches 74°C / 165°F at the center, about 12 minutes covered with foil, then crisp skin under broiler 2 minutes.
- Pro tip: Use a leave-in probe thermometer so you aren't opening the oven and dropping heat; see our sheet pan quesadillas for another easy leftover use.
- Make ahead: Dry the bird uncovered in the fridge overnight for firmer, crisper skin the next day.
