

A good pistachio butter recipe turns a bag of shelled nuts into a spoonable, toasty spread with a deep green color and a clean, nutty sweetness. You don’t need added oil if you use a strong blender and give the machine breaks so the motor stays cool. This version keeps the ingredient list short so the pistachio flavor stays front and center.
The method below walks through roasting, blending, and fixing common texture problems so you end up with a smooth result instead of a dry crumb. You’ll also see storage times, serving ideas, and a few simple twists. If you enjoy nut spreads, our fresh milled flour bread makes a sturdy base for it. Making this pistachio butter at home is surprisingly straightforward once you know the key steps.
Why You’ll Love These Pistachio Butter
- Two main ingredients and one appliance, so cleanup stays minimal.
- Roasting the nuts first builds a richer, less raw flavor than unroasted blends.
- The finished spread is naturally sweet with no refined sugar needed.
- It works as a toast topping, oatmeal stir-in, or baking fat.
- You control the salt and texture from chunky to fully smooth.
Ingredients You’ll Need
- 3 cups raw shelled pistachios (about 420 g), unsalted
- 1/2 tsp fine sea salt
- 1 tbsp neutral oil (sunflower or grapeseed), optional for thinner texture
- 1 tsp honey or maple syrup, optional for light sweetness
The pistachios do the heavy lifting, so buy nuts that smell fresh and look bright green rather than yellow. Salt sharpens the nutty notes, while the oil and sweetener are listed as optional because a dry blend can still come together with enough blend time. The pistachio butter works well for weeknight cooking when time is limited.







Ingredient Substitutions
Raw shelled pistachios: Replace with an equal weight of roasted unsalted pistachios to skip the oven step. Pre-roasted nuts already carry a deeper color, so your blend will look darker from the start. Watch the blender temperature closely because roasted nuts release oils faster and can turn pasty if overprocessed. Storing leftover pistachio butter correctly keeps it tasting good for days.
Fine sea salt: Use an equal amount of kosher salt ground small, or cut the salt entirely for a no-salt spread. Coarse salt won’t dissolve evenly and leaves crunchy specks that read as grit. A salt-free version tastes flatter, so add a tiny pinch of cinnamon if you want more dimension. For the best results with this pistachio butter, read through all the steps before starting.
Neutral oil: Swap the sunflower oil for an equal amount of mild olive oil if you like a fruitier edge. Olive oil thickens more in the fridge, so the jar will feel firmer after chilling. Keep the quantity small because too much oil makes the spread greasy instead of creamy.
Honey: Replace the honey with an equal amount of agave for a vegan-friendly sweet note. Agave blends in cold and keeps the color light, while honey adds a faint floral tone. Either option softens the dry-roast edge but isn’t required for a usable spread. If you enjoyed this, our garlic butter baked is worth trying next.
Step-by-Step Instructions
- Heat the oven to 180°C / 350°F and spread the pistachios on a rimmed sheet pan in one layer. Roast for 8 to 10 minutes until they smell toasty and the skins look dry, then cool for 10 minutes so the blender jar doesn’t steam.
- Pour the cooled nuts into a high-speed blender or food processor and run on high for 2 minutes. Scrape the sides with a spatula, then blend again for 1 minute to pull the crumbs back into the blade path.
- Continue blending in 1-minute bursts with 30-second rests, about 6 to 8 rounds, until the mass goes from crumbs to a sticky dough and then to a glossy paste. The sides will climb, so pause and push the paste down each time.
- Add the salt and optional oil or sweetener once the paste looks smooth, then blend for 1 minute to combine. Taste on a cool spoon and adjust salt only after the flavor settles.
- Spoon the warm spread into a clean glass jar, close the lid, and let it cool on the counter for 20 minutes before refrigerating. A cooled jar prevents condensation that could shorten shelf life.
Pro Tips
Keep the blender running in short bursts rather than one long session so the motor and nut paste stay under medium-low heat from friction. A hot jar signals overprocessing and can dull the green color.
If the blend stalls, pack the crumbs tight under the blade and use the tamper instead of adding oil too early. The natural oils release once the particles are fine enough to smear against each other.
For a brighter green jar, peel a portion of the nuts after roasting because the purple skins darken the final spread. This adds prep time but gives a more vivid look on toast.
Check the food network blending guides if your machine manual lists a max runtime for nut butters. Following that limit protects the motor on thick jobs like this.
Common Mistakes to Avoid
Adding oil in the first minute is the fastest way to a greasy, split spread because the nuts haven’t released their own fat yet. Wait until the paste is already glossy before deciding if a teaspoon is needed.
Overroasting past 10 minutes at 180°C turns the nuts brown and makes the butter taste bitter rather than sweet. Set a timer and smell the pan after 8 minutes to catch the shift early.
Skipping the cool-down before blending traps steam that condenses in the jar later and invites mold. Let the nuts sit off the pan so heat escapes from all sides, not just the top. For another easy option, check out our garlic butter baked.
Serving Suggestions
Spread a thin layer over warm baked salmon with lemon butter for a nutty contrast to the rich fish. The cool paste melts slightly and adds texture without extra cooking.
Stir a spoonful into plain yogurt or oatmeal where it acts like a flavored cream. It also pairs well with sliced pear for a snack that balances sweet and savory.
Use it as a filling layer in sandwich cookies or as a finish on pasta with butter beans if you want a creative, nut-forward twist on a warm plate.
Storage and Reheating
Keep the jar sealed in the refrigerator for up to 3 weeks because the natural oils stay stable when cold. Always use a dry spoon to avoid introducing moisture that shortens the window.
The spread firms in the fridge and can be softened at room temperature for 15 minutes before use. If it separates, stir well rather than heating it, since gentle warming protects the color.
For longer holding, freeze in a tightly sealed container for up to 3 months and thaw overnight in the fridge. Label the date so you can rotate the oldest jar forward first. You might also like our garlic butter salmon.
Recipe Variations
Cardamom Version
Add 1/4 tsp ground cardamom with the salt for a warm, floral note common in Middle Eastern sweets. The spice pairs with the natural sweetness and works well on brioche or in rice pudding.
Chocolate Swirl
Fold 1 tbsp melted dark chocolate into the cooled jar for a two-tone spread with bitter cocoa contrast. Keep the chocolate minimal so the pistachio still leads the flavor.
Lemon Zest Twist
Stir in 1 tsp finely grated lemon zest after blending to add a bright, acidic lift. The citrus cuts the richness and makes the spread taste fresher on cold morning toast.
Chunky Style
Reserve 1/4 cup roasted nuts and chop them, then fold into the smooth base at the end. You get a spreadable paste with small crisp bits for texture in every bite.

Pistachio Butter
Description
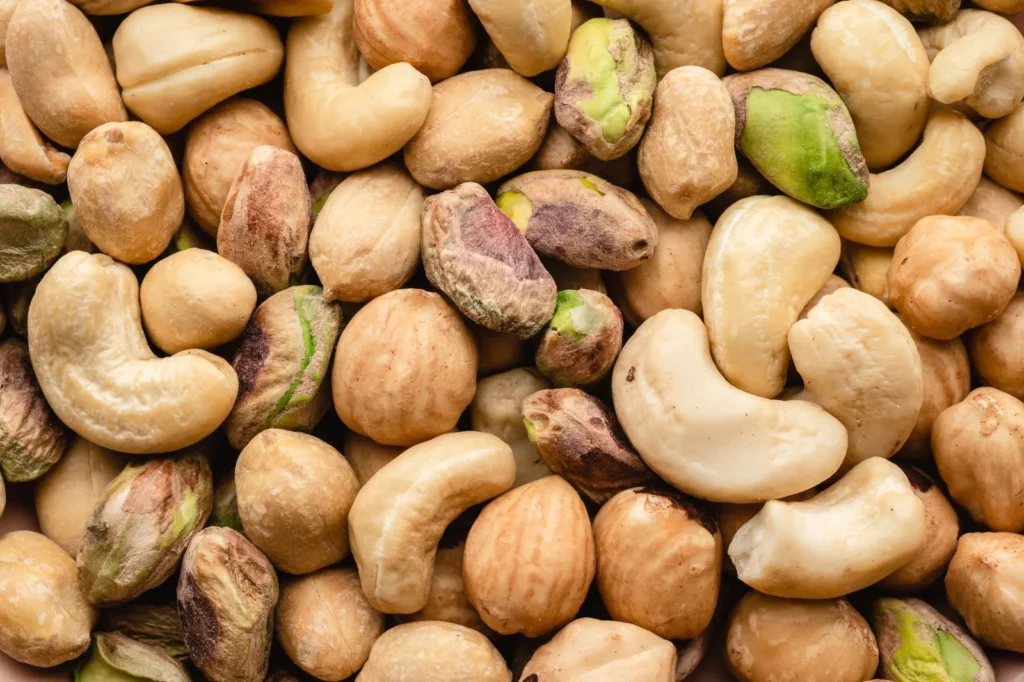
This pistachio butter turns a bag of shelled nuts into a spoonable, toasty spread with deep green color and clean nutty sweetness. No added oil is needed if you use a strong blender and let the motor cool between bursts.
Ingredients
Instructions
-
Heat and roast nuts
Heat the oven to 180°C / 350°F and spread the pistachios on a rimmed sheet pan in one layer. Roast for 8 to 10 minutes until they smell toasty and the skins look dry, then cool for 10 minutes so the blender jar doesn't steam.
-
Initial high-speed blend
Pour the cooled nuts into a high-speed blender or food processor and run on high for 2 minutes. The nuts will first break into coarse crumbs before beginning to clump from their released oils.
-
Scrape and blend again
Scrape the sides with a spatula, then blend again for 1 minute to pull the crumbs back into the blade path. This keeps the mixture moving so it doesn't stall in dry pockets around the jar walls.
-
Burst blend to paste
Continue blending in 1-minute bursts with 30-second rests, about 6 to 8 rounds, until the mass goes from crumbs to a sticky dough and then to a glossy paste. The sides will climb, so pause and push the paste down each time so the texture turns smooth rather than dry.
-
Add salt and options
Add the salt and optional oil or sweetener once the paste looks smooth, then blend for 1 minute to combine. Taste on a cool spoon and adjust salt only after the flavor settles so you don't over-season from heat.
-
Jar the spread
Spoon the warm spread into a clean glass jar, close the lid, and let it cool on the counter for 20 minutes before refrigerating. A cooled jar prevents condensation that could shorten shelf life and invite spoilage.
Nutrition Facts
Servings 4
- Amount Per Serving
- Calories 350kcal
- % Daily Value *
- Total Fat 28g44%
- Saturated Fat 4g20%
- Sodium 150mg7%
- Total Carbohydrate 14g5%
- Dietary Fiber 6g24%
- Sugars 4g
- Protein 13g26%
* Percent Daily Values are based on a 2,000 calorie diet. Your daily value may be higher or lower depending on your calorie needs.
Note
- Storage: Keep the sealed jar in the refrigerator for up to 3 weeks and always use a dry spoon to avoid introducing moisture.
- Make ahead: The spread firms in the fridge and can be softened at room temperature for 15 minutes before use; if it separates, stir well rather than heating.
- Pro tip: For a brighter green jar, peel a portion of the nuts after roasting because the purple skins darken the final spread, as seen with our butter beans pairing idea.
- Blender care: Keep blends in short bursts and follow your machine's max runtime for nut butters to protect the motor on thick jobs.
